No Bake Oatmeal Cookie Bars
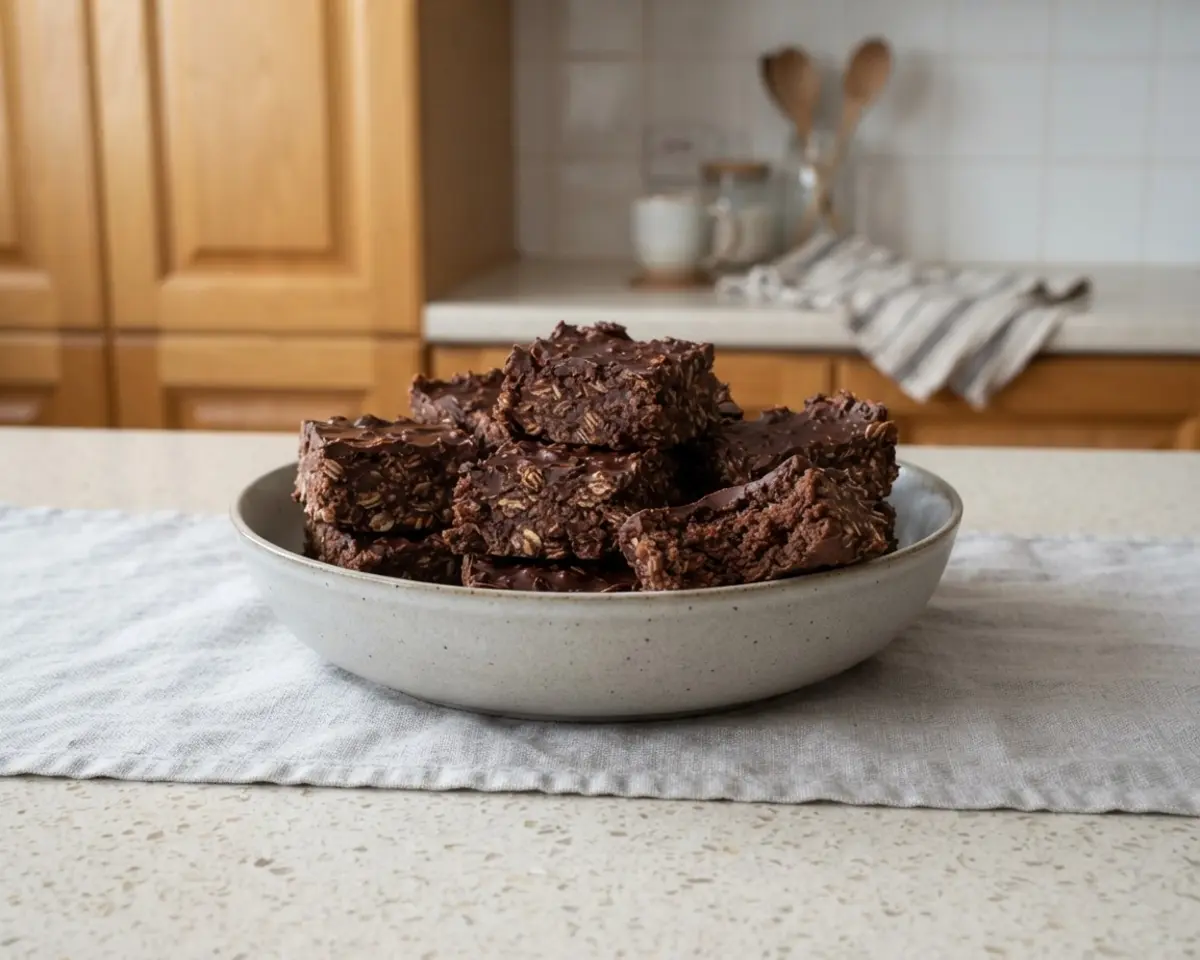
No Bake Oatmeal Cookie Bars saved my Tuesday when the oven died mid-testing week. No stove drama, just one saucepan, a square baking dish, and twenty minutes before these hit the fridge.
Picture melted salted butter and brown sugar bubbling together, rolled oats soaking it all up, then a glossy layer of chocolate chips and peanut butter pressed into the middle.
I’ve made this one more times than I can count, and peanut butter melting into chocolate still gets my kids running into the kitchen.
This one’s sturdy, fudgy, and it has never once failed to set for me.
Table of Contents
What Are No Bake Oatmeal Cookie Bars?
No Bake Oatmeal Cookie Bars are a stovetop treat made by boiling butter and brown sugar, then stirring in oats and layering in melted peanut butter and chocolate. They taste like a chewy granola bar crossed with a peanut butter cup, and need zero oven time.
- Melt the butter and brown sugar in a saucepan until it bubbles and smells caramelized.
- Stir in vanilla and rolled oats until every flake is coated and glossy.
- Press half the oat mixture into a parchment-lined pan to form the base.
- Melt chocolate chips and peanut butter until silky smooth.
- Layer the chocolate over the oat base, then top with the rest of the oats.
- Chill until firm, then slice into squares.
- No-bake oats vs. baked cookies: no-bake stays chewier, baked gets crisp, dry edges.
- Peanut butter chocolate vs. plain chocolate: peanut butter adds creaminess and a salty balance.
- Pan method vs. individual drop cookies: the pan method is faster and holds together better.
- Stovetop melting vs. microwave melting: stovetop gives more control, microwave is just quicker.
If you want something fast, foolproof, and fridge-friendly, this pan method wins every time.
Why You’ll Love This No Bake Oatmeal Cookie Bars
This recipe earns its spot in my regular rotation because it’s nearly impossible to mess up and always disappears fast. If you’re new to this style of dessert, check out my ultimate guide to no-bake cookies for the basics first.
- No oven needed: Just a saucepan and a fridge, perfect for hot days or when your oven’s acting up.
- Chewy-crisp texture: The oats stay chewy while the chocolate layer turns almost fudgy after chilling.
- Tested five times: I found pressing the oats firmly, not lightly, is the real secret to bars that hold together.
- Better than drop cookies: No scooping, no waiting between batches, just one pan and one knife.
- Kid-approved: My own kids ask for the peanut butter chocolate ones over bakery cookies every time.
Ingredients
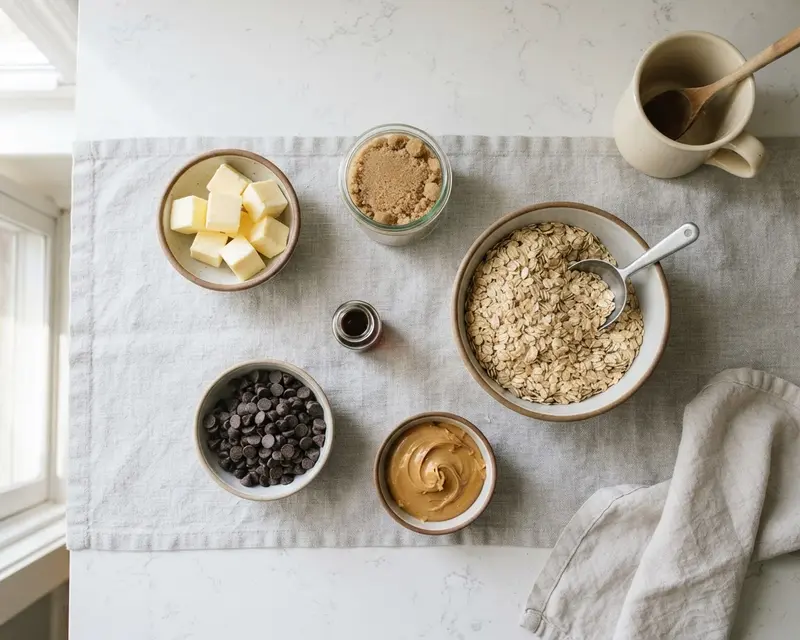
This easy no-bake oatmeal bars pan method only needs six pantry staples, and it doubles as a no-bake peanut butter oatmeal bars recipe once that chocolate layer goes in.
It’s about as simple oatmeal cookie bars no bake as it gets, and these chocolate peanut butter oatmeal bars come together in under 30 minutes of active time.
| Amount | Ingredient |
|---|---|
| 1 cup | Salted butter |
| ½ cup | Light brown sugar (packed) |
| 1 teaspoon | Vanilla extract |
| 3 cups | Rolled oats |
| 1 cup | Semisweet chocolate chips |
| ½ cup | Peanut butter |
My favorite ingredient here is the salted butter, it keeps the whole pan from tasting one-note sweet.
What Equipment Do You Need to Make No Bake Oatmeal Cookie Bars?
A sturdy square baking dish is the tool that prevents the most common mistake: bars that are too thin to hold together. Beyond that, your equipment list is refreshingly short.
| Tool | Purpose |
|---|---|
| Essential: Large saucepan | Needed to boil the butter and sugar evenly without scorching. |
| Essential: 8×8-inch baking dish | Gives the bars enough thickness to hold together once sliced. |
| Essential: Parchment paper | Lets you lift the whole slab out cleanly for slicing. |
| Essential: Microwave-safe bowl | Melts the chocolate and peanut butter gently in short bursts. |
| Optional: Offset spatula | Spreads the chocolate layer smoothly and evenly. |
| Optional: Sharp chef’s knife | Gives clean, bakery-style cut edges on the chilled bars. |
How Do You Make No Bake Oatmeal Cookie Bars Step by Step?
No Bake Oatmeal Cookie Bars come together in three quick phases: cooking the oat mixture, building the chocolate layer, and chilling until firm.
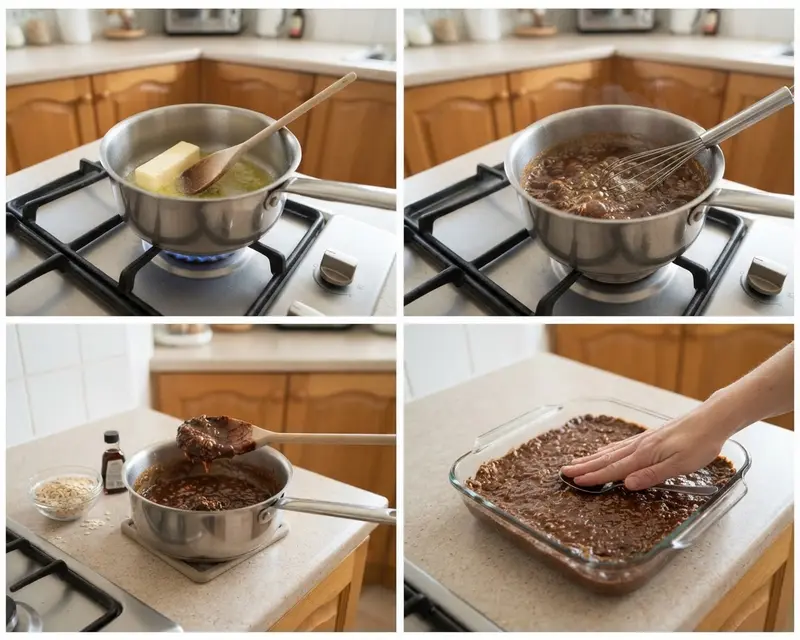
Cooking the Oat Base
- Melt the 1 cup salted butter in a large saucepan over medium heat until fully liquid and starting to foam slightly at the edges.
- Add the ½ cup brown sugar and bring to a boil, stirring until the sugar dissolves and the mixture smells like caramel.
- Reduce heat to low, stir in 1 teaspoon vanilla and 3 cups rolled oats, and cook 3 minutes, stirring often so nothing scorches.
Building the Layers
- Press about half the warm oat mixture into your parchment-lined dish, using the back of a spoon to pack it down firmly.
- Microwave the chocolate chips and peanut butter in 30-second bursts, stirring between each, until glossy and smooth. [If it looks grainy, keep stirring, the residual heat will smooth it out.]
- Pour most of the chocolate mixture over the oat crust and spread it edge to edge with a spatula.
Finishing and Chilling
- Scatter the remaining oat mixture over the chocolate layer and press gently so it sticks without squeezing the chocolate out the sides.
- Drizzle the reserved peanut butter chocolate over the top in thin lines for that bakery-case look.
- Refrigerate at least 2 hours, until firm to the touch, before lifting out and slicing into squares.
Pro Tips for Perfect No Bake Oatmeal Cookie Bars
What separates a sad, crumbly pan from bars that hold their shape in your hand usually comes down to two things: sugar temperature and pressing pressure.
Bringing the butter and sugar to an actual boil matters more than it seems. According to Serious Eats’ testing on no-bake treats, that boil lets the sugar set up firm once cooled instead of staying soft and sticky.
After five test batches, I learned the hard way that pressing too gently leaves bars that crumble the second you cut them. Use real pressure with the back of a measuring cup, especially on that bottom layer.
I also learned not to rush the chill time, bars that look set after 45 minutes often slump back into a puddle once you try to lift them out.
Troubleshooting: When Something Goes Wrong
Why are my no bake oatmeal cookie bars crumbling? Your oat mixture likely wasn’t pressed firmly enough before chilling. Press hard with the back of a spoon or a parchment-lined palm, and give it the full 2 hours in the fridge.
Why didn’t my sugar mixture boil properly? Low heat or a too-small pan keeps it from reaching a true boil. Use medium heat and a saucepan at least 2 quarts, and watch for actual bubbling, not just steam.
Can I fix bars that won’t set at all? Pop the whole pan back in the fridge for another hour or two before giving up. If they’re still soft after 4 hours, the sugar mixture probably never reached a boil the first time.
How do I stop the chocolate layer from cracking when I cut? Let the bars sit at room temperature 5 minutes before slicing, and use a sharp knife warmed under hot water. This softens the chocolate just enough for clean lines.
Variations & Ways to Customize
This recipe is forgiving enough to swap in whatever you’ve got in the pantry, and I’ve tested most of the obvious options myself.
Seasonal No Bake Oatmeal Cookie Bars Variation
Swap the vanilla for pumpkin pie spice in fall, or add crushed peppermint on top in December. The base recipe doesn’t change, just the flavor on top.
Gluten-Free No Bake Oatmeal Cookie Bars
Use certified gluten-free rolled oats, since regular oats are often processed alongside wheat. Everything else in the recipe is naturally gluten-free as written.
Chocolate Peanut Butter Oatmeal Bars (Double Layer)
For extra decadence, double the chocolate peanut butter mixture so every bite gets a thick middle layer. For more no-bake inspiration, my no-bake chocolate oatmeal cookies use a similar melt-and-press method.
Can You Make No Bake Oatmeal Cookie Bars Ahead of Time?
Yes, these bars are honestly better made a day ahead since the chill time lets every layer set completely firm.
Serve them straight from the fridge alongside a cold glass of milk, or let them sit out 10 minutes if you want the chocolate layer softer.
Texture-wise, expect the bars to firm up more in the fridge over time, while freezing keeps them slightly softer and chewier once thawed.
| Method | How Long | Details |
|---|---|---|
| Fridge | Up to 1 week | Store in an airtight container with parchment between layers so bars don’t stick together. |
| Freezer | Up to 3 months | Wrap bars individually in plastic wrap, then store in a freezer bag; thaw in the fridge overnight. |
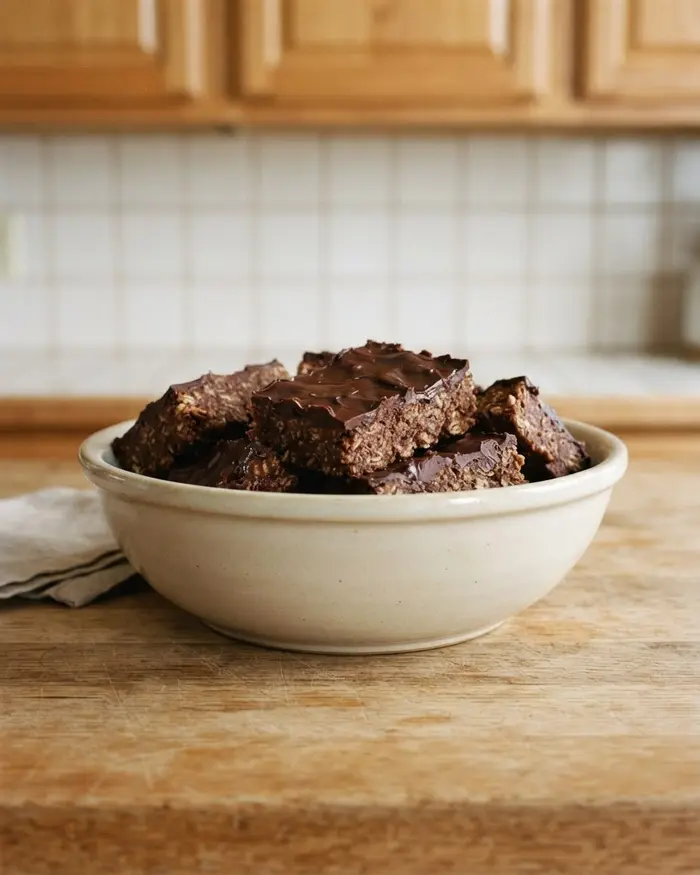
These don’t need reheating, but if you want that fresh-melted chocolate feel, microwave a single bar for 5-7 seconds right before serving.
No Bake Oatmeal Cookie Bars FAQs
Should no bake cookies be refrigerated or left out?
No bake cookies can be left out at room temperature in an airtight container for up to 5 days if your kitchen is cool and dry. Refrigerate them for up to 2 weeks if your kitchen is warm or humid, or if you want them to last longer. Both methods work—choose based on your climate and how soon you’ll eat them.
How do you keep no bake cookies from getting hard?
Keep no bake cookies soft by storing them in an airtight container as soon as they set. Never leave them uncovered—exposure to air dries them out within hours. Layer parchment between stacks and store in a cool, dry spot. If refrigerating, let them sit at room temp for 10 minutes before eating to soften.
Can you store no bake cookies in a Ziploc bag?
Yes, a heavy-duty zip-top bag works well for storing no bake cookies as long as you press out all the air before sealing. Layer parchment or wax paper between cookies to prevent sticking. A rigid airtight container is slightly better because it protects the cookies from getting squished, but a bag is fine if sealed tightly.
Why are my no bake cookies dry and crumbly after storing?
No bake cookies turn dry and crumbly when they’re left uncovered or stored in a container that isn’t airtight. Exposure to air pulls moisture out of the sugar and butter mixture, causing the texture to turn grainy and chalky. Always seal them tightly as soon as they’ve set to lock in moisture.
Can you freeze no bake cookies to keep them fresh longer?
Yes, no bake cookies freeze beautifully for up to 3 months. Freeze them in a single layer on parchment until solid, then transfer to an airtight container or freezer bag with parchment between layers. Thaw in the sealed container at room temp for 15 to 20 minutes before eating.
No Bake Oatmeal Cookie Bars are worth keeping on repeat because they’re fast, fridge-stable, and taste like a peanut butter cup had a baby with granola. Drop a comment below if you try them or have an oats-to-chocolate ratio question, I read every one.
For more foolproof treats, my easy no-bake cookies for beginners guide is a great next stop.
Baked with love by Rebeccah Ellene, who has tested this recipe in six different pans to find the perfect bar thickness.
No Bake Oatmeal Cookie Bars: Easy 10-Minute Dessert Recipe
Ingredients
Ingredients
- 1 cup salted butter
- ½ cup light brown sugar packed
- 1 teaspoon vanilla extract
- 3 cups rolled oats
- 1 cup semisweet chocolate chips
- ½ cup peanut butter
Instructions
- Line a square baking dish with parchment paper.
- In a large saucepan, melt the 1 cup salted butter over medium heat.
- Add the ½ cup light brown sugar. Bring the mixture to a boil, stirring to dissolve the sugar.
- Reduce the heat to low and stir in the 1 teaspoon vanilla extract and 3 cups rolled oats. Continue to cook over low heat for 3 minutes, stirring frequently.
- Spoon about half of the oat mixture into the lined baking dish. Spread it out evenly and press down slightly to form the bottom crust.
- Put the 1 cup semisweet chocolate chips and ½ cup peanut butter in a medium microwave safe bowl. Microwave on high in 30-second intervals, until you can stir it smooth.
- Pour most of the melted chocolate mixture over the oat crust. Spread to form an even layer. Reserve a little bit to drizzle over the top if desired.
- Distribute the rest of the oat mixture over the chocolate layer. Press gently to help form cohesive bars. Drizzle with the remaining peanut butter chocolate mixture.
- Refrigerate for at least 2 hours to set. Then, cut into small squares.