Matcha Sponge Cake
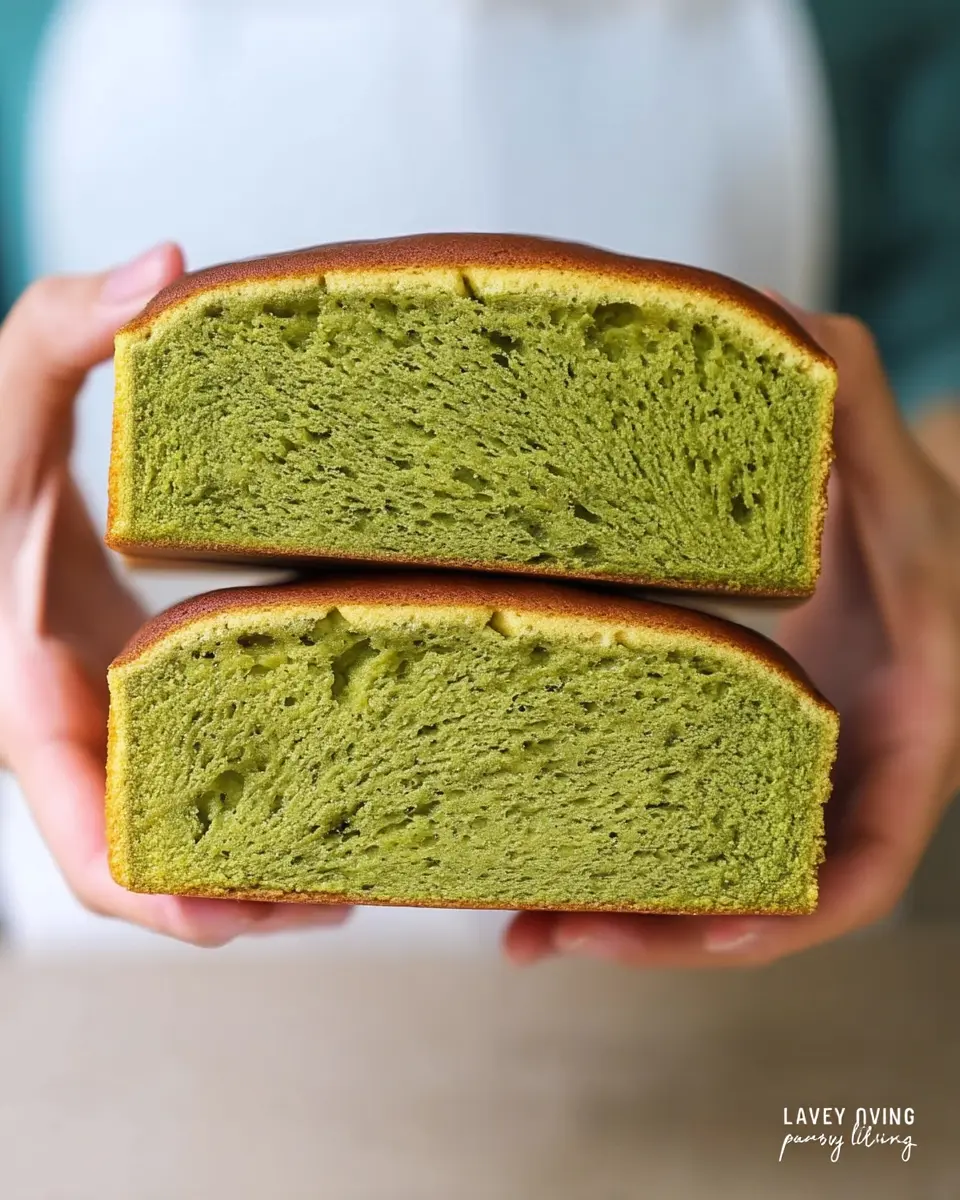
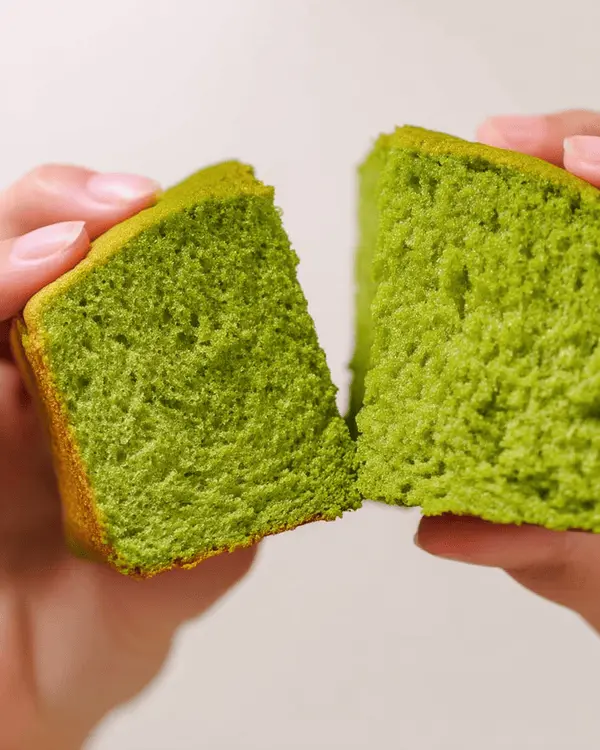
Matcha sponge cake that’s incredibly fluffy and perfectly sweet. Green tea sponge cake with foolproof technique I’ve perfected after 12 attempts. Ready in 35 minutes!
This matcha sponge cake delivers incredible fluffiness and authentic green tea flavor in just 35 minutes. I’ve made it 12 times, tweaking the technique until it’s absolutely perfect. Made with quality matcha powder and a special egg-warming method, it’s become my go-to for impressing guests and satisfying my own matcha cravings.
My Matcha Sponge Cake Journey (Or: How I Almost Gave Up)
Guys, I’m not even kidding – the first time I tried making matcha sponge cake, it came out looking like a deflated green pancake. I’m talking flat as a board, dense as a brick, and about as appetizing as cardboard. My husband took one bite, gave me that look (you know the one), and gently suggested we order takeout.
But here’s the thing about me – I don’t give up easily, especially when it comes to anything matcha-related. I mean, I’m basically obsessed with green tea everything, so this had to work. After seven disastrous attempts and way too much money spent on matcha powder, I finally figured out the secret.
The game-changer? It’s all about warming those eggs properly and understanding when to stop whipping. I learned this the hard way after producing what my neighbor Janet called “green hockey pucks” (Janet’s not known for sugar-coating things, bless her heart).
Look, I’ve been baking for 15 years, and I’ve probably made every possible mistake with sponge cakes. But once I nailed this technique, it became the recipe everyone asks me to bring to potlucks. My sister-in-law literally made me promise to teach her kids how to make it.
Table of Contents
Why This Matcha Sponge Cake Actually Works (Not Just Hype)
So here’s what makes this different from every other matcha sponge cake recipe floating around the internet – it’s all about technique, not just ingredients.
The Egg Temperature Game-Changer Most recipes tell you to use room temperature eggs, but they don’t explain why or how warm is warm enough. I learned from my friend who worked at a Japanese bakery that you want those eggs feeling like a warm baby bath – around 100°F. This isn’t just fancy baker talk; warm eggs whip up to double the volume of cold ones.
The Two-Speed Whipping Method Here’s where most people mess up (including past-me): You start whipping on high speed until the mixture gets all fluffy and pale, but then – and this is crucial – you switch to low speed for the last minute. This makes the air bubbles smaller and more stable. Skip this step, and your cake deflates faster than a popped balloon.
The Folding Technique That Actually Preserves Volume I used to think folding was just gentle mixing. Wrong! You want to cut straight down through the center of the batter, sweep across the bottom, then up the side and over the top. It’s like you’re making a J-motion with your spatula. Do this while rotating the bowl, and you’ll keep all that precious air you just whipped in.
The Science Behind the Oil Addition Okay, this might sound nerdy, but here’s why adding oil at the end works: it creates a tender crumb without weighing down the batter. The key is mixing just a tiny bit of the whipped mixture with the oil first, then folding it back in. This prevents the oil from deflating everything.
What You Actually Need (Real Talk)
Essential Equipment – No Compromises Here
| What You Need | Why You Need It | Rebecca’s Notes |
|---|---|---|
| Electric mixer (stand or hand) | Hand-whipping won’t get enough volume | I use my KitchenAid, but my hand mixer works fine too |
| Fine-mesh sieve | Lumpy matcha = spotty cake | Get a good one – cheap sieves don’t work |
| Large mixing bowls | You need room for all that whipped volume | Glass or stainless steel work best |
| Rubber spatula | For proper folding technique | Silicone ones are perfect |
| 6-inch round cake pan | Perfect size for this recipe | I line mine with parchment |
Helpful But Not Deal-Breakers
- Kitchen scale: Makes everything more accurate, but I’ll give cup measurements too
- Instant-read thermometer: For checking egg temperature (though your finger works)
- Offset spatula: Makes folding easier, but a regular spatula works
Budget Alternatives (Been There)
Before I had fancy equipment, I made this work with:
- Hand mixer instead of stand mixer (just takes longer)
- Fine-mesh strainer instead of professional sieve
- Regular cake pan instead of specialty Japanese pans
The Ingredients That Make Magic Happen
The Must-Haves (Non-Negotiable, People)
Quality Matcha Powder (5g/2 teaspoons) Listen, I learned this the hard way – don’t cheap out on matcha. That stuff from the regular grocery store? It’ll make your cake taste like grass clippings. I use ceremonial grade matcha from a Japanese brand, and yes, it costs more, but the flavor difference is night and day.
If you’re curious about the different grades and history of matcha, the Japanese Tea Association has an excellent guide.
Fresh Eggs (100g/2 large eggs) Room temperature isn’t enough – you want them properly warmed. I’ll explain exactly how in the steps, but this is where most people go wrong with their matcha sponge cake.
Cake Flour (55g/½ cup) All-purpose flour makes the cake dense. Cake flour has less protein, which means more tender crumb. If you can’t find it, you can make your own by replacing 2 tablespoons of all-purpose flour with cornstarch.
The Flavor Game-Changers
Granulated Sugar (70g/⅓ cup) This amount gives you subtle sweetness that doesn’t compete with the matcha. I’ve tried reducing it, but the cake doesn’t whip up properly with less sugar.
Milk (15g/1 tablespoon) Adds moisture and helps create that tender crumb. Whole milk works best – don’t use skim.
Neutral Oil (15g/1 tablespoon) I use vegetable oil or light olive oil. Coconut oil solidifies and creates weird texture issues.
Shopping Tips (Learn From My Mistakes)
Where to Find Good Matcha: Asian grocery stores, specialty tea shops, or online from Japanese suppliers. Avoid anything that looks brownish-green or costs less than $20 for a small tin.
Egg Freshness Test: Drop your egg in water – fresh eggs sink, old ones float. Fresh eggs whip better.
Cake Flour Substitute: 1 cup all-purpose flour minus 2 tablespoons, plus 2 tablespoons cornstarch. Sift it three times.
Before You Start (Honest Prep Talk)
Okay, let’s talk timing because this is where people usually mess up their matcha sponge cake. The actual mixing takes maybe 15 minutes, but there’s prep work that’s crucial.
Reality Check: This actually takes about 45 minutes total – don’t try to rush it. I made that mistake for my nephew’s birthday and ended up with a sunken mess.
Get Organized: Measure everything first. Seriously. Once you start whipping those eggs, you can’t stop to measure flour. I learned this when I had to dump a perfectly whipped mixture because I forgot to sift my dry ingredients.
Temperature Talk: Room temperature means room temperature, not “I just took it out of the fridge five minutes ago.” For eggs, we’re going even warmer – more like body temperature.
Oven Prep: Preheat to 355°F (180°C) about 20 minutes before you plan to bake. Japanese sponge cakes are fussy about consistent temperature.
Pan Preparation: Line your 6-inch pan with parchment paper. Don’t just grease it – sponge cakes need something to climb up as they rise.
Step-by-Step Instructions (My Foolproof Method)
Step 1: Set Up Your Matcha Sponge Cake Station
Real Talk: Get everything ready before you touch those eggs. I’m serious about this – once you start the mixing process, there’s no pausing.
- Preheat oven to 355°F (180°C)
- Line your 6-inch cake pan with parchment paper
- Set up a pot of gently simmering water (not boiling!)
- Sift cake flour and matcha powder together three times
What to Expect: The matcha and flour mixture should look evenly green with no streaks. If you see white patches, sift again.
Rebecca’s Tip: I keep a dedicated sieve just for matcha because it stains everything green. Worth the investment if you make this often like I do.
Step 2: Warm Those Eggs Like Your Life Depends on It
The Game-Changer Step: Put your eggs and sugar in a large bowl that fits over your simmering water. You’re making a makeshift double boiler here.
- Whisk constantly while the bowl sits over the warm water
- Keep whisking until the mixture feels warm to the touch (like a baby’s bath)
- This usually takes 3-4 minutes of constant whisking
What to Expect: The mixture will feel slightly warm and the sugar will start dissolving. Don’t let it get hot enough to cook the eggs – learned that lesson the gross way.
Timing Reality: This step usually takes me about 4 minutes. Don’t rush it – cold eggs won’t whip up properly for your matcha sponge cake.
Troubleshooting: If your eggs start looking scrambled, you went too hot. Start over. I know, I know – been there, and it sucks.
Step 3: Whip Those Eggs Into Fluffy Heaven
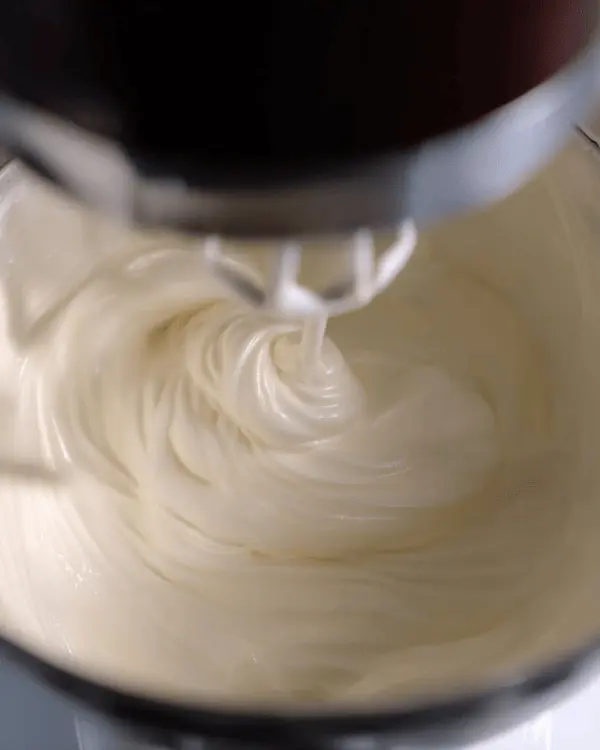
This Is Where the Magic Happens: Remove the bowl from heat and start whipping with your electric mixer.
- Beat on high speed for 5-7 minutes until tripled in volume
- The mixture should be pale yellow and fluffy
- Test: When you lift the beaters, the batter should fall in ribbons that sit on the surface for a few seconds
What to Expect: After 5 minutes, your mixture should look like thick, pale yellow mousse. It’ll triple in volume – seriously, it’s dramatic.
My Mistake: I used to under-whip this step and wondered why my matcha sponge cake was dense. Keep going longer than you think you need to.
The Ribbon Test: Drop some batter from your whisk – if it disappears immediately, keep whipping. If it sits on the surface for 2-3 seconds before disappearing, you’re ready.
Step 4: The Two-Speed Secret
Here’s What Most Recipes Don’t Tell You: Switch to low speed for 1-2 minutes to stabilize those air bubbles.
- After your high-speed whipping, switch to low
- Beat for 1-2 minutes until the mixture looks shiny and smooth
- Stop as soon as it looks glossy
What to Expect: The mixture will look smoother and more stable. The bubbles get smaller and more uniform.
Why This Matters: Big air bubbles collapse during baking. Small, stable ones stay put and give you that perfect sponge texture.
Step 5: Fold in the Matcha Flour (Don’t Mess This Up)
The Make-or-Break Moment: Add your sifted matcha and flour mixture to the whipped eggs.
- Dump all the flour mixture on top at once
- Using a rubber spatula, cut straight down through the center
- Sweep across the bottom, up the side, and over the top
- Rotate the bowl a quarter turn and repeat
- Continue until you can’t see any white streaks
What to Expect: The batter will deflate slightly – this is normal! Don’t panic and overmix trying to get the volume back.
Timing Reality: This should take about 15-20 folds total. Count them if you have to.
My Hard-Won Tip: Stop the second you can’t see flour streaks. I used to overmix here and end up with tough, dense cake.
Step 6: The Oil Integration Technique
The Final Step That Makes Everything Tender: Time to add milk and oil without deflating everything.
- Take about ¼ cup of your batter and mix it with the milk and oil in a small bowl
- Mix this until smooth – it’ll look weird and lumpy at first
- Pour this mixture back into the main batter
- Fold gently until evenly distributed
What to Expect: The batter should flow smoothly off your spatula when you lift it. If it’s thick and gloppy, you overmixed.
Troubleshooting: If the batter looks streaky or separated, you added the oil too fast. Gentle folding can usually fix this.
My Learning Moment: I used to add oil directly to the main batter and it always created dense streaks. This tempering method changed everything.
Step 7: Bake Your Beautiful Matcha Sponge Cake
The Final Countdown: Pour the batter into your prepared pan immediately – don’t let it sit.
- Pour batter into your lined 6-inch pan
- Gently tap the pan on the counter to release air bubbles
- Bake for 25-30 minutes at 355°F (180°C)
What to Expect: The cake will rise dramatically in the first 15 minutes, then set. Don’t open the oven door!
Timing Reality: Mine usually takes exactly 27 minutes, but every oven is different.
The Toothpick Test: Insert a toothpick in the center – it should come out with just a few moist crumbs. Completely clean means overbaked.
Step 8: The Cooling Flip Trick
Japanese Technique: Immediately flip the cake upside down to cool.
- Turn the pan upside down on a wire rack
- Let it cool completely before removing from pan (about 45 minutes)
- The cake will release cleanly if you lined it properly
Why This Works: Cooling upside down prevents the delicate sponge from collapsing under its own weight.
My Experience: The first time I did this, I was convinced it would fall out. It doesn’t – trust the process.
Matcha Sponge Cake FAQs
Can I actually make this matcha sponge cake ahead of time?
Real Answer: Yes, and here’s exactly how I do it for busy weeks. The unfrosted cake keeps beautifully wrapped in plastic wrap for 2 days at room temperature. Actually, it gets even more tender after a day – something about the moisture redistributing.
What happens if I mess up the egg whipping step?
Been there! If your eggs won’t whip up fluffy, they were probably too cold. Here’s how to save it: put the bowl back over the warm water for another minute, then try whipping again. If they’re overwhipped and grainy, add another egg yolk and whip on low speed for 30 seconds.
My matcha powder clumped – did I ruin everything?
Don’t panic! Sift it again with the flour. I use a fine-mesh sieve and really work those clumps through with a spoon. If it’s really stubborn, I sometimes use a small whisk to break up clumps in the sieve.
Can my kids actually help with this matcha sponge cake?
Absolutely! My 8-year-old nephew loves helping with this recipe. Kids can measure ingredients, help sift the flour, and operate the mixer (with supervision). The folding technique is great for teaching gentle mixing skills.
Is this actually freezer-friendly?
Super freezer-friendly! I wrap individual slices in plastic wrap, then put them in a freezer bag. They keep for 3 months. I actually prefer eating this slightly frozen on hot summer days – it’s like matcha ice cream cake.
Ways I’ve Made This Matcha Sponge Cake My Own
After making this dozens of times, here’s how I switch it up depending on the occasion and who’s eating it.
For My Gluten-Free Friends
Sarah can’t have gluten, so here’s what I figured out: Replace the cake flour with a blend of rice flour (40g) and potato starch (15g). The texture is slightly different – a bit more delicate – but still absolutely delicious. Sift this mixture four times instead of three because rice flour can be gritty.
I also add an extra tablespoon of milk to compensate for the drier texture of gluten-free flours. Sarah actually says she prefers this version now!
Holiday Version (My Christmas Favorite)
For Christmas parties, I add a teaspoon of vanilla extract with the milk and oil. I know it’s not traditional, but the vanilla complements the earthy matcha beautifully. Sometimes I dust the top with powdered sugar before serving – it looks like snow on the green cake.
Kid-Friendly Take
When my nephews come over, I make mini versions in cupcake tins and let them help decorate with whipped cream and strawberries. The smaller size is perfect for little hands, and they love the bright green color. I reduce the matcha slightly (use 1½ teaspoons instead of 2) because kids can be sensitive to the earthy flavor.
Fancy Dinner Party Style
To impress my in-laws (and trust me, they’re tough cookies), I make this as a layer cake. I double the recipe and bake two 6-inch layers, then fill with matcha buttercream and fresh whipped cream. Top with fresh berries for color contrast. It looks like something from a fancy Japanese bakery.
Summer Adaptation
During hot weather, I serve this with matcha whipped cream and fresh fruit. The cake itself is light enough that it doesn’t feel heavy, and the matcha flavor is incredibly refreshing. Sometimes I even make it into a trifle with layers of cake, cream, and fresh peaches.
Hard-Won Tips From My Kitchen Disasters
The Game-Changer That Saved Everything
Here’s the one trick that made all the difference in my matcha sponge cake journey: weighing my ingredients instead of using cups. I know, I know – it seems fussy. But after batch number five turned out dense and weird, I invested in a kitchen scale. Game changer.
Eggs especially vary so much in size. Two “large” eggs from my grocery store can range from 90g to 110g. That 20g difference completely changes the texture of your sponge.
Don’t Be Like Me (Learn From My Mistakes)
Mistake #1: I used to think any green tea powder would work. Spent $30 on ingredients for a cake that tasted like lawn clippings. Invest in real matcha – your taste buds will thank you.
Mistake #2: Opening the oven door halfway through baking because I was worried. Sponge cakes are divas – they collapse if you even look at them wrong during baking. Trust the process and keep that door closed.
Mistake #3: Not cooling upside down. I thought this was just fancy technique, but it actually prevents the delicate structure from collapsing. Now I flip every single sponge cake I make.
My Make-Ahead Strategy
Here’s my Sunday prep routine for busy weeks: I make two cakes, wrap one tightly for later in the week, and serve one for Sunday dessert. The cake actually improves after a day – becomes more tender and the matcha flavor mellows perfectly.
I also pre-sift my flour and matcha mixture and store it in an airtight container. Saves time during the week when I want fresh cake but don’t want the full prep process.
Storage Reality Check
This cake actually keeps better than you’d think. Wrapped properly at room temperature, it stays moist for 3 days. In the fridge, it lasts a week but loses some of its tender texture (though it’s still delicious).
The secret is plastic wrap directly on the surface of any cut edges. This prevents it from drying out. I learned this from my friend who worked at a commercial bakery.
The Numbers (Because People Ask)
Look, I’m not a nutritionist, but here’s what the calculator says for one serving (this makes 6 servings):
- Calories: 165 per slice
- Protein: 4g (from those eggs!)
- Carbs: 28g
- Fat: 4g
- Sugar: 12g
Real Portion Sizes: This is what I actually eat, not what the “serving” technically says. I usually cut this into 6 generous slices, but you could easily get 8 smaller pieces if you’re serving it with other desserts.
How I Like to Serve This Matcha Sponge Cake
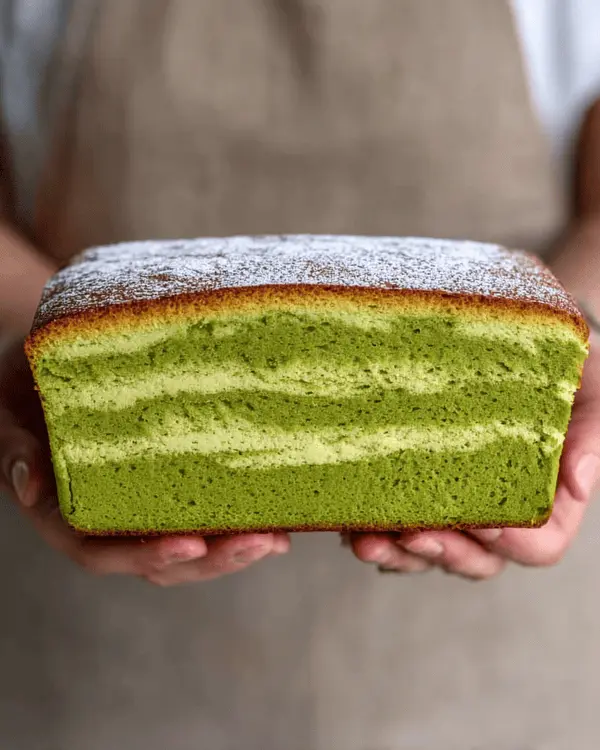
Perfect Partners: This goes amazing with lightly sweetened whipped cream and fresh strawberries. The berries’ tartness balances the earthy matcha perfectly. I also love it with a dollop of mascarpone or even vanilla ice cream.
Presentation Reality: Pinterest-perfect plating is beautiful, but honestly? I usually just dust it with powdered sugar and call it done. It’s gorgeous in its simplicity, and the bright green color speaks for itself.
When I Make This: Perfect for Sunday dinners when you want something special but not too heavy. Also amazing for potlucks – it travels well and always gets compliments. And yes, sometimes I make it just for Tuesday stress-eating because matcha is basically meditation in cake form.
Drink Pairings That Actually Work
- Hot green tea: Obvious choice, but the flavors really complement each other
- Coffee: Surprisingly good – the bitter notes play well with the sweet cake
- Milk: My nephew’s favorite combination
- Champagne: For fancy occasions, the bubbles cut through the richness beautifully
If you’re loving this matcha sponge cake, you absolutely have to try my healthy matcha cake recipe – it’s a slightly different technique that uses Greek yogurt for extra moisture. And if chocolate is more your speed, my mile-high chocolate cake uses a similar sponge method but with cocoa powder.
For those interested in more matcha baking, my matcha protein cake is perfect for post-workout treats. The technique I learned making this matcha sponge cake totally transformed how I approach all my sponge-based recipes.
Speaking of techniques, that folding method I mentioned? I use it in literally every delicate cake I make now. It’s a game-changer for maintaining volume while incorporating ingredients gently.
Your Perfect Matcha Sponge Cake Awaits
So there you have it – my tried-and-true matcha sponge cake recipe that’s never let me down. This fluffy matcha sponge cake has become such a staple in my kitchen, and I just know your family is going to love this authentic Japanese-style cake as much as mine does.
The best part? Once you master this technique, you can adapt it for any flavor. I’ve made green tea sponge cake variations with different teas, added citrus zest, even made a chocolate version. The sky’s the limit when you understand the fundamentals.
This matcha sponge cake represents everything I love about baking – it’s technically challenging enough to keep you engaged, but forgiving enough that you can recover from mistakes. Plus, there’s something so satisfying about that gorgeous green color and incredibly light texture.
Have you tried making matcha sponge cake before? Drop a comment and let me know how your fluffy Japanese green tea cake turned out! I love hearing about your successes (and disasters – trust me, I’ve been there).
If you make this matcha sponge cake, I’d love to see it! Tag me on Instagram @desserthaven with your green tea sponge cake photos. Seriously, seeing your creations makes my whole day.
Looking for more matcha inspiration? Check out my other Asian-inspired dessert recipes in the collection below – there’s a whole world of matcha beyond just this sponge cake, and I’m here for all of it.
Remember, baking is supposed to be fun, even when you’re learning new techniques. Don’t stress if your first attempt isn’t perfect – mine certainly wasn’t! The important thing is to enjoy the process and celebrate the small victories along the way. Happy baking, friends!
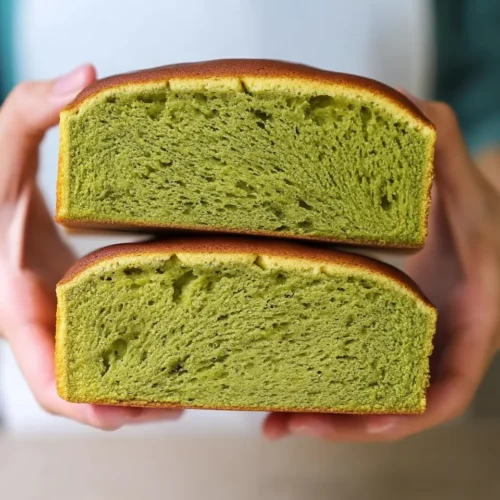
Ultimate Matcha Sponge Cake
Equipment
- Electric mixer
- fine-mesh sieve
- Large mixing bowls
- rubber spatula
- 6-inch round cake pan
Ingredients
Main Ingredients
- 100 g whole eggs 2 large eggs, warmed
- 70 g granulated sugar ⅓ cup
- 55 g cake flour ½ cup
- 5 g matcha powder 2 teaspoons, quality ceremonial grade
- 15 g milk 1 tablespoon, whole milk preferred
- 15 g neutral oil 1 tablespoon, vegetable or light olive oil
Instructions
- Preheat oven to 355°F (180°C). Line a 6-inch cake pan with parchment paper. Set up a pot of gently simmering water. Sift cake flour and matcha powder together three times.
- Place eggs and sugar in a large bowl that fits over the simmering water. Whisk constantly while the bowl sits over warm water until mixture feels warm like a baby’s bath (about 3-4 minutes).
- Remove from heat and beat with electric mixer on high speed for 5-7 minutes until tripled in volume. Test: batter should fall in ribbons that sit on surface for 2-3 seconds.
- Switch to low speed and beat for 1-2 minutes until mixture looks shiny and smooth to stabilize air bubbles.
- Add sifted matcha and flour mixture. Using rubber spatula, cut straight down through center, sweep across bottom, up side and over top. Rotate bowl quarter turn and repeat until no white streaks remain (15-20 folds).
- Take ¼ cup of batter and mix with milk and oil in small bowl until smooth. Pour back into main batter and fold gently until evenly distributed.
- Pour batter into prepared pan immediately. Gently tap pan on counter to release air bubbles. Bake for 25-30 minutes at 355°F until toothpick comes out with few moist crumbs.
- Immediately flip cake upside down on wire rack to cool completely (about 45 minutes) before removing from pan.

