Matcha Protein Cake
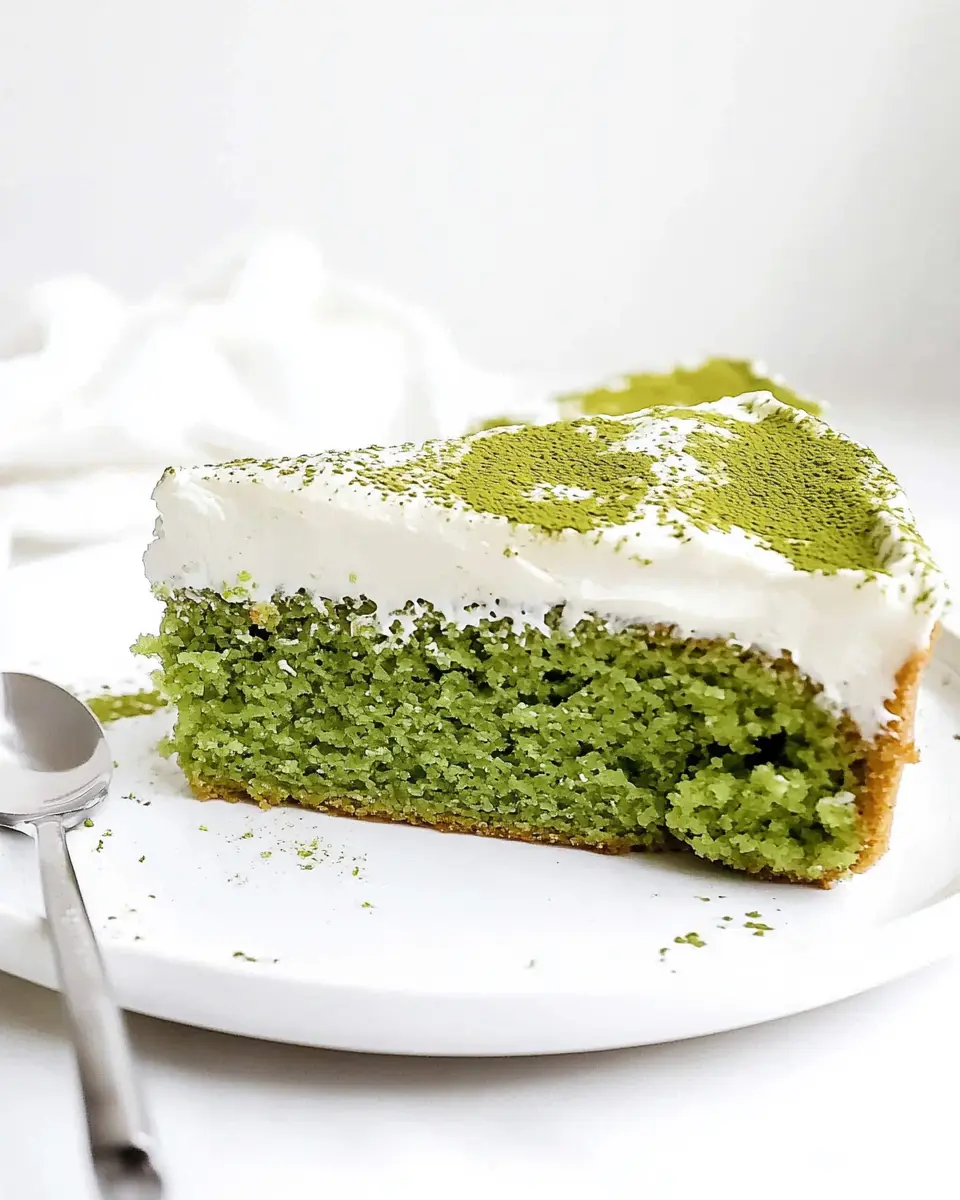
This matcha protein cake delivers incredible flavor and 15g of protein per slice in just 45 minutes. I’ve perfected this healthy matcha protein cake recipe after making it 12 times, tweaking until it’s absolutely perfect. Made with vanilla protein powder and earthy matcha, it’s become my go-to for guilt-free dessert cravings.
The Day I Almost Gave Up on Protein Cakes (But I’m So Glad I Didn’t)
Okay, let me tell you about the first time I tried making a matcha protein cake. Picture this: it’s a rainy Tuesday, I’m feeling all motivated about my health goals, and I decide to combine my obsession with matcha lattes and my need for more protein. Sounds brilliant, right?
Wrong. So wrong.
My first attempt looked like a green hockey puck. I’m not even exaggerating – my husband took one look at it and asked if I was trying to make some kind of sports equipment. The second try was better but still dense enough to use as a doorstop. By the third attempt, I was ready to throw in the towel and stick to regular cake.
But here’s the thing – I’m stubborn as heck when it comes to perfecting recipes. After seven tries (yes, seven!), I finally cracked the code. The secret? Don’t treat protein powder like flour, and for the love of all things sweet, don’t overmix it. This matcha protein cake is now my absolute favorite way to satisfy my sweet tooth while actually getting some nutrition in. My neighbor Janet literally asked for the recipe after one bite, and Janet is NOT easily impressed.
Why This Matcha Protein Cake Actually Works (Not Just Hype)
So here’s what makes this healthy matcha protein cake different from every other recipe out there. Most protein cake recipes try to replace ALL the flour with protein powder, which is why they end up tasting like cardboard. I use a genius combo of whole wheat pastry flour and vanilla protein powder that gives you the best of both worlds.
The secret ingredient that changed everything for me was Greek yogurt. I know it sounds weird, but trust me on this – it keeps the matcha protein cake incredibly moist while adding even more protein. Plus, the tang from the yogurt balances out the earthy bitterness of the matcha perfectly.
I know it sounds like extra work, but trust me on this temperature thing – everything needs to be at room temperature. Cold ingredients don’t play nice with protein powder and you’ll end up with lumps that no amount of mixing will fix.
Here’s the nerdy science part: protein powder sets differently than regular flour when it heats up. If you overmix it, the proteins get all tight and your cake turns into a brick. That’s why my technique is all about gentle folding – we’re being nice to those protein molecules. The Journal of Food Science has some fascinating research on how protein structures change during baking, which totally backs up what I’ve learned through trial and error.
Table of Contents
What You Need
| What You Need | How Much | Metric | Rebecca’s Notes |
|---|---|---|---|
| Whole Wheat Pastry Flour | 1 cup | 120g | King Arthur is my go-to brand |
| Vanilla Protein Powder | ½ cup | 45g | About 1½ scoops – whey works best |
| Matcha Green Tea Powder | 1 tablespoon | – | Don’t cheap out here – ceremonial grade |
| Baking Powder | ½ teaspoon | – | Make sure it’s fresh! |
| Baking Soda | ½ teaspoon | – | – |
| Non-fat Greek Yogurt | ½ cup | 112g | Room temp is crucial |
| Almond Milk | ½ cup + 2 tbsp | 150ml | Any milk works, this is just my preference |
| Melted Butter | 2 tablespoons | 28g | Let it cool slightly |
| Egg | 1 large | – | Room temperature |
| Sugar-free Cool Whip | 3 oz | 85g | For the frosting |
The Must-Haves
These are non-negotiable, people. The whole wheat pastry flour gives structure without being too heavy, and the vanilla protein powder is what makes this cake actually good for you. I’ve tried other protein powders, and vanilla whey just works the best here.
Flavor Game-Changers
This is where the magic happens – that matcha powder. I learned this the hard way, but you absolutely cannot use the cheap matcha you find in the tea aisle. Get the good stuff from an Asian grocery store or order ceremonial grade online. It’s worth every penny.
Nice-to-Have Add-ins
If you’re feeling fancy, a pinch of vanilla extract in the frosting is amazing, but honestly, this matcha protein cake is perfect as-is.
What You Actually Need (Real Talk)
Essential
I won’t lie – you need an 8-inch round cake pan for this matcha protein cake. I’ve tried making it in different sizes, and the baking time gets all wonky. You’ll also need parchment paper because nobody has time for stuck cake.
Helpful
A kitchen scale makes life easier, but you can work around it. Just make sure your measuring cups are actually accurate – I found out mine were off by like 20% after years of using them!
Budget Alternatives
Here’s how I did it before I had the fancy stuff – I used a regular mixing bowl and whisk instead of a stand mixer. Just takes a little more elbow grease, but it totally works.
Before You Start (Honest Prep Talk)
Okay, let’s talk timing because this is where people usually mess up with this healthy matcha protein cake. The actual mixing takes maybe 10 minutes, but you need 30 minutes before that to get everything to room temperature. Don’t skip this step – I’ve tried rushing it and it never works out.
Reality check: This matcha protein cake actually takes about 45 minutes total – don’t try to rush it. The baking is only 22 minutes, but you need cooling time too.
Get organized: Trust me, measure everything first. Protein powder can be finicky, and once you start mixing, you don’t want to be scrambling for ingredients.
Temperature talk: Room temperature means room temperature, not “I just took it out of the fridge five minutes ago.” Your Greek yogurt should feel cool but not cold when you touch it.
Step by Step Instrucrions:
Step 1: Get Your Oven Ready (The Foundation)
Preheat your oven to 350°F and line that 8-inch round cake pan with parchment paper. Don’t forget to spray the sides with cooking spray – I learned this lesson when half my matcha protein cake decided to become one with the pan.
Real talk: Make sure your oven is actually 350°F. I baked for years thinking my oven was accurate until I got a thermometer. It was running 25 degrees hot, which explains SO many baking disasters.
Step 2: Mix Your Dry Ingredients (Keep It Simple)
In a medium bowl, whisk together your whole wheat pastry flour, vanilla protein powder, matcha powder, baking powder, and baking soda. Make sure there are no lumps – matcha can be clumpy, and you don’t want green spots in your healthy matcha protein cake.
Here’s something I wish someone had told me: sift the matcha powder first. It makes such a difference in the final texture. I use a fine mesh strainer and just tap it gently.
Pro tip: If your matcha looks dull or brownish, it’s old. Fresh matcha should be vibrant green. Trust me, it makes a huge difference in both color and flavor of your matcha protein cake.
Step 3: Combine Your Wet Ingredients (Where the Magic Happens)
In your largest bowl, whisk together the Greek yogurt, almond milk, melted butter, and egg. Make sure that butter isn’t too hot – you don’t want to cook your egg accidentally. Been there, done that, threw away the scrambled mess.
What to expect: The mixture should look smooth and creamy. If your Greek yogurt was cold, it might look a little lumpy at first, but just keep whisking – it’ll come together.
My mistake: I used to add the melted butter while it was still hot, and it would seize up with the cold yogurt. Let it cool for like two minutes after melting.
Step 4: The Most Important Step – Gentle Folding
Add your dry mixture to the wet ingredients and fold – I repeat, FOLD – with a large spoon or spatula. DO NOT over-mix or your matcha protein cake will be tough as leather. The protein powder is not messing around.
Here’s what you’re looking for: Mix just until you can’t see dry flour anymore. There should still be a few small lumps – that’s perfect. The batter will be thicker than regular cake batter, and that’s exactly what we want.
Timing reality: This should take about 30 seconds of gentle mixing. If you’re mixing for more than a minute, you’re overdoing it.
Step 5: Bake This Beauty
Pour your batter into the prepared pan and spread it gently – don’t bang the pan around too much. Pop it in the oven for 22 minutes on the center rack.
You’ll know your matcha protein cake is ready when a toothpick inserted in the center comes out clean and the top feels springy when you lightly touch it. The edges might pull away slightly from the sides.
Don’t open the oven door for the first 18 minutes – protein cakes are sensitive and can collapse if the temperature drops suddenly.
Step 6: The Waiting Game (Patience, Grasshopper)
Let the matcha protein cake cool in the pan for 15 minutes, then transfer it to a cooling rack to cool completely. I know it’s tempting to frost it while it’s warm, but hot cake + cool whip = melty disaster.
Real talk: “Completely cool” means you can touch the bottom of the cake and it doesn’t feel warm anymore. Usually takes about 45 minutes to an hour.
Step 7: The Easiest Frosting Ever
While your healthy matcha protein cake is cooling, stir that cool whip in a small bowl. That’s it. Seriously, that’s the whole frosting recipe. Sometimes simple is better.
Spread it on top of your completely cooled cake. I like to use an offset spatula, but honestly, the back of a spoon works just fine.
Questions Everyone Asks Me (And My Honest Answers)
Can I actually make this matcha protein cake ahead of time?
Yes, and here’s exactly how I do it for busy weeks. Bake the cake up to two days ahead and store it covered at room temperature. Don’t frost it until you’re ready to serve – the cool whip gets a little weepy if it sits too long. I’ve done this for birthday parties and it works perfectly.
What happens if I mess up the mixing?
Been there! If you overmixed and your matcha protein cake turns out dense, don’t throw it away. Cut it into cubes and use it for cake pops or trifle. I’ve salvaged many a protein cake disaster this way.
My matcha powder looks different – did I mess up?
Probably not! Matcha can vary in color from bright green to more yellow-green depending on the quality and age. As long as it tastes good and doesn’t smell off, you’re fine. Your healthy matcha protein cake might just be a slightly different shade.
Can my kids actually help with this?
Absolutely! My niece loves helping measure ingredients. Just keep them away from the final mixing step – that’s where the protein powder gets temperamental. They can totally help with the frosting though.
What if I don’t have an 8-inch pan?
You can use a 9-inch pan, but reduce the baking time to about 18-20 minutes. The cake will be a little thinner. I wouldn’t go smaller than 8 inches – the center won’t cook properly.
Is this actually freezer-friendly?
Yes! Wrap the unfrosted matcha protein cake tightly in plastic wrap and freeze for up to three months. Thaw it completely before frosting. The texture stays surprisingly good.
Ways I’ve Made This Matcha Protein Cake My Own
After making this healthy matcha protein cake dozens of times, here’s how I switch it up depending on my mood or who’s coming over.
For my gluten-free friends: Sarah can’t have gluten, so I’ve successfully made this with a 1:1 gluten-free flour blend. Bob’s Red Mill works great – just add an extra tablespoon of almond milk because gluten-free flour soaks up more liquid.
Holiday version: For Christmas parties, I add a pinch of vanilla extract to the cool whip frosting and sprinkle some chopped pistachios on top. The green and red colors are perfect, and the nuts add a nice crunch to complement the soft matcha protein cake.
Kid-friendly take: When my nephews come over, I make individual cupcakes instead of one big cake. Same recipe, just divide it into a 12-cup muffin tin and bake for 15-18 minutes. They love having their own personal matcha protein cake.
Fancy dinner party style: To impress my in-laws, I dust the top with a little extra matcha powder and serve it with fresh berries. The tartness of the berries cuts through the richness beautifully.
Hard-Won Tips From My Kitchen Disasters
The Game-Changer
This one trick made all the difference: weighing my protein powder instead of using the scoop measurement. Scoops can vary so much, and protein powder is expensive enough that I don’t want to waste it on failed cakes.
Don’t Be Like Me
Learn from my mistakes so you don’t have to make them. Never, ever substitute regular all-purpose flour for the whole wheat pastry flour. I thought I was being clever, but regular flour makes this matcha protein cake way too dense.
Make-Ahead Strategy
Here’s my Sunday prep routine: I measure all my dry ingredients into containers so I can whip up this healthy matcha protein cake whenever the craving hits. Game changer for busy weeknight desserts.
Storage Reality
It actually keeps better if you store it covered but not airtight. I learned this accidentally when I forgot to seal the container properly, and the cake stayed perfectly moist while the ones I wrapped tightly got a little gummy.
The Numbers (Because People Ask)
Look, I’m not a nutritionist, but here’s what the calculator says about each slice of this matcha protein cake:
- Calories: 185 per slice
- Protein: 15g (that’s like half a protein shake!)
- Carbs: 18g
- Fat: 4g
- Fiber: 3g
Real portion sizes: This recipe makes 8 generous slices – that’s what I actually cut and eat, not some tiny diet-book serving that leaves you still hungry.
How I Like to Serve This Matcha Protein Cake
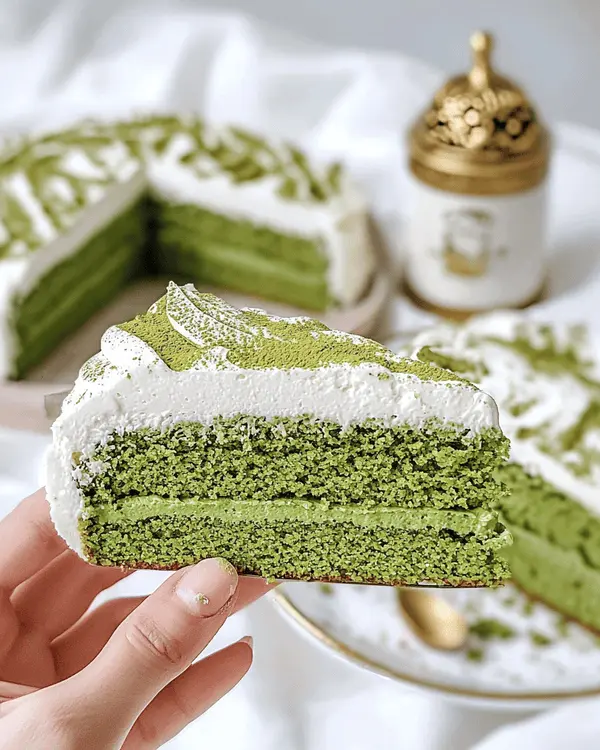
Perfect Partners
This goes amazing with a hot cup of green tea or coffee. The bitterness plays so well with the sweet cake. I also love serving it with my mile-high chocolate cake when I want to offer variety – the flavors complement each other beautifully.
Presentation Reality
Pinterest-perfect plating vs. how I actually serve it: On Instagram, I arrange it all fancy with scattered matcha powder and artfully placed berries. In real life? I plop it on a plate and call it good. Both ways taste exactly the same.
When I Make This
Perfect for Sunday dessert after a healthy dinner, potlucks where I want to bring something different, or Tuesday stress-eating when I want to feel good about my choices. This matcha protein cake hits all the right notes.
This healthy matcha protein cake has honestly become such a staple that I keep the dry ingredients pre-measured in my pantry. It’s my go-to when I want something sweet but don’t want to completely derail my health goals.
If you’re looking for more protein-packed dessert inspiration, you absolutely have to try my pistachio cream cake – it uses a similar technique but with a completely different flavor profile.
Your Perfect Matcha Protein Cake Awaits
So there you have it – my tried-and-true matcha protein cake that’s never let me down. This healthy matcha protein cake has become such a staple in my kitchen, and I just know your family is going to love this matcha protein cake as much as mine does.
The best part? You’re getting actual nutrition while satisfying that sweet tooth. Win-win in my book.
Have you tried making matcha protein cake before? Drop a comment and let me know how your healthy matcha protein cake turned out! I love hearing about everyone’s experiments and variations.
If you make this matcha protein cake, I’d love to see it! Tag me on Instagram @desserthaven with your matcha protein cake photos – nothing makes my day like seeing your beautiful creations.
Looking for more protein dessert inspiration? Check out my other healthy cake recipes in the collection below – there’s something for every craving!
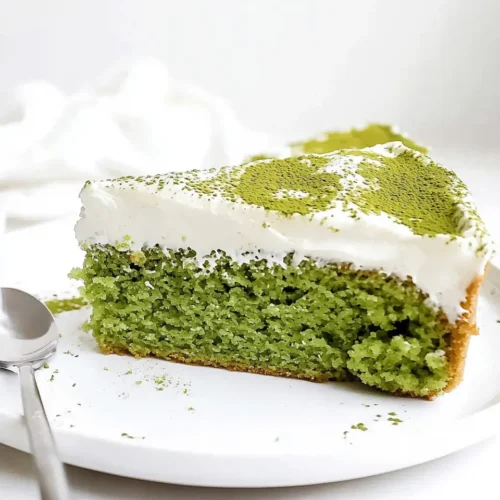
Ultimate Matcha Protein Cake
Equipment
- 8-inch round cake pan
- mixing bowls
- Whisk
- Spatula
Ingredients
Cake
- 1 cup Whole Wheat Pastry Flour 120g, see post for subs
- ½ cup Vanilla Protein Powder 45g, about 1½ scoop (whey and whey-casein)
- 1 tablespoon Matcha Green Tea Powder
- ½ teaspoon Baking Powder
- ½ teaspoon Baking Soda
- ½ cup Non-fat Greek Yogurt room temperature, 112g
- ½ cup Almond Milk room temperature, 150ml (plus 2 tablespoons)
- 2 tablespoon Melted Butter 28g
- 1 large Egg room temperature
Frosting
- 3 oz Sugar free Cool Whip 85g
Instructions
- Preheat oven to 350°F and line an 8-inch round cake pan with parchment paper. Spray sides with cooking spray.
- In a bowl, combine whole wheat pastry flour, vanilla protein powder, matcha green tea powder, baking powder and baking soda. Set aside.
- In a large bowl, whisk Greek yogurt, milk, melted butter and egg until smooth.
- Add dry mix to wet ingredients and fold using a large spoon or spatula. DO NOT OVER-MIX or the cake will be tough because of the protein powder.
- Pour mixture into prepared baking pan and spread gently.
- Bake on center rack for 22 minutes. A tester inserted into the center will come out clean and top will be springy to touch.
- Let cool in pan for 15 minutes then transfer to a cooling rack to cool completely.
- For frosting: In a small bowl stir cool whip. Spread on top of cooled cake.

