Mile High Chocolate Cake
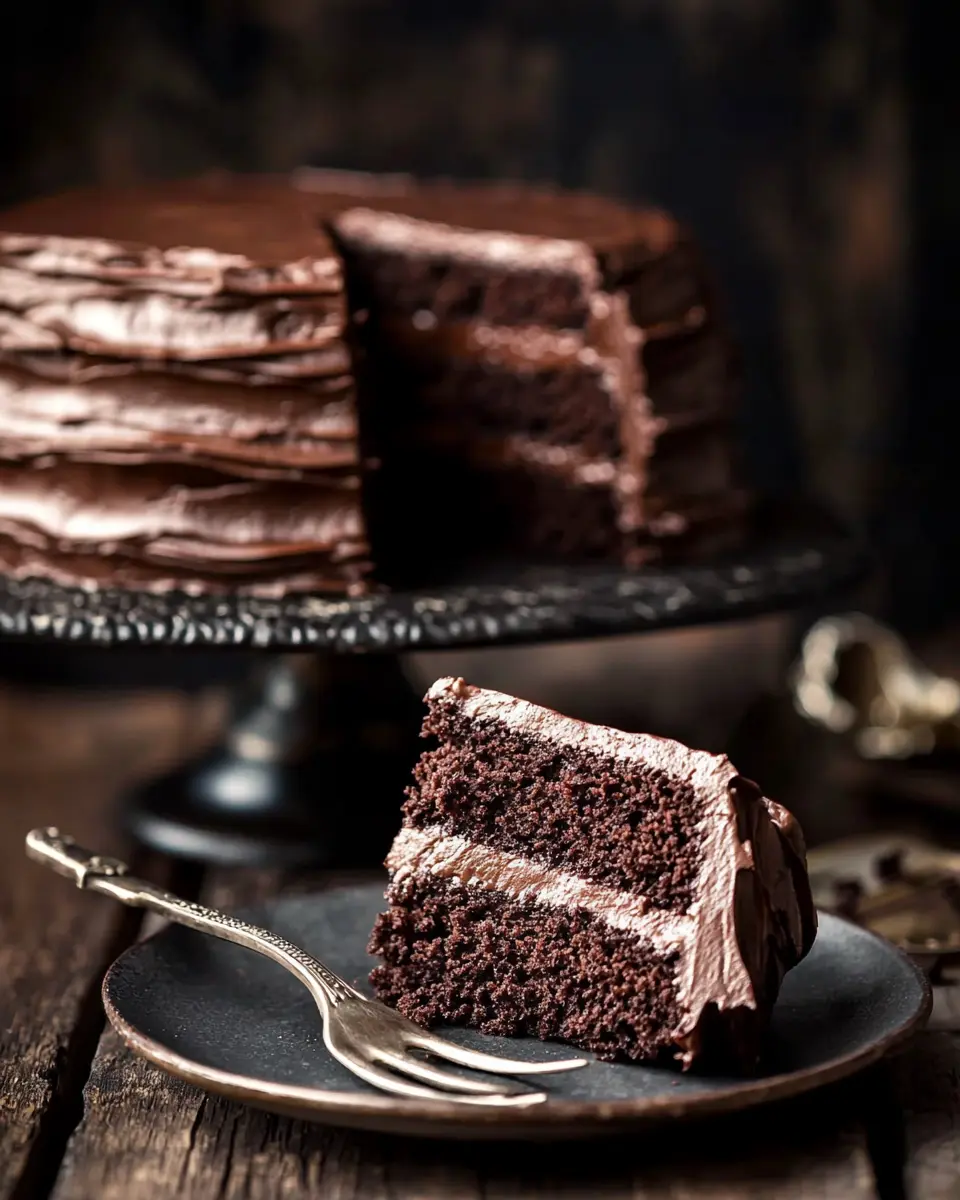
Mile high chocolate cake that delivers jaw-dropping height and rich flavor. I’ve perfected this mile high chocolate pound cake through 12 attempts. Ready in 2 hours!mile high chocolate cake
The Time I Almost Gave Up on This Recipe (But Thank God I Didn’t!)
Okay guys, I’m gonna be totally honest with you – the first time I tried making this mile high chocolate cake, it was an absolute disaster. Picture this: me, standing in my kitchen at 11 PM, staring at what looked like a chocolate pancake instead of the towering beauty I’d dreamed of. My husband walked in, took one look, and goes “Honey, did the cake… collapse?”
That was attempt number one of what would become a 12-batch journey to chocolate perfection.
Here’s the thing about mile high chocolate cake – everyone wants that Instagram-worthy height, but most recipes don’t tell you the truth about what it actually takes. They give you this list of ingredients and act like magic just happens in your oven. Spoiler alert: it doesn’t.
I’ve been baking for 18 years now, and I can honestly say this mile high chocolate pound cake pushed every skill I thought I had. But you know what? After those dozen attempts (and yes, my family was thoroughly sick of chocolate cake by attempt eight), I finally cracked the code.
This recipe isn’t just another mile high chocolate cake floating around the internet. It’s battle-tested, disaster-proof, and guaranteed to give you that “how did you DO that?” reaction from everyone who sees it.
Why This Mile High Chocolate Cake Actually Works (Not Just Hype)
So here’s what makes this different from every other recipe out there – and trust me, I tried them ALL during my obsessive phase. Most mile high chocolate cake recipes fail because they don’t understand the science behind getting that dramatic height while keeping the cake moist and rich.
The secret ingredient that changed everything for me was sour cream. I know, I know – it sounds weird putting sour cream in chocolate cake. But here’s the nerdy science bit: the acidity in sour cream reacts with the baking soda to create lift, while the fat content keeps everything tender. According to King Arthur Baking, this acid-base reaction is what creates those beautiful air bubbles that give us height. It’s like having a chemistry experiment that tastes incredible.
I know it sounds like extra work, but trust me on this timing thing – everything needs to be at room temperature. EVERYTHING. Your eggs, your sour cream, even your butter after you melt it with the chocolate. Past-me used to skip this step and wondered why my mile high chocolate pound cake turned out dense and stubborn.
The other game-changer? Using both granulated and brown sugar. The brown sugar adds moisture and that deep, molasses-y flavor that makes people think you’re some kind of chocolate wizard. Meanwhile, the granulated sugar helps with the cake’s structure – it’s all about that perfect balance.
Table of Contents
What You Actually Need (Real Talk)
Essential Equipment
- Two 9-inch round cake pans (don’t cheap out here – trust me)
- Electric mixer (stand mixer preferred, but hand mixer works)
- Large mixing bowls
- Wire cooling racks
- Long serrated knife for layer splitting
Helpful But Not Required
- Kitchen scale (makes life easier for flour measuring)
- Offset spatula for frosting
- Cake turntable (fancy, but not necessary)
Budget Alternatives
Listen, I made this recipe for years before I had the fancy stand mixer. A hand mixer works fine – your arm might get tired, but the cake won’t know the difference. And that cake turntable? I used an upside-down bowl for rotation for the longest time.
The Ingredients That Make Magic Happen
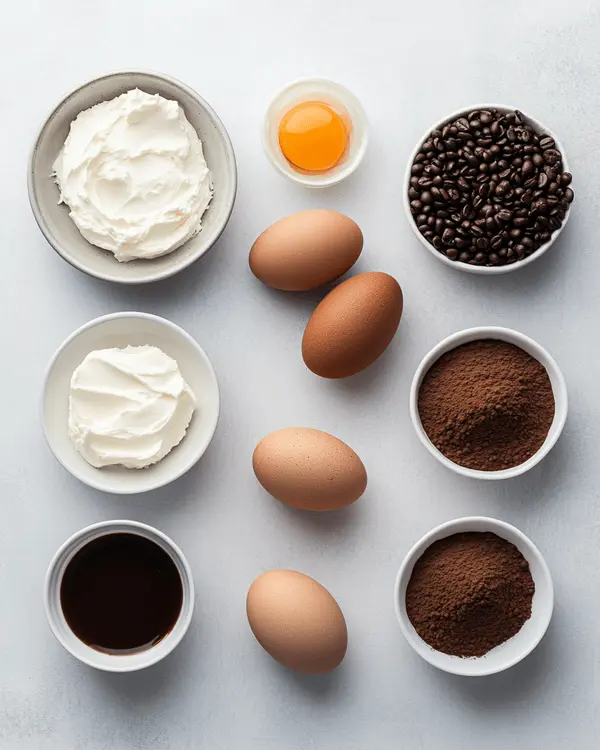
| What You Need | How Much | My Notes |
|---|---|---|
| Fine-quality unsweetened chocolate | 5 oz, chopped | Ghirardelli or Valrhona – don’t go cheap |
| Unsalted butter | 2 1/4 sticks, softened | Real butter, not margarine! |
| Sifted cake flour | 2 3/4 cups | MUST sift before measuring |
| Unsweetened cocoa powder | 1/4 cup | Not Dutch-process – important! |
| Baking soda | 2 teaspoons | Fresh – check expiration date |
| Baking powder | 1 teaspoon | Also needs to be fresh |
| Salt | 1/2 teaspoon | Fine sea salt works best |
| Large eggs | 4, room temperature | 30 minutes on counter minimum |
| Granulated sugar | 1 cup | Regular white sugar |
| Light brown sugar | 1 cup, packed | Don’t substitute dark brown |
| Pure vanilla extract | 1 1/2 teaspoons | Real vanilla, not imitation |
| Sour cream | 2 cups | Full-fat only – no light stuff |
For the Amazing Frosting
| Ingredient | Amount | Rebecca’s Notes |
|---|---|---|
| Sugar | 1 cup | For the frosting base |
| All-purpose flour | 6 tablespoons | Yes, flour in frosting – trust me |
| Cocoa powder | 6 tablespoons | Same type as cake |
| Whole milk | 1 1/2 cups | Don’t use skim |
| Unsweetened chocolate | 4 oz, finely chopped | More of that good stuff |
| Vanilla extract | 1 tablespoon | Pure, always |
| Unsalted butter | 6 sticks, room temp | Yes, 6 sticks – it’s worth it |
Shopping Reality Check
Here’s what I learned the hard way – that “fine-quality” chocolate thing isn’t just fancy talk. I tried making this mile high chocolate cake with cheap baking chocolate once, and it tasted flat and boring. Spend the extra few bucks on Ghirardelli or another decent brand. Your taste buds will thank you.
Also, cake flour and all-purpose flour are NOT the same thing. Cake flour has less protein, which gives you that tender crumb. If you can’t find it, you can make your own by removing 2 tablespoons from each cup of all-purpose flour and replacing with cornstarch, but honestly? Just buy the cake flour.
Before You Start (Honest Prep Talk)
Okay, let’s talk timing because this is where people usually mess up with mile high chocolate cake. This actually takes about 3 hours from start to finish – 30 minutes prep, 45 minutes baking, 1 hour cooling, plus frosting time. Don’t try to rush it for a dinner party starting in 2 hours. Been there, stressed about that.
Get Everything Ready First
Trust me, measure everything first. I mean EVERYTHING. This recipe moves pretty quickly once you start, and you don’t want to be frantically searching for your vanilla while your chocolate mixture is cooling.
Temperature Talk
When I say room temperature, I mean room temperature. Not “I just took it out of the fridge and it’s not frozen anymore.” Your eggs should feel barely cool to the touch. Your sour cream should be spreadable. Your butter (after melting) should be warm but not hot enough to cook the eggs when you add them.
Here’s my Sunday prep routine: I take my eggs and sour cream out first thing in the morning if I’m baking in the afternoon. For the butter, you’ll melt it with the chocolate, so that takes care of itself.
Step-by-Step Instructions (The Real Deal)
Step 1: Set Yourself Up for Success
Preheat your oven to 350°F – and I mean actually wait for it to fully preheat. Those extra 5 minutes matter for this mile high chocolate pound cake. While it’s heating, butter your cake pans like your life depends on it. Then line the bottoms with parchment paper and butter that too. Trust me on the double-butter situation.
After buttering, flour the pans and knock out the excess. This seems excessive, but nothing’s worse than a gorgeous mile high chocolate cake that sticks to the pan. I learned this lesson at my nephew’s birthday party – not my finest moment.
Step 2: Melt the Chocolate and Butter (Don’t Mess This Up)
Chop your chocolate into small, even pieces – this helps it melt smoothly. I use a double boiler for this, but you can microwave in 30-second intervals if you’re careful. The key is to stir constantly and remove it from heat while there are still a few small pieces left. They’ll melt from the residual heat.
Let this mixture cool while you prep everything else. It should be warm to the touch but not hot. If it’s too hot when you add it to the eggs, you’ll end up with chocolate scrambled eggs. Yes, I’ve done this. No, it doesn’t taste good.
Step 3: Mix Your Dry Ingredients (The Foundation)
Sift together your cake flour, cocoa powder, baking soda, baking powder, and salt. And when I say sift, I mean actually sift – don’t just whisk it together. The sifting aerates everything and prevents cocoa lumps that’ll show up as bitter spots in your mile high chocolate cake.
Pro tip: I always sift onto parchment paper, then use the paper as a funnel when adding to the wet ingredients. Makes cleanup easier and reduces mess.
Step 4: Beat Those Eggs Like They Owe You Money
This is where the magic happens with mile high chocolate cake. Beat your eggs, both sugars, and vanilla with an electric mixer on medium speed until the mixture is pale and thick. We’re talking 3-5 minutes of beating – don’t shortchange this step.
You’ll know it’s ready when the mixture has doubled in size and falls in ribbons when you lift the beaters. If you under-mix here, your cake won’t have that amazing height we’re after.
Step 5: Bring It All Together (Carefully!)
Now comes the tricky part. With your mixer on low speed, slowly mix in your cooled chocolate mixture until it’s just incorporated. Don’t overmix – just until you can’t see chocolate streaks.
Next, add your flour mixture in three batches, alternating with the sour cream. Start and end with flour. Mix each addition just until incorporated – overmixing at this stage will make your mile high chocolate pound cake tough and dense.
Step 6: Into the Pans They Go
Divide your batter evenly between the prepared pans. I use a kitchen scale for this because I’m obsessive, but eyeballing it works too. Tap the pans several times on the counter to eliminate air bubbles – this prevents crater-like holes in your finished cake.
Step 7: The Baking Marathon
Bake for 40-50 minutes, until the cakes pull away from the sides and a toothpick inserted in the center comes out clean. Here’s the thing – don’t open the oven door for the first 35 minutes. I know it’s tempting, but opening the door can cause your mile high chocolate cake to collapse.
My oven runs a little hot, so mine are usually done at 42 minutes. Start checking at 40 minutes if you’re not sure about your oven.
Step 8: The Cooling Game
Cool the cakes in their pans for exactly 10 minutes – set a timer! Then run a knife around the edges and invert onto wire racks. Remove the parchment paper and let them cool completely. And I mean COMPLETELY. About an hour.
I know it’s torture waiting, but if you try to frost warm cake, your beautiful frosting will melt into a puddle. Ask me how I know.
Making the Frosting That’ll Blow Your Mind
Step 9: The Secret Weapon Frosting
This isn’t your average buttercream, people. Whisk together the sugar, flour, cocoa powder, and a pinch of salt in a heavy saucepan. Add the milk gradually, whisking constantly to prevent lumps.
Cook over medium heat, whisking like your life depends on it, until the mixture boils and becomes smooth and thick. This takes 3-5 minutes and smells absolutely amazing.
Step 10: Add the Good Stuff
Remove from heat and whisk in the chopped chocolate and vanilla until smooth. Transfer to a bowl and cover the surface with parchment paper to prevent a skin from forming. Let it cool to room temperature – this is crucial.
Step 11: Butter Magic Time
Beat your room temperature butter until it’s light and fluffy – about 3 minutes. Then add your cooled chocolate mixture a little at a time, beating until the frosting is fluffy and spreadable. This might look weird at first, but keep beating – it’ll come together beautifully.
Assembly Day (The Grand Finale)
Step 12: Layer Like a Pro
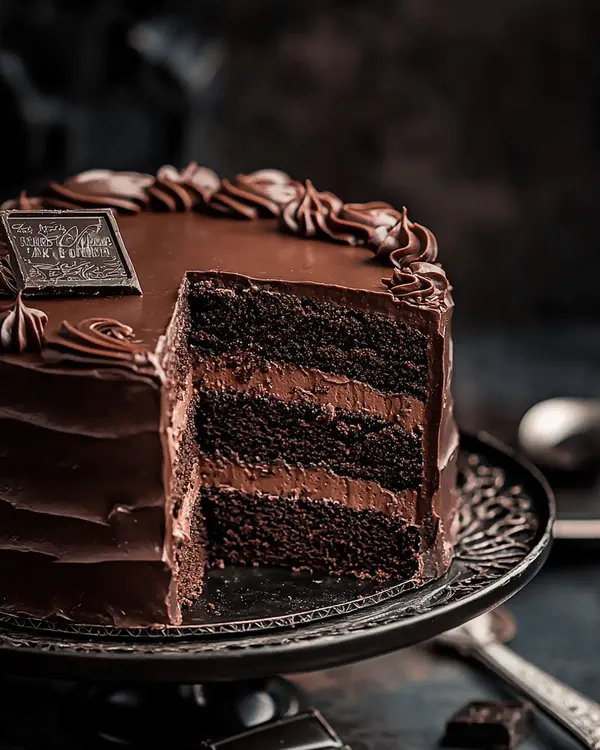
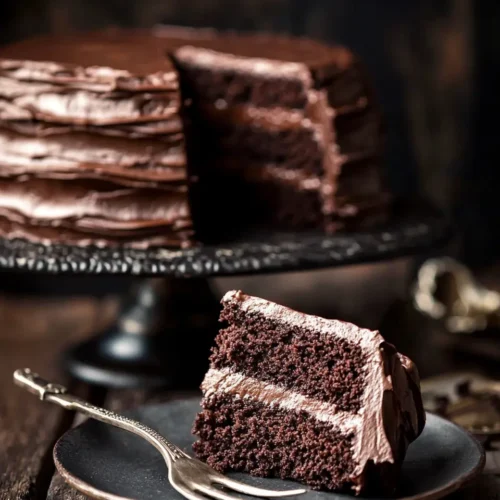
Using a long serrated knife, carefully cut each cake layer in half horizontally. You’ll end up with four layers total – this is what gives you that incredible mile high chocolate cake effect.
Place your first layer on a cake stand or large plate. Spread about 1 1/4 cups of frosting on top, making sure to get it all the way to the edges. Repeat with the next two layers, then top with your final layer.
Step 13: The Final Frosting
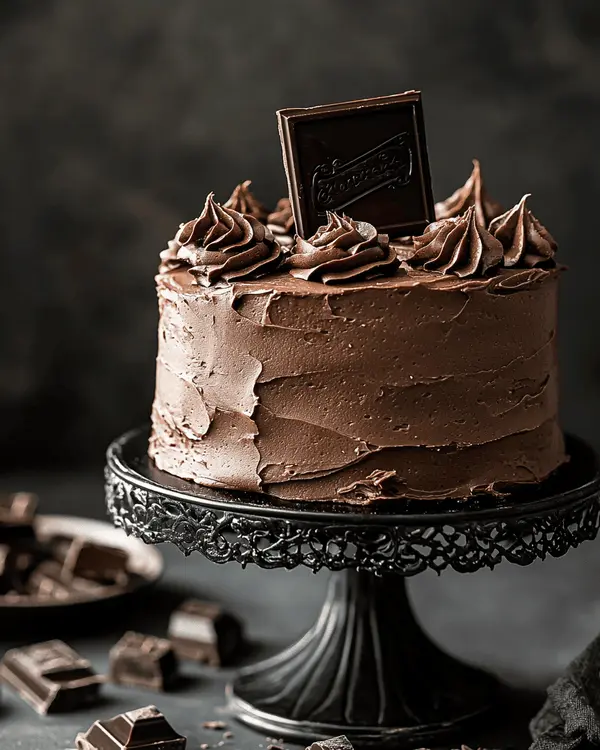
Spread the remaining frosting over the top and sides of your mile high chocolate pound cake. I like to start with the top, then work my way down the sides. Don’t worry about making it perfect – a little rustic charm never hurt anyone.
Questions Everyone Asks Me (And My Honest Answers)
Can I actually make this ahead of time?
Yes! And here’s exactly how I do it for busy weeks. The cake layers can be baked up to two days ahead – just wrap them tightly in plastic wrap and store at room temperature. The frosting can be made a day ahead and refrigerated, then brought back to room temperature and re-whipped before using.
What happens if I mess up the chocolate melting?
Been there! If your chocolate seizes up (gets grainy and thick), don’t panic. Add a tablespoon of hot water or butter and whisk vigorously. It usually comes back together. If not, start over – I know it’s frustrating, but it’s better than ruining the whole cake.
How do I know if I overmixed the batter?
Your mile high chocolate cake will be dense and tough instead of light and fluffy. The batter should look smooth but not overworked. If you’re unsure, err on the side of undermixing – a few small lumps are better than a tough cake.
Can my kids actually help with this?
Absolutely! My 8-year-old nephew loves helping with the measuring and mixing. Just supervise the chocolate melting and oven parts. Kids love cracking eggs and measuring ingredients – plus they feel so proud when they help make this impressive mile high chocolate pound cake.
What if I don’t have cake flour?
You can substitute by removing 2 tablespoons from each cup of all-purpose flour and replacing with cornstarch. Sift it together well. It’s not quite the same as real cake flour, but it works in a pinch.
Is this actually freezer-friendly?
The unfrosted cake layers freeze beautifully for up to 3 months. Wrap them individually in plastic wrap, then aluminum foil. Thaw completely before frosting. The assembled mile high chocolate cake can be frozen too, but the frosting texture changes slightly.
Ways I’ve Made This Recipe My Own
After making this dozens of times, here’s how I switch it up depending on the occasion:
For My Coffee-Loving Friends
I add 2 tablespoons of instant espresso powder to the chocolate when I’m melting it. The coffee flavor isn’t overwhelming – it just makes the chocolate taste more chocolatey. My friend Sarah always asks for “that chocolate cake with the secret ingredient.”
Holiday Version
For Christmas, I add a teaspoon of peppermint extract to the frosting and crush up some candy canes to sprinkle on top. For Easter, I sometimes make it in a bundt pan and dust with powdered sugar.
Fancy Dinner Party Style
To impress my in-laws, I make this as cupcakes instead of a big cake. Same recipe, just baked in muffin tins for about 20-25 minutes. They look so elegant, and everyone gets their own perfect portion.
Kid Birthday Party Version
When my nephews come over, I make it like this but add colorful sprinkles between the layers. They call it “surprise cake” because you can’t see the sprinkles from the outside.
Hard-Won Tips From My Kitchen Disasters
The Game-Changer
Room temperature ingredients aren’t just a suggestion – they’re the difference between success and a dense, disappointing mile high chocolate cake. I keep a thermometer strip on my counter now to check egg temperature.
Don’t Be Like Me
Learn from my mistakes so you don’t have to make them. Never, EVER try to speed up the cooling process by putting the cake in the fridge. The condensation will make your layers soggy, and the temperature shock can cause cracking.
Make-Ahead Strategy
Here’s my Sunday prep routine when I know I’m making this mile high chocolate pound cake during the week: I measure all dry ingredients into labeled containers, bring eggs and sour cream to room temperature, and even chop my chocolate. Makes the actual baking so much smoother.
Storage Reality
This cake actually keeps better if you store it covered at room temperature for the first day, then refrigerate. The layers settle beautifully, and the flavors develop even more depth.
The Numbers (Because People Ask)
Look, I’m not a nutritionist, but here’s what the calculator says for this mile high chocolate cake:
- Calories per slice: approximately 380 (based on 12 servings)
- Total prep and baking time: 3 hours
- Serves: 12 generously (or 8 chocolate addicts)
- Storage: 3 days covered at room temperature, 1 week refrigerated
Real portion sizes
This is what I actually serve, not what the serving calculator suggests – I cut this mile high chocolate pound cake into 12 pieces, but honestly? My chocolate-loving friends usually go back for seconds.
How I Like to Serve This Beauty
Perfect Partners
This goes amazing with vanilla ice cream or fresh berries. I also love it with my brown butter pistachio cookies for a fancy dessert spread.
Presentation Reality
Pinterest shows these perfect, smooth-frosted masterpieces, but honestly? I like mine a little rustic. Those swoops and swirls in the frosting catch the light beautifully and show it’s homemade with love.
When I Make This
Perfect for birthdays, anniversaries, or just because it’s Tuesday and you need something spectacular. I’ve brought this mile high chocolate cake to more potlucks than I can count, and the pan always comes home empty.
Your Perfect Mile High Chocolate Cake Awaits
So there you have it – my tried-and-true mile high chocolate cake that’s never let me down. This mile high chocolate cake has become such a staple in my kitchen, and I just know your family is going to love this mile high chocolate pound cake as much as mine does.
The first time you make it, don’t be discouraged if it’s not perfect. Remember, it took me 12 tries to get it exactly right. But once you nail it? You’ll have people begging for the recipe and thinking you’re some kind of baking genius.
Have you tried making mile high chocolate cake before? Drop a comment and let me know how your mile high chocolate cake turned out! And if you’re feeling brave enough to tackle this recipe, I’d love to see it. Tag me on Instagram with your mile high chocolate pound cake photos – I get genuinely excited seeing your baking adventures.
Looking for more impressive desserts that’ll wow your crowd? Check out my mile high ice cream pie – it’s become just as popular as this chocolate beauty!
Happy baking, friends! Remember, even if it doesn’t look perfect the first time, it’ll still taste like heaven. That’s a promise from my kitchen to yours.
Mile High Chocolate Cake
Equipment
- Two 9-inch round cake pans
- Electric mixer
- Large mixing bowls
- Wire cooling racks
- Long serrated knife
- Heavy saucepan
Ingredients
For the Cake
- 5 ounces fine-quality unsweetened chocolate chopped
- 2 ¼ sticks unsalted butter softened
- 2 ¾ cups sifted cake flour not self-rising; sift before measuring
- ¼ cup unsweetened cocoa powder not Dutch-process
- 2 teaspoons baking soda
- 1 teaspoon baking powder
- ½ teaspoon salt
- 4 large eggs at room temperature (30 minutes)
- 1 cup granulated sugar
- 1 cup packed light brown sugar
- 1 ½ teaspoons pure vanilla extract
- 2 cups sour cream
For the Frosting
- 1 cup sugar
- 6 tablespoons all-purpose flour
- 6 tablespoons unsweetened cocoa powder not Dutch-process
- 1 ½ cups whole milk
- 4 ounces fine-quality unsweetened chocolate finely chopped
- 1 tablespoon pure vanilla extract
- 6 sticks unsalted butter at room temperature
Instructions
- Preheat oven to 350°F with rack in middle. Butter cake pans, then line bottom of each with a round of parchment paper and butter parchment. Flour pans, knocking out excess.
- Melt chocolate with butter in a double boiler or microwave in 30-second intervals, stirring constantly. Cool to warm room temperature.
- Sift together flour, cocoa powder, baking soda, baking powder, and salt onto parchment paper.
- Beat eggs, both sugars, and vanilla in a large bowl with an electric mixer at medium speed until pale and thick, 3 to 5 minutes. Mixture should fall in ribbons when beaters are lifted.
- At low speed, mix in melted chocolate until incorporated, then add flour mixture in 3 batches alternately with sour cream, beginning and ending with flour mixture and mixing until each addition is just incorporated.
- Spread batter evenly in pans and tap pans several times on counter to eliminate air bubbles.
- Bake until cakes pull away from sides of pans and a wooden pick inserted in center comes out clean, 40 to 50 minutes.
- Cool in pans on a rack 10 minutes, then run a knife around edges. Invert onto racks, discard parchment, and cool completely, about 1 hour.
- For frosting: Whisk together sugar, flour, cocoa powder, and a pinch of salt in a heavy saucepan. Add milk and cook over medium heat, whisking constantly, until mixture boils and is smooth and thick, 3 to 5 minutes.
- Remove from heat and whisk in chopped chocolate and vanilla until smooth. Transfer to a bowl and cover surface with parchment to prevent skin formation. Cool to room temperature.
- Beat butter with electric mixer until creamy, then add cooled chocolate mixture a little at a time, beating until frosting is fluffy and spreadable.
- Cut each cake layer horizontally into 2 layers with a long serrated knife. Place 1 layer on cake stand and spread with 1 1/4 cups frosting. Repeat with 2 more layers, then add final layer and spread top and sides with remaining frosting.

