Hibiscus Panna Cotta Recipe
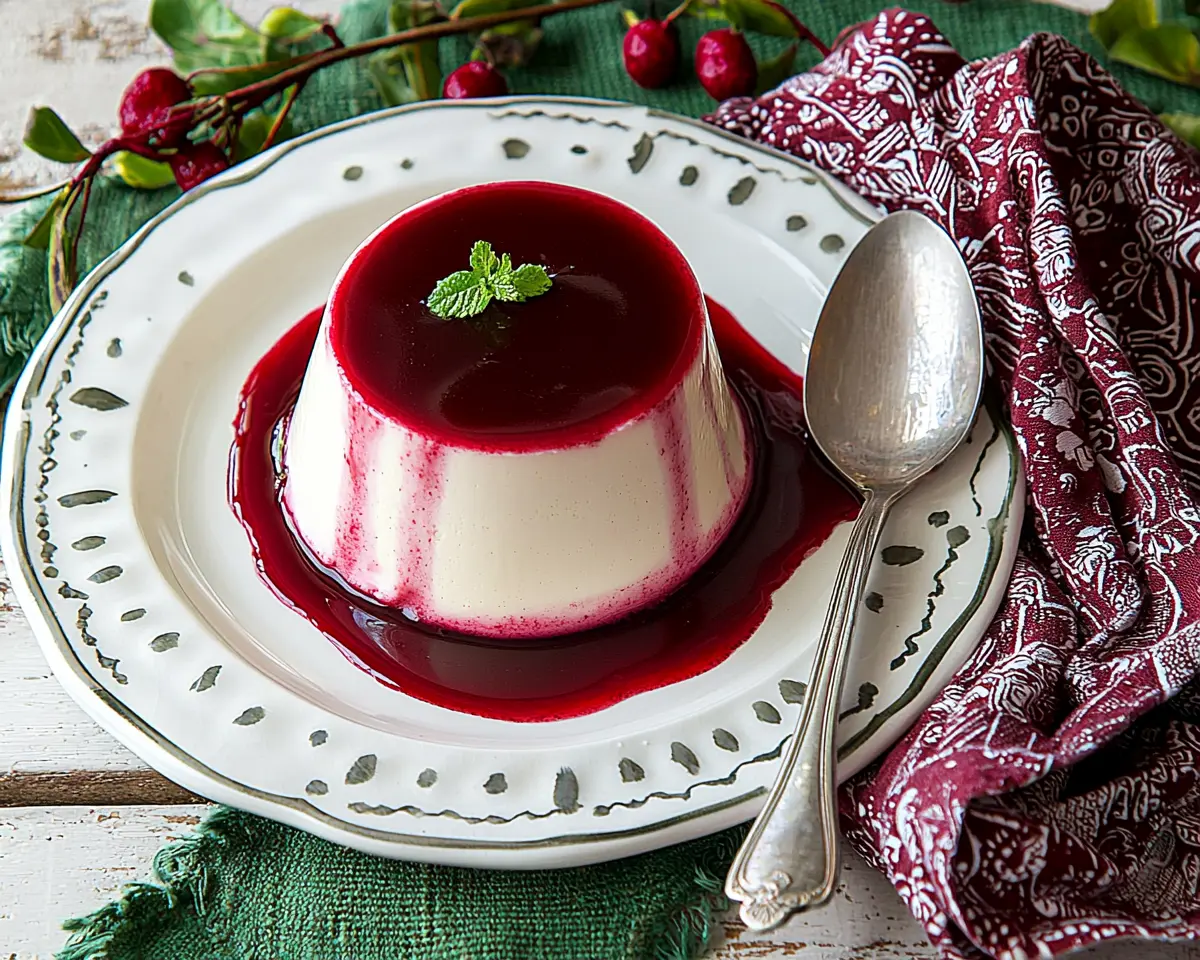
This dreamy hibiscus panna cotta combines silky cream with floral hibiscus for an elegant dessert. Easy 30-minute recipe with pro tips & variations.
This hibiscus panna cotta is pure magic in a cup – silky, creamy, and kissed with the most gorgeous floral notes that’ll transport you straight to a sun-dappled garden party. With just six simple ingredients and zero fancy techniques, you’ll create an elegant dessert that tastes like it came from a high-end restaurant.
This hibiscus infused panna cotta transforms ordinary cream into something extraordinary with dried hibiscus flowers, creating a beautiful pink-hued dessert that’s both sophisticated and surprisingly simple.
The floral notes pair beautifully with vanilla, and the silky texture melts on your tongue like a dream. Try pairing it with our rose water macarons for an elegant floral dessert spread.
Table of Contents
Why You’ll Love This Hibiscus Panna Cotta
Starting with this hibiscus cream panna cotta recipe, you’re about to discover why Italian grandmothers have been perfecting this “cooked cream” for centuries:
- Effortlessly elegant – looks fancy but uses basic pantry staples
- Natural beauty – the hibiscus creates the most stunning rosy pink color
- Make-ahead magic – actually tastes better after chilling overnight
- Surprisingly simple – no tempering, no water baths, just gentle simmering
- Floral without being overwhelming – the hibiscus adds subtle tartness that balances the richness
According to Bon Appétit’s guide to panna cotta, the key to perfect panna cotta is getting the gelatin ratio just right – too little and it won’t set, too much and you’ll have dessert rubber. This recipe hits that sweet spot perfectly.
Nutritional Peek
| Per Serving (serves 6) | Amount |
|---|---|
| Calories | 285 |
| Protein | 4g |
| Carbohydrates | 20g |
| Fat | 21g |
| Sugar | 18g |
Hibiscus Panna Cotta Ingredients
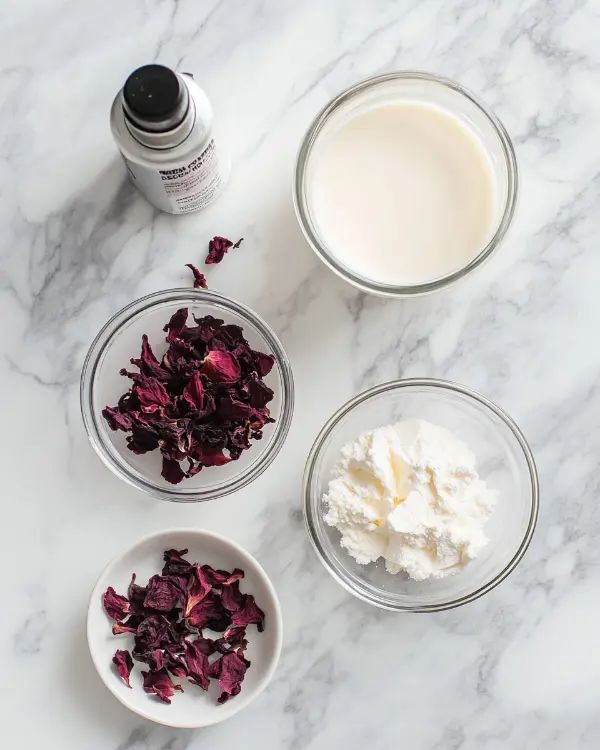
Let’s talk about what makes this hibiscus dessert so special – it’s all about quality ingredients doing beautiful things together:
| Amount | Ingredient |
|---|---|
| 350 ml (1½ cups) | Heavy cream |
| 350 ml (1½ cups) | Whole milk |
| 20 grams (¼ cup) | Dried hibiscus flowers |
| 110 grams (½ cup) | Raw cane sugar or granulated sugar |
| 1 tablespoon | Granulated gelatin (or 1 envelope) |
| 1 teaspoon | Vanilla extract (or seeds from 1 vanilla bean) |
Pro tip: Look for food-grade dried hibiscus at health stores, Mexican markets, or online. The color and flavor are so much more vibrant than tea bags! If you’re feeling adventurous, try making your own vanilla extract like we do in our ultimate elderflower ice cream recipe.
Hibiscus Panna Cotta Equipment
Essential:
- Medium saucepan
- Fine-mesh sieve
- 6 ramekins or silicone molds
- Whisk
Optional but helpful:
- Kitchen scale (for precise measurements)
- Ladle (for neat pouring)
- Plastic wrap
Step-by-Step Instructions
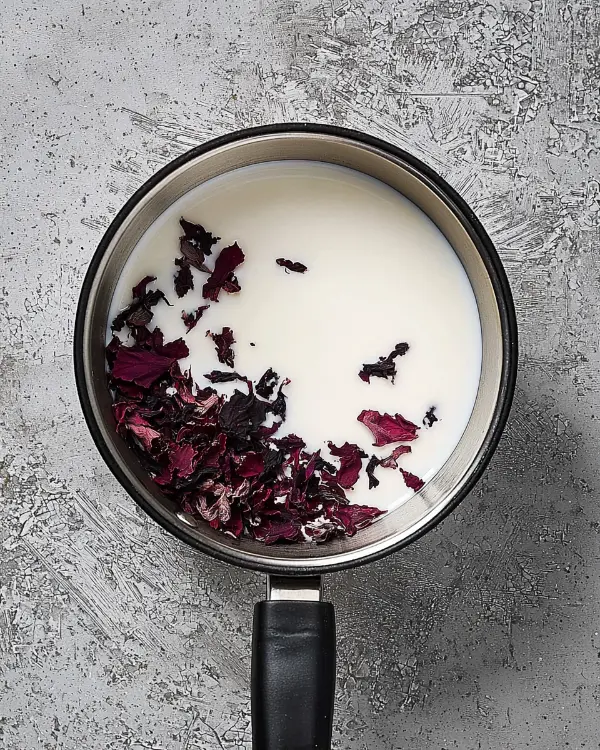
Making hibiscus panna cotta is like creating edible poetry – each step builds on the last to create something truly beautiful.
Step 1: Create the Hibiscus Infusion
In your saucepan, combine the heavy cream, whole milk, sugar, and dried hibiscus. Bring this gorgeous mixture to a gentle boil over medium heat, stirring occasionally. You’ll know it’s ready when you see those first excited bubbles breaking the surface.
Step 2: Let the Magic Happen
The moment it starts boiling, reduce the heat to low and let it simmer for exactly 10 minutes. This is when the hibiscus releases all its floral goodness and that stunning pink color starts blooming through the cream. Your kitchen will smell absolutely divine.
Step 3: The Patient Pause
Turn off the heat and let the mixture sit for 5-10 minutes. This extra steeping time is crucial – it’s what transforms good panna cotta into extraordinary hibiscus infused panna cotta. The longer you wait, the deeper that floral flavor becomes.
Step 4: Strain with Care
Pour the mixture through your fine-mesh sieve, pressing gently on the hibiscus flowers to extract every drop of flavor before discarding them. You should have this beautiful, rosy-pink liquid that looks like liquid silk.
Step 5: Gelatin Magic
Return the strained mixture to your saucepan over low heat. Sprinkle the gelatin evenly over the surface and whisk gently but constantly for about 5 minutes until completely dissolved. No lumps allowed in this silky paradise!
Step 6: The Safety Check
Here’s a trick I learned the hard way – strain the mixture one more time to catch any stubborn gelatin bits. Trust me on this one; it’s the difference between professional-smooth and slightly chunky homemade.
Step 7: Final Touch
Remove from heat and stir in your vanilla extract. Take a moment to inhale – this is what happiness smells like.
Step 8: The Pour
Divide the mixture evenly between your ramekins or molds. Let them cool to room temperature (about 30 minutes), then cover with plastic wrap and refrigerate for at least 3 hours, though overnight is even better.
Pro Tips & Guidance
This hibiscus cream panna cotta taught me a few kitchen lessons worth sharing:
- Gelatin 101: Always sprinkle gelatin over the liquid, never dump it in clumps. It prevents those dreaded lumps that’ll haunt your dreams.
- Temperature matters: Too hot and you’ll scramble the cream, too cool and the gelatin won’t dissolve properly. Low and gentle wins the race.
- The wobble test: Perfect panna cotta should jiggle like a confident dancer – not stiff, not liquidy, but gracefully wobbly.
According to Serious Eats’ comprehensive guide to gelatin, the ideal gelatin-to-liquid ratio for panna cotta is about 1 packet (7g) per 2 cups of liquid, which is exactly what we’re using here.
Troubleshooting Guide
Help! My panna cotta won’t set:
Don’t panic, friend. This usually means your gelatin got too hot and lost its setting power, or you didn’t dissolve it completely. Next time, keep that heat low and whisk like you mean it.
The texture feels rubbery:
You’re not alone – I’ve been there! This happens when there’s too much gelatin or it got overheated. The good news? The flavor is probably still amazing. Serve it as a “hibiscus cream” instead!
It tastes too floral:
Some hibiscus varieties are more potent than others. Next time, reduce the hibiscus to 15 grams and taste as you go during the steeping process.
It won’t unmold:
Run a thin knife around the edges and dip the bottom of the ramekin in warm water for just 10 seconds. Patience and gentle coaxing work better than force.
Variations & Twists
Your hibiscus dessert adventure doesn’t have to end here:
Citrus Hibiscus: Add the zest of one lemon or lime during the steeping process for a bright, summery twist.
Coconut Hibiscus: Replace half the heavy cream with full-fat coconut milk for a tropical vibe.
Layered Beauty: Make half batches of different flavors and layer them for an Instagram-worthy presentation.
Vegan Version: Use coconut cream and agar powder instead of gelatin (use 2 teaspoons agar powder).
Boozy Upgrade: Add 2 tablespoons of elderflower liqueur or gin for grown-up dinner parties.
For more floral dessert inspiration, check out our mile-high chocolate cake with edible flowers.
Serving, Storage & Reheating
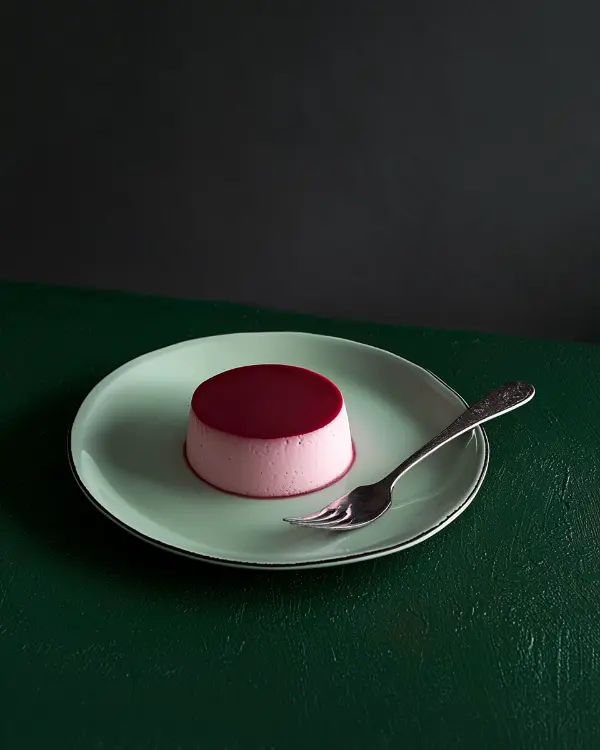
This hibiscus infused panna cotta is best served chilled, straight from the fridge. I love garnishing with fresh berries, a drizzle of honey, or even edible flowers if I’m feeling extra fancy.
Storage: These beauties keep beautifully in the fridge for up to 4 days, covered with plastic wrap. The flavors actually deepen over time, so day two might be even better than day one.
Serving: Serve directly in the ramekins for a rustic charm, or unmold onto plates for restaurant-style presentation. A small spoon and maybe a delicate cookie on the side complete the picture perfectly.
No-Waste Kitchen Magic
Don’t toss those used hibiscus flowers just yet! Here’s what I do with mine:
- Compost gold: Those spent flowers make excellent compost material
- Natural dye: Steep them again in hot water for a beautiful natural fabric dye
- Garden boost: Mix them into your garden soil – plants love the nutrients
The leftover hibiscus-infused liquid (if you have any) makes an incredible base for cocktails or can be frozen in ice cube trays for future floral drinks.
Hibiscus Panna Cotta FAQs
What is panna cotta made of?
Panna cotta literally means “cooked cream” in Italian, and it’s traditionally made with cream, sugar, and gelatin. Our hibiscus version adds dried hibiscus flowers for that gorgeous color and unique floral flavor that sets it apart from classic vanilla versions.
What flavors mix well with hibiscus?
Hibiscus plays beautifully with citrus (especially lime and lemon), vanilla, rose, coconut, and even chocolate. The slightly tart, floral notes complement both sweet and tangy flavors wonderfully.
What does panna cotta literally mean?
“Panna cotta” translates directly to “cooked cream” from Italian. Despite the name, it’s actually more about gently warming and setting cream rather than intensive cooking – perfect for our delicate hibiscus infusion.
What fruit is best with panna cotta?
Fresh berries are classic for a reason – strawberries, raspberries, and blackberries all complement the floral hibiscus beautifully. Stone fruits like peaches and apricots also work wonderfully, especially in summer.
What are common panna cotta mistakes?
The most common mistakes are using too much gelatin (creating a rubbery texture), not dissolving the gelatin completely (hello, lumps!), or overheating the mixture. Low and slow is your friend with this delicate dessert.
Cozy Closing
There’s something magical about creating this hibiscus panna cotta – watching that plain cream transform into something so beautiful and elegant never gets old. Each spoonful is like a little celebration of simple ingredients doing extraordinary things together.
I hope this recipe brings as much joy to your kitchen as it has to mine. There’s nothing quite like the satisfied smile on someone’s face when they taste that first silky, floral bite. Don’t forget to share your creations – I love seeing how this recipe comes to life in kitchens around the world!
For more elegant desserts that’ll wow your guests, try our collection of floral-inspired treats. Happy baking, beautiful humans!

Hibiscus Panna Cotta
Ingredients
Equipment
Method
- In your saucepan, combine the heavy cream, whole milk, sugar, and dried hibiscus. Bring this gorgeous mixture to a gentle boil over medium heat, stirring occasionally. You’ll know it’s ready when you see those first excited bubbles breaking the surface.
- The moment it starts boiling, reduce the heat to low and let it simmer for exactly 10 minutes. This is when the hibiscus releases all its floral goodness and that stunning pink color starts blooming through the cream.
- Turn off the heat and let the mixture sit for 5-10 minutes. This extra steeping time is crucial – it’s what transforms good panna cotta into extraordinary hibiscus infused panna cotta.
- Pour the mixture through your fine-mesh sieve, pressing gently on the hibiscus flowers to extract every drop of flavor before discarding them. You should have this beautiful, rosy-pink liquid that looks like liquid silk.
- Return the strained mixture to your saucepan over low heat. Sprinkle the gelatin evenly over the surface and whisk gently but constantly for about 5 minutes until completely dissolved.
- Strain the mixture one more time to catch any stubborn gelatin bits, then remove from heat and stir in your vanilla extract.
- Divide the mixture evenly between your ramekins or molds. Let them cool to room temperature (about 30 minutes), then cover with plastic wrap and refrigerate for at least 3 hours, though overnight is even better.

