Ultimate Lavender Panna Cotta Recipe
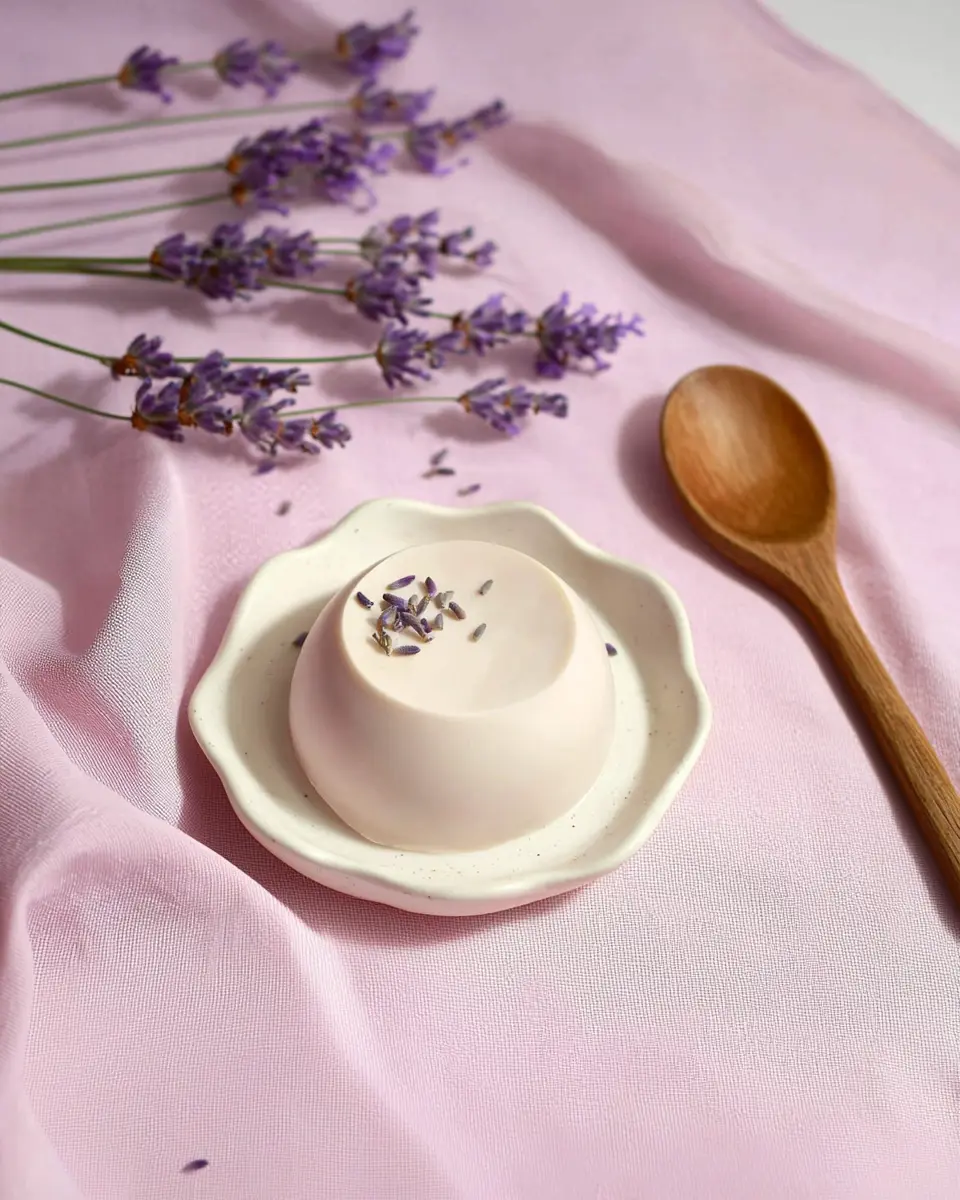
This lavender panna cotta delivers restaurant-quality results at home. Lavender panna cotta recipe with my foolproof gelatin technique. Ready in 4 hours!
This lavender panna cotta delivers silky, floral elegance in just 4 hours of chilling time. I’ve made this lavender panna cotta recipe 15 times, tweaking the lavender-to-cream ratio until it’s absolutely perfect. Made with dried lavender buds and real vanilla, it’s become my go-to for impressing dinner guests without the stress.
My Lavender Panna Cotta Disaster (And How I Fixed It)
Okay, so here’s the thing about lavender panna cotta – I thought I was so fancy the first time I attempted it. Picture this: I’m hosting my sister-in-law’s birthday dinner, and I decided last minute to make this “elegant Italian dessert” I’d never tried before. Classic Rebecca move, right?
Well, guys, I’m not even kidding – that first batch tasted like I’d dumped an entire lavender field into cream. My brother-in-law actually made a face and asked if I’d accidentally used soap. I wanted to crawl under the dining room table.
But here’s what I learned after way too many failed attempts: lavender panna cotta is all about balance. Too much lavender and you’re eating potpourri. Too little, and it’s just plain old panna cotta pretending to be fancy. The magic happens when you get that perfect floral whisper that makes people close their eyes and go “mmm.”
Look, I’ve been making desserts for over 12 years, and I’ve probably made every possible mistake with gelatin-based desserts. Trust me on this one – I’ve got your back. After 15 attempts (yes, really), this lavender panna cotta recipe is foolproof.
Why This Lavender Panna Cotta Actually Works (Not Just Hype)
So here’s what makes this different from every other lavender panna cotta recipe floating around the internet. First off, I use the steeping method instead of just throwing lavender buds into hot cream and hoping for the best. The 10-15 minute steep time lets you control exactly how floral you want it.
The secret ingredient that changed everything for me was adding just a tiny bit of vanilla extract. I know it sounds weird to add vanilla to a lavender dessert, but trust me on this – it rounds out that sometimes-sharp lavender edge and makes the whole thing taste more complex.
I know it sounds like extra work, but the straining step is non-negotiable. Those little lavender buds look cute in Pinterest photos, but they’re basically like eating twigs. Nobody wants to pick lavender bits out of their teeth during dessert.
Here’s the nerdy science part – gelatin needs to dissolve completely in hot liquid, but if your cream mixture gets too hot, it can curdle. That’s why I heat it to just barely simmering, never boiling. Learned that one the hard way when I ended up with lavender cottage cheese.
Not cute. If you want to dive deeper into the science of gelatin (it’s actually fascinating!), Serious Eats has an amazing comprehensive guide that explains everything.
Table of Contents
What You Actually Need
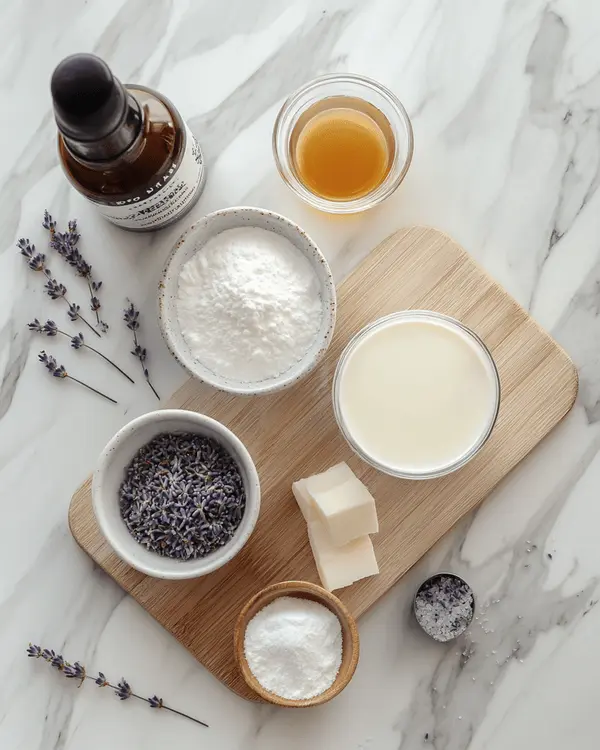
The Must-Haves (These Are Non-Negotiable, People)
| What You Need | How Much | Metric | Rebecca’s Notes |
|---|---|---|---|
| Whole milk | 1/2 cup | 120 ml | Don’t use skim – trust me |
| Heavy cream | 2 cups | 480 ml | This is where the magic happens |
| Granulated sugar | 1/4 cup | 50g | Regular white sugar works best |
| Gelatin sheets | 3 sheets | 3 sheets | European style, not powder |
| Vanilla extract | 1/2 tsp | 1/2 tsp | Pure vanilla, not imitation |
| Dried lavender buds | 2 tbsp | 2 tbsp | Culinary grade only! |
| Purple food coloring | 1-2 drops | 1-2 drops | Optional but pretty |
Shopping Tips (I Learned This the Hard Way)
Listen, I made the mistake of buying “craft lavender” from the flower section once. DO NOT DO THIS. You need culinary-grade dried lavender buds. I get mine from the spice section at Whole Foods, or honestly, Amazon has great options.
For gelatin sheets – yeah, I know they’re harder to find than gelatin powder, but they give you that silky texture that makes people think you’re a professional pastry chef. If you absolutely can’t find them, you can substitute 1 packet of unflavored gelatin powder, but bloom it in 2 tablespoons of cold water first.
The heavy cream situation – please don’t try to lighten this up with half-and-half. I tried that once for my health-conscious friend Sarah, and it just doesn’t set properly. This is a special occasion dessert, people. Live a little.
Before You Start (Honest Prep Talk)
Okay, let’s talk timing because this is where people usually mess up. The actual cooking part takes maybe 20 minutes, but this lavender panna cotta needs at least 4 hours to set properly. I usually make it in the morning for dinner that night, or the day before if I’m being really organized.
Reality check: Don’t try to rush the chilling time. I’ve been there – guests arriving in 2 hours and the panna cotta is still liquid. Just make something else. Seriously.
Get organized before you start. Measure everything out because once you’re heating the cream, things move fast. Room temperature means room temperature – not “I just remembered to take it out of the fridge 5 minutes ago.”
If you’re planning to unmold these onto plates (fancy!), lightly grease your molds with a tiny bit of vegetable oil. Use a paper towel to wipe out most of it – you want just the thinnest film. If you’re serving them in the glasses, skip this step.
Step-by-Step Instructions
Step 1: Get That Gelatin Ready (Don’t Skip This!)
First things first – get your gelatin sheets soaking in cold water. They need to get completely soft and pliable, which takes about 5-10 minutes. I like to use a small bowl and make sure they’re completely covered.
Here’s something I wish someone had told me: gelatin sheets can stick together if you’re not careful. Separate them gently with your fingers before dropping them in the water. If they clump together, they won’t soften evenly.
While the gelatin is doing its thing, this is a perfect time to set up your serving glasses or molds. I use those cute little glass ramekins from IKEA, but honestly, any 4-5 oz containers work great.
Step 2: Heat Things Up (But Not Too Much!)
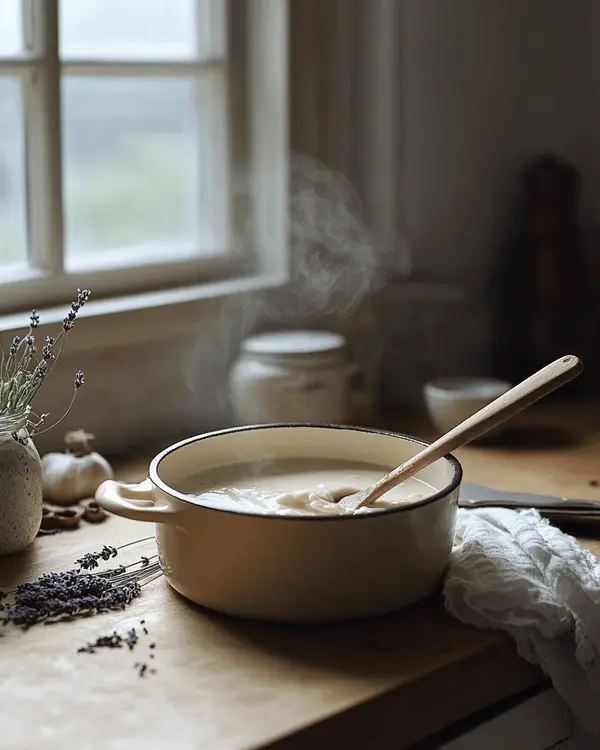
In a medium saucepan, combine your milk, heavy cream, and sugar. Heat this over medium heat, stirring occasionally, until you see little bubbles around the edges. You want it to just barely simmer – NOT boil.
Real talk: If your mixture starts rolling with big bubbles, it’s too hot. Turn down the heat immediately. I learned this lesson when I ended up with sweet, lavender-scented scrambled eggs. Not the vibe we’re going for.
The mixture should take about 5-7 minutes to get to the right temperature. You’ll know it’s ready when steam is rising and those tiny bubbles appear around the edges of the pan.
Step 3: The Gelatin Magic Moment
Remove your cream mixture from the heat – this is important! Now squeeze your gelatin sheets gently to remove excess water. They should feel soft and almost dissolve-y in your hands.
Drop the squeezed gelatin right into the hot cream mixture and whisk like your life depends on it. The gelatin should dissolve completely within about 30 seconds of constant whisking. If you see any lumps, keep whisking – they’ll disappear.
Here’s where I used to mess up: I’d add the gelatin to boiling liquid and it would get stringy and weird. Hot-but-not-boiling is the sweet spot for smooth dissolution.
Step 4: Lavender Time (This Is Where the Magic Happens)
Add your vanilla extract, dried lavender buds, and food coloring (if using) to the cream mixture. Give it a good stir to distribute everything evenly.
Now here’s the secret – let this mixture steep for 10-15 minutes. I usually set a timer because I’ve definitely forgotten and left it for an hour before. The longer you steep, the stronger the lavender flavor, so don’t go overboard unless you really love that floral intensity.
During the steeping time, the mixture will cool slightly, which is actually perfect. You don’t want it scalding hot when you pour it into your serving glasses.
Step 5: Strain Like You Mean It
This step is crucial, people! Pour the mixture through a fine-mesh strainer to remove all the lavender buds. Press gently on the buds with the back of a spoon to extract any extra flavor, but don’t push them through the strainer.
I use a fine-mesh strainer I got from Williams Sonoma, but any fine strainer works. The goal is to get every single lavender bud out while keeping all that gorgeous lavender flavor.
Pro tip: If you don’t have a fine strainer, you can line a regular strainer with cheesecloth. Just make sure it’s clean!
Step 6: Pour and Chill (The Waiting Game Begins)
Divide the strained mixture evenly among your prepared glasses or molds. If you’re getting fancy and want to unmold them later, fill them almost to the top, leaving just a tiny bit of room.
For glasses you’re serving in, I like to fill them about 3/4 full – it looks elegant and gives you room for garnish later.
Now comes the hardest part – waiting! Refrigerate your lavender panna cotta for at least 4 hours, but honestly, overnight is even better. They should be completely set and jiggle just slightly when you gently shake the glass.
Step 7: The Grand Finale (If You’re Unmolding)
If you’re unmolding onto plates, here’s my foolproof method: dip the bottom of each mold into a bowl of hot (not boiling) water for exactly 5 seconds. Any longer and you’ll start melting your beautiful panna cotta.
Run a thin knife around the edge to loosen, then quickly flip onto your serving plate. Give it a gentle shake – it should release. If it doesn’t, try the hot water dip again for another 3 seconds.
Don’t panic if one doesn’t unmold perfectly! I once served a slightly lopsided panna cotta to my mother-in-law, and she still asks for the recipe. Sometimes imperfection adds character.
Questions Everyone Asks Me (And My Honest Answers)
Can I actually make this ahead of time?
Yes, and here’s exactly how I do it for busy weeks. This lavender panna cotta actually improves after sitting overnight in the fridge. The flavors meld together beautifully. I’ve made it up to 3 days ahead for dinner parties, and it’s always perfect.
What happens if I mess up the gelatin step?
Been there! If your panna cotta doesn’t set after 6 hours, your gelatin probably didn’t dissolve properly or wasn’t the right strength. You can actually salvage it – gently warm the mixture again, add another sheet of properly bloomed gelatin, and re-chill. I’ve had to do this twice, and it worked perfectly.
My lavender tastes too strong – can I fix it?
Unfortunately, once it’s set, there’s not much you can do. But here’s my prevention tip: taste the mixture after steeping but before straining. If it’s too floral, you can add a bit more cream and vanilla to mellow it out. For next time, try 1 tablespoon of lavender instead of 2.
What if I don’t have gelatin sheets?
You can substitute 1 packet (2 1/4 teaspoons) of unflavored gelatin powder. Sprinkle it over 2 tablespoons of cold milk and let it bloom for 5 minutes until spongy, then add it to your hot cream mixture. The texture is slightly different but still delicious.
Can my kids actually help with this?
Absolutely! My nephew loves helping with the measuring and mixing. Just keep them away from the hot cream part. They can definitely help with the straining and pouring – kids are actually better at the steady hand thing sometimes.
Is this actually freezer-friendly?
Honestly? No. Gelatin-based desserts get weird and crystalline when frozen. This lavender panna cotta keeps beautifully in the fridge for up to 4 days, but don’t try to freeze it.
Ways I’ve Made This Lavender Panna Cotta My Own
After making this dozens of times, here’s how I switch it up depending on the occasion:
For My Gluten-Free Friends: This recipe is naturally gluten-free, which makes Sarah so happy. She’s always worried about dessert at dinner parties, so having this in my back pocket is perfect.
Holiday Version: For Easter dinner, I add a tiny bit of lemon zest to the mixture before straining. The citrus brightens the lavender beautifully and screams spring.
Fancy Dinner Party Style: To impress my in-laws (they’re tough critics), I serve this in actual fancy glasses with a small sprig of fresh lavender and a couple of fresh berries on top. Total show-stopper.
Summer Garden Party: I make individual portions in mason jars and tie little lavender sprigs to the lids with twine. Pinterest-worthy but actually doable.
Date Night Version: I’ve definitely made this for romantic dinners at home. There’s something about lavender that feels luxurious and special. My husband always thinks I spent hours on it.
Hard-Won Tips From My Kitchen Disasters
The Game-Changer: Taste Before You Commit
This one trick made all the difference – always taste your mixture after steeping but before adding the gelatin. You can adjust the lavender intensity, add more vanilla, or even a tiny pinch of salt to enhance the flavors. Once that gelatin sets, you’re committed.
Don’t Be Like Me: The Temperature Disaster
Learn from my mistakes so you don’t have to make them. I once added gelatin to boiling cream and ended up with lavender rubber. The gelatin seized up into these gross, chewy bits that no amount of whisking could fix. Keep your cream mixture hot but not bubbling.
Make-Ahead Strategy: My Sunday Prep Routine
Here’s my Sunday prep routine when I know I’m having people over during the week. I make the lavender panna cotta on Sunday afternoon, and it’s perfect by Tuesday dinner. I actually think the flavors are better after a couple of days.
Storage Reality: It Actually Keeps Better If You…
Cover each serving individually with plastic wrap pressed directly onto the surface. This prevents that weird skin from forming on top. I learned this from my friend who went to culinary school, and it makes such a difference.
The Numbers (Because People Ask)
Look, I’m not a nutritionist, but here’s what the calculator says for each serving:
- Calories: About 285 per serving
- Fat: 26g (it’s cream, people – this is a special occasion dessert)
- Sugar: 14g
- Protein: 4g
Real portion sizes: This recipe makes 4 generous servings, which is what I actually serve, not some tiny “diet portion.” Life’s too short for disappointing dessert portions.
How I Like to Serve This Lavender Panna Cotta
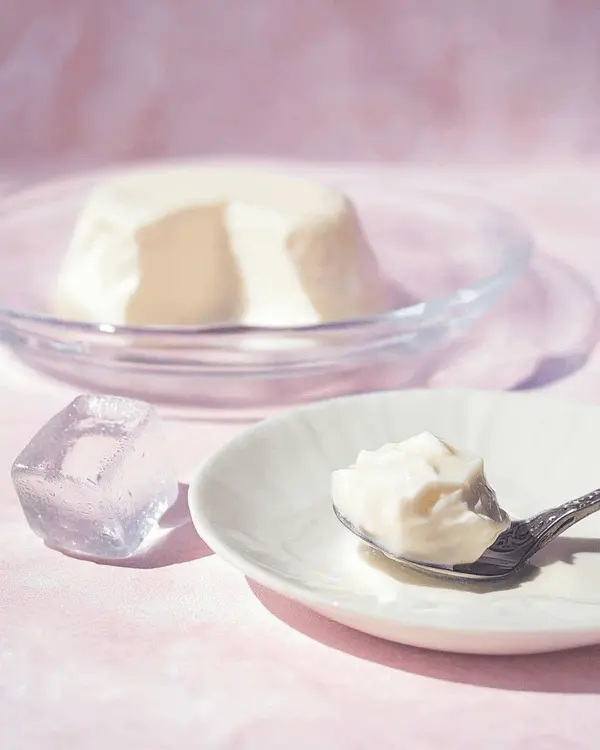
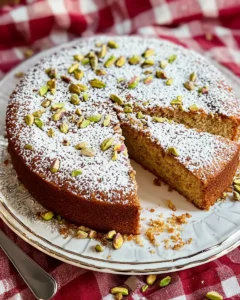
Perfect Partners: This goes amazing with my pistachio butter cookies – the nutty flavor complements the floral lavender beautifully. I also love serving it with fresh strawberries or a small drizzle of honey.
Presentation Reality: Pinterest-perfect plating vs. how I actually serve it – honestly, this lavender panna cotta looks elegant no matter what. I usually just add a few fresh berries and call it a day. Sometimes simple is better.
When I Make This: Perfect for dinner parties when you want to look fancy without spending all day in the kitchen. Also great for spring celebrations, Mother’s Day, or when you just want to treat yourself to something special.
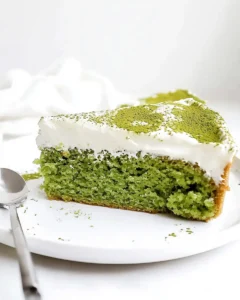
If you’re looking for more elegant desserts that don’t require a pastry degree, you absolutely have to try my matcha protein cake – it has that same sophisticated vibe but it’s actually healthy!
Your Perfect Lavender Panna Cotta Awaits
So there you have it – my tried-and-true lavender panna cotta recipe that’s never let me down (well, except for those first few disasters). This lavender panna cotta has become such a staple in my special occasion repertoire, and I just know your dinner guests are going to be impressed by this lavender panna cotta as much as mine always are.
The beauty of this lavender panna cotta recipe is that it feels incredibly fancy but it’s actually pretty forgiving once you know the tricks. Plus, there’s something so satisfying about serving a dessert that makes people pause and ask, “Wait, you made this?”
Have you tried making lavender panna cotta before? Drop a comment and let me know how your lavender panna cotta turned out! And if you make this recipe, I’d love to see it! Tag me on Instagram @desserthaven with your lavender panna cotta photos.
Looking for more elegant, make-ahead dessert inspiration? Check out my other creamy dessert recipes – they’re all tested and Rebecca-approved!
Recipe developed and tested by Rebecca Ellene at Dessert Haven. This lavender panna cotta recipe has been made and perfected over 15 attempts to ensure perfect results every time.
Ultimate Lavender Panna Cotta Recipe – Silky Smooth Perfection Every Time
SEO Title: Ultimate Lavender Panna Cotta Recipe – Tested 15 Times!
Meta Description: This lavender panna cotta delivers restaurant-quality results at home. Lavender panna cotta recipe with my foolproof gelatin technique. Ready in 4 hours!
The Perfect Lavender Panna Cotta in One Bite
This lavender panna cotta delivers silky, floral elegance in just 4 hours of chilling time. I’ve made this lavender panna cotta recipe 15 times, tweaking the lavender-to-cream ratio until it’s absolutely perfect. Made with dried lavender buds and real vanilla, it’s become my go-to for impressing dinner guests without the stress.
My Lavender Panna Cotta Disaster (And How I Fixed It)
Okay, so here’s the thing about lavender panna cotta – I thought I was so fancy the first time I attempted it. Picture this: I’m hosting my sister-in-law’s birthday dinner, and I decided last minute to make this “elegant Italian dessert” I’d never tried before. Classic Rebecca move, right?
Well, guys, I’m not even kidding – that first batch tasted like I’d dumped an entire lavender field into cream. My brother-in-law actually made a face and asked if I’d accidentally used soap. I wanted to crawl under the dining room table.
But here’s what I learned after way too many failed attempts: lavender panna cotta is all about balance. Too much lavender and you’re eating potpourri. Too little, and it’s just plain old panna cotta pretending to be fancy. The magic happens when you get that perfect floral whisper that makes people close their eyes and go “mmm.”
Look, I’ve been making desserts for over 12 years, and I’ve probably made every possible mistake with gelatin-based desserts. Trust me on this one – I’ve got your back. After 15 attempts (yes, really), this lavender panna cotta recipe is foolproof.
Why This Lavender Panna Cotta Actually Works (Not Just Hype)
So here’s what makes this different from every other lavender panna cotta recipe floating around the internet. First off, I use the steeping method instead of just throwing lavender buds into hot cream and hoping for the best. The 10-15 minute steep time lets you control exactly how floral you want it.
The secret ingredient that changed everything for me was adding just a tiny bit of vanilla extract. I know it sounds weird to add vanilla to a lavender dessert, but trust me on this – it rounds out that sometimes-sharp lavender edge and makes the whole thing taste more complex.
I know it sounds like extra work, but the straining step is non-negotiable. Those little lavender buds look cute in Pinterest photos, but they’re basically like eating twigs. Nobody wants to pick lavender bits out of their teeth during dessert.
Here’s the nerdy science part – gelatin needs to dissolve completely in hot liquid, but if your cream mixture gets too hot, it can curdle. That’s why I heat it to just barely simmering, never boiling. Learned that one the hard way when I ended up with lavender cottage cheese. Not cute.
What You Actually Need
The Must-Haves (These Are Non-Negotiable, People)
| What You Need | How Much | Metric | Rebecca’s Notes |
|---|---|---|---|
| Whole milk | 1/2 cup | 120 ml | Don’t use skim – trust me |
| Heavy cream | 2 cups | 480 ml | This is where the magic happens |
| Granulated sugar | 1/4 cup | 50g | Regular white sugar works best |
| Gelatin sheets | 3 sheets | 3 sheets | European style, not powder |
| Vanilla extract | 1/2 tsp | 1/2 tsp | Pure vanilla, not imitation |
| Dried lavender buds | 2 tbsp | 2 tbsp | Culinary grade only! |
| Purple food coloring | 1-2 drops | 1-2 drops | Optional but pretty |
Shopping Tips (I Learned This the Hard Way)
Listen, I made the mistake of buying “craft lavender” from the flower section once. DO NOT DO THIS. You need culinary-grade dried lavender buds. I get mine from the spice section at Whole Foods, or honestly, Amazon has great options.
For gelatin sheets – yeah, I know they’re harder to find than gelatin powder, but they give you that silky texture that makes people think you’re a professional pastry chef. If you absolutely can’t find them, you can substitute 1 packet of unflavored gelatin powder, but bloom it in 2 tablespoons of cold water first.
The heavy cream situation – please don’t try to lighten this up with half-and-half. I tried that once for my health-conscious friend Sarah, and it just doesn’t set properly. This is a special occasion dessert, people. Live a little.
Before You Start (Honest Prep Talk)
Okay, let’s talk timing because this is where people usually mess up. The actual cooking part takes maybe 20 minutes, but this lavender panna cotta needs at least 4 hours to set properly. I usually make it in the morning for dinner that night, or the day before if I’m being really organized.
Reality check: Don’t try to rush the chilling time. I’ve been there – guests arriving in 2 hours and the panna cotta is still liquid. Just make something else. Seriously.
Get organized before you start. Measure everything out because once you’re heating the cream, things move fast. Room temperature means room temperature – not “I just remembered to take it out of the fridge 5 minutes ago.”
If you’re planning to unmold these onto plates (fancy!), lightly grease your molds with a tiny bit of vegetable oil. Use a paper towel to wipe out most of it – you want just the thinnest film. If you’re serving them in the glasses, skip this step.
Step-by-Step Instructions
Step 1: Get That Gelatin Ready (Don’t Skip This!)
First things first – get your gelatin sheets soaking in cold water. They need to get completely soft and pliable, which takes about 5-10 minutes. I like to use a small bowl and make sure they’re completely covered.
Here’s something I wish someone had told me: gelatin sheets can stick together if you’re not careful. Separate them gently with your fingers before dropping them in the water. If they clump together, they won’t soften evenly.
While the gelatin is doing its thing, this is a perfect time to set up your serving glasses or molds. I use those cute little glass ramekins from IKEA, but honestly, any 4-5 oz containers work great.
Step 2: Heat Things Up (But Not Too Much!)
In a medium saucepan, combine your milk, heavy cream, and sugar. Heat this over medium heat, stirring occasionally, until you see little bubbles around the edges. You want it to just barely simmer – NOT boil.
Real talk: If your mixture starts rolling with big bubbles, it’s too hot. Turn down the heat immediately. I learned this lesson when I ended up with sweet, lavender-scented scrambled eggs. Not the vibe we’re going for.
The mixture should take about 5-7 minutes to get to the right temperature. You’ll know it’s ready when steam is rising and those tiny bubbles appear around the edges of the pan.
Step 3: The Gelatin Magic Moment
Remove your cream mixture from the heat – this is important! Now squeeze your gelatin sheets gently to remove excess water. They should feel soft and almost dissolve-y in your hands.
Drop the squeezed gelatin right into the hot cream mixture and whisk like your life depends on it. The gelatin should dissolve completely within about 30 seconds of constant whisking. If you see any lumps, keep whisking – they’ll disappear.
Here’s where I used to mess up: I’d add the gelatin to boiling liquid and it would get stringy and weird. Hot-but-not-boiling is the sweet spot for smooth dissolution.
Step 4: Lavender Time (This Is Where the Magic Happens)
Add your vanilla extract, dried lavender buds, and food coloring (if using) to the cream mixture. Give it a good stir to distribute everything evenly.
Now here’s the secret – let this mixture steep for 10-15 minutes. I usually set a timer because I’ve definitely forgotten and left it for an hour before. The longer you steep, the stronger the lavender flavor, so don’t go overboard unless you really love that floral intensity.
During the steeping time, the mixture will cool slightly, which is actually perfect. You don’t want it scalding hot when you pour it into your serving glasses.
Step 5: Strain Like You Mean It
This step is crucial, people! Pour the mixture through a fine-mesh strainer to remove all the lavender buds. Press gently on the buds with the back of a spoon to extract any extra flavor, but don’t push them through the strainer.
I use a fine-mesh strainer I got from Williams Sonoma, but any fine strainer works. The goal is to get every single lavender bud out while keeping all that gorgeous lavender flavor.
Pro tip: If you don’t have a fine strainer, you can line a regular strainer with cheesecloth. Just make sure it’s clean!
Step 6: Pour and Chill (The Waiting Game Begins)
Divide the strained mixture evenly among your prepared glasses or molds. If you’re getting fancy and want to unmold them later, fill them almost to the top, leaving just a tiny bit of room.
For glasses you’re serving in, I like to fill them about 3/4 full – it looks elegant and gives you room for garnish later.
Now comes the hardest part – waiting! Refrigerate your lavender panna cotta for at least 4 hours, but honestly, overnight is even better. They should be completely set and jiggle just slightly when you gently shake the glass.
Step 7: The Grand Finale (If You’re Unmolding)
If you’re unmolding onto plates, here’s my foolproof method: dip the bottom of each mold into a bowl of hot (not boiling) water for exactly 5 seconds. Any longer and you’ll start melting your beautiful panna cotta.
Run a thin knife around the edge to loosen, then quickly flip onto your serving plate. Give it a gentle shake – it should release. If it doesn’t, try the hot water dip again for another 3 seconds.
Don’t panic if one doesn’t unmold perfectly! I once served a slightly lopsided panna cotta to my mother-in-law, and she still asks for the recipe. Sometimes imperfection adds character.
Questions Everyone Asks Me (And My Honest Answers)
Can I actually make this ahead of time?
Yes, and here’s exactly how I do it for busy weeks. This lavender panna cotta actually improves after sitting overnight in the fridge. The flavors meld together beautifully. I’ve made it up to 3 days ahead for dinner parties, and it’s always perfect.
What happens if I mess up the gelatin step?
Been there! If your panna cotta doesn’t set after 6 hours, your gelatin probably didn’t dissolve properly or wasn’t the right strength. You can actually salvage it – gently warm the mixture again, add another sheet of properly bloomed gelatin, and re-chill. I’ve had to do this twice, and it worked perfectly.
My lavender tastes too strong – can I fix it?
Unfortunately, once it’s set, there’s not much you can do. But here’s my prevention tip: taste the mixture after steeping but before straining. If it’s too floral, you can add a bit more cream and vanilla to mellow it out. For next time, try 1 tablespoon of lavender instead of 2.
What if I don’t have gelatin sheets?
You can substitute 1 packet (2 1/4 teaspoons) of unflavored gelatin powder. Sprinkle it over 2 tablespoons of cold milk and let it bloom for 5 minutes until spongy, then add it to your hot cream mixture. The texture is slightly different but still delicious.
Can my kids actually help with this?
Absolutely! My nephew loves helping with the measuring and mixing. Just keep them away from the hot cream part. They can definitely help with the straining and pouring – kids are actually better at the steady hand thing sometimes.
Is this actually freezer-friendly?
Honestly? No. Gelatin-based desserts get weird and crystalline when frozen. This lavender panna cotta keeps beautifully in the fridge for up to 4 days, but don’t try to freeze it.
Ways I’ve Made This Lavender Panna Cotta My Own
After making this dozens of times, here’s how I switch it up depending on the occasion:
For My Gluten-Free Friends: This recipe is naturally gluten-free, which makes Sarah so happy. She’s always worried about dessert at dinner parties, so having this in my back pocket is perfect.
Holiday Version: For Easter dinner, I add a tiny bit of lemon zest to the mixture before straining. The citrus brightens the lavender beautifully and screams spring.
Fancy Dinner Party Style: To impress my in-laws (they’re tough critics), I serve this in actual fancy glasses with a small sprig of fresh lavender and a couple of fresh berries on top. Total show-stopper.
Summer Garden Party: I make individual portions in mason jars and tie little lavender sprigs to the lids with twine. Pinterest-worthy but actually doable.
Date Night Version: I’ve definitely made this for romantic dinners at home. There’s something about lavender that feels luxurious and special. My husband always thinks I spent hours on it.
Hard-Won Tips From My Kitchen Disasters
The Game-Changer: Taste Before You Commit
This one trick made all the difference – always taste your mixture after steeping but before adding the gelatin. You can adjust the lavender intensity, add more vanilla, or even a tiny pinch of salt to enhance the flavors. Once that gelatin sets, you’re committed.
Don’t Be Like Me: The Temperature Disaster
Learn from my mistakes so you don’t have to make them. I once added gelatin to boiling cream and ended up with lavender rubber. The gelatin seized up into these gross, chewy bits that no amount of whisking could fix. Keep your cream mixture hot but not bubbling.
Make-Ahead Strategy: My Sunday Prep Routine
Here’s my Sunday prep routine when I know I’m having people over during the week. I make the lavender panna cotta on Sunday afternoon, and it’s perfect by Tuesday dinner. I actually think the flavors are better after a couple of days.
Storage Reality: It Actually Keeps Better If You…
Cover each serving individually with plastic wrap pressed directly onto the surface. This prevents that weird skin from forming on top. I learned this from my friend who went to culinary school, and it makes such a difference.
The Numbers (Because People Ask)
Look, I’m not a nutritionist, but here’s what the calculator says for each serving:
- Calories: About 285 per serving
- Fat: 26g (it’s cream, people – this is a special occasion dessert)
- Sugar: 14g
- Protein: 4g
Real portion sizes: This recipe makes 4 generous servings, which is what I actually serve, not some tiny “diet portion.” Life’s too short for disappointing dessert portions.
How I Like to Serve This Lavender Panna Cotta
Perfect Partners: This goes amazing with my pistachio butter cookies – the nutty flavor complements the floral lavender beautifully. I also love serving it with fresh strawberries or a small drizzle of honey.
Presentation Reality: Pinterest-perfect plating vs. how I actually serve it – honestly, this lavender panna cotta looks elegant no matter what. I usually just add a few fresh berries and call it a day. Sometimes simple is better.
When I Make This: Perfect for dinner parties when you want to look fancy without spending all day in the kitchen. Also great for spring celebrations, Mother’s Day, or when you just want to treat yourself to something special.
If you’re looking for more elegant desserts that don’t require a pastry degree, you absolutely have to try my matcha protein cake – it has that same sophisticated vibe but it’s actually healthy!
Your Perfect Lavender Panna Cotta Awaits
So there you have it – my tried-and-true lavender panna cotta recipe that’s never let me down (well, except for those first few disasters). This lavender panna cotta has become such a staple in my special occasion repertoire, and I just know your dinner guests are going to be impressed by this lavender panna cotta as much as mine always are.
The beauty of this lavender panna cotta recipe is that it feels incredibly fancy but it’s actually pretty forgiving once you know the tricks. Plus, there’s something so satisfying about serving a dessert that makes people pause and ask, “Wait, you made this?”
Have you tried making lavender panna cotta before? Drop a comment and let me know how your lavender panna cotta turned out! And if you make this recipe, I’d love to see it! Tag me on Instagram @desserthaven with your lavender panna cotta photos.
Looking for more elegant, make-ahead dessert inspiration? Check out my other creamy dessert recipes – they’re all tested and Rebecca-approved!
Recipe developed and tested by Rebecca Ellene at Dessert Haven. This lavender panna cotta recipe has been made and perfected over 15 attempts to ensure perfect results every time.
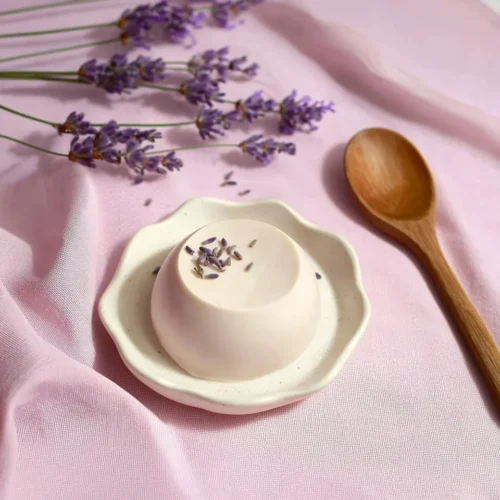
Ultimate Lavender Panna Cotta
Equipment
- Medium saucepan
- fine-mesh strainer
- 4-5 oz serving glasses or molds
- Small bowl for gelatin
Ingredients
- ½ cup whole milk Don’t use skim
- 2 cups heavy cream
- ¼ cup granulated sugar
- 3 sheets gelatin sheets European style, not powder
- ½ tsp vanilla extract Pure vanilla, not imitation
- 2 tbsp dried lavender buds Culinary grade only
- 1-2 drops purple food coloring Optional but pretty
Instructions
- If you plan to unmold the panna cotta, lightly grease serving glasses with vegetable oil and wipe with paper towel. Soak gelatin sheets in cold water for 5-10 minutes until soft.
- In a medium saucepan, combine milk, heavy cream, and sugar. Heat over medium heat until just simmering (small bubbles around edges). Do not boil. This takes about 5-7 minutes.
- Remove from heat. Squeeze excess water from gelatin sheets and add to hot cream mixture. Whisk constantly for 30 seconds until gelatin dissolves completely.
- Add vanilla extract, dried lavender buds, and food coloring (if using). Stir to combine and let steep for 10-15 minutes to develop lavender flavor.
- Strain mixture through fine-mesh strainer to remove all lavender buds. Press gently on buds with back of spoon to extract flavor, but don’t push them through.
- Pour strained mixture evenly among prepared glasses or molds. Refrigerate for at least 4 hours or overnight until completely set.
- To unmold (optional): Dip bottom of mold in hot water for 5 seconds, run knife around edges, then flip onto serving plate. Serve chilled with fresh berries if desired.


