Creamy Pistachio Cheesecake Bars
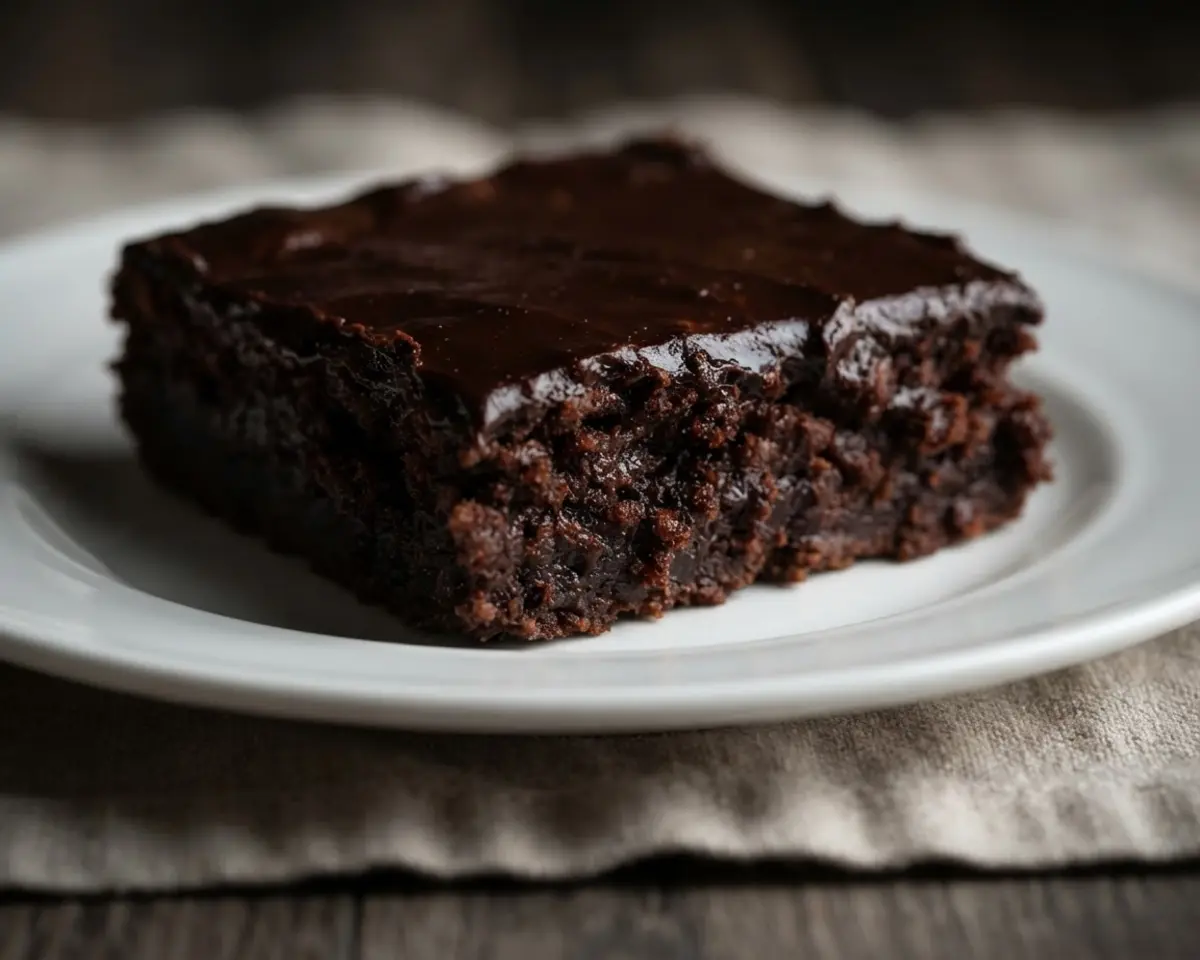
Pistachio cheesecake bars saved my dinner party last month when my “fancy” tiramisu collapsed into soup. I needed something rich, sliceable, and forgiving — and these bars delivered on all three counts within an hour.
Picture layers of buttery ladyfinger crumbs, silky mascarpone swirled with pistachio cream, and a dark chocolate ganache that cracks slightly when you cut in. My neighbor Priya, who grew up eating actual Dubai chocolate bars, said these tasted closer to the real thing than anything she’d tried in the States.
That’s when I knew this recipe was a keeper.
Table of Contents
What Are Pistachio Cheesecake Bars?
Pistachio cheesecake bars are a no-bake dessert layering crushed ladyfingers, espresso-soaked mascarpone, and pistachio cream into a sliceable bar with a chocolate ganache top. They taste like tiramisu met a pistachio version of Dubai chocolate at a very good party.
- Press ladyfinger crumbs into a lined pan — they should feel sandy but hold together when pressed.
- Whip mascarpone with sugar until it’s cloud-light and no lumps remain.
- Fold in pistachio cream until the mixture turns pale green and glossy.
- Pour melted dark chocolate ganache over the top and smooth it flat.
- Chill until firm, then slice into clean squares.
- No-bake vs. baked cheesecake bars: no-bake stays creamier, baked feels denser and more custard-like.
- Mascarpone vs. cream cheese: mascarpone tastes milder and silkier, cream cheese brings more tang.
- Espresso-dipped vs. plain ladyfingers: espresso adds bitter depth, plain keeps things sweeter and simpler.
- Pistachio cream vs. pistachio paste: cream is sweeter and smoother, paste is more intensely nutty.
If you want maximum flavor with minimum oven time, this no-bake version wins every time.
Why You’ll Love This Pistachio Cheesecake Bars
These bars hit that sweet spot between elegant and easy — no water baths, no cracked tops, no stress. Here’s what makes them special after testing this recipe six times in my own kitchen.
- No oven required: The whole thing sets in the fridge, so there’s zero risk of overbaking or a sunken center.
- Texture contrast: Creamy mascarpone against crunchy pistachio pieces and snappy chocolate keeps every bite interesting.
- Make-ahead friendly: I discovered these actually taste better on day two once the flavors meld — a happy accident from a busy week.
- Crowd-pleaser: They disappear faster than my pistachio cream recipe at potlucks, and that’s saying something.
- Beginner-proof: If you can whip cream and melt chocolate, you can nail this on the first try.
Ingredients
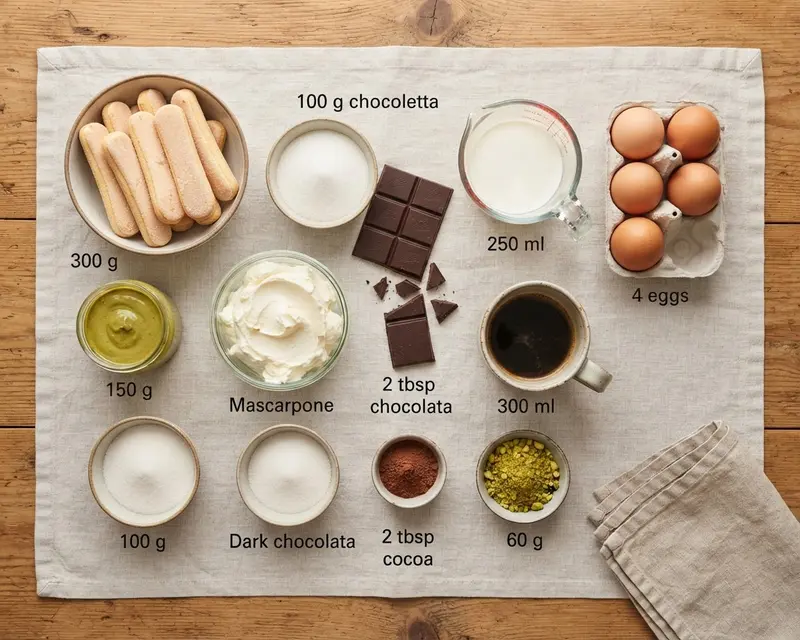
This recipe borrows its soul from Dubai chocolate bars, its soul from tiramisu, and its texture from classic cheesecake — all in one no-bake recipe. The espresso and cocoa powder do the heavy lifting for depth, while pistachio cream ties everything together.
| Amount | Ingredient |
|---|---|
| 300 g | Ladyfinger biscuits (savoiardi work best) |
| 500 g | Mascarpone (full-fat, cold from the fridge) |
| 150 g | Pistachio cream (unsweetened or lightly sweetened) |
| 200 g | Dark chocolate (60-70% cacao, chopped) |
| 250 ml | Heavy cream (cold, for whipping) |
| 300 ml | Strong espresso (cooled to room temp) |
| 100 g | Sugar (fine granulated) |
| 4 large | Eggs (room temperature, pasteurized if serving raw) |
| 2 tbsp | Cocoa powder (unsweetened, for dusting) |
| 60 g | Crushed pistachios (unsalted, for topping) |
The pistachio cream is my favorite part — it smells like toasted nuts and tastes like a hug.
What Equipment Do You Need to Make Pistachio Cheesecake Bars?
A metal 9×9 pan with a removable bottom prevents the most common mistake: bars that won’t release cleanly.
| Tool | Purpose |
|---|---|
| Essential: 9×9-inch metal pan | Metal conducts cold faster than glass, helping bars set firmer and slice cleaner. |
| Essential: Hand mixer | Whips mascarpone and cream to the right airy consistency without overworking it. |
| Essential: Fine sieve | Dusts cocoa powder evenly without clumping on the chocolate top. |
| Essential: Offset spatula | Smooths ganache into an even layer without dragging up the mascarpone below. |
| Optional: Kitchen torch | Helps release bars from the pan edges if they stick after chilling. |
| Optional: Parchment sling | Makes lifting whole bars out of the pan easier before slicing. |
How Do You Make Pistachio Cheesecake Bars Step by Step?
Pistachio cheesecake bars come together in three simple phases: base, filling, and topping.
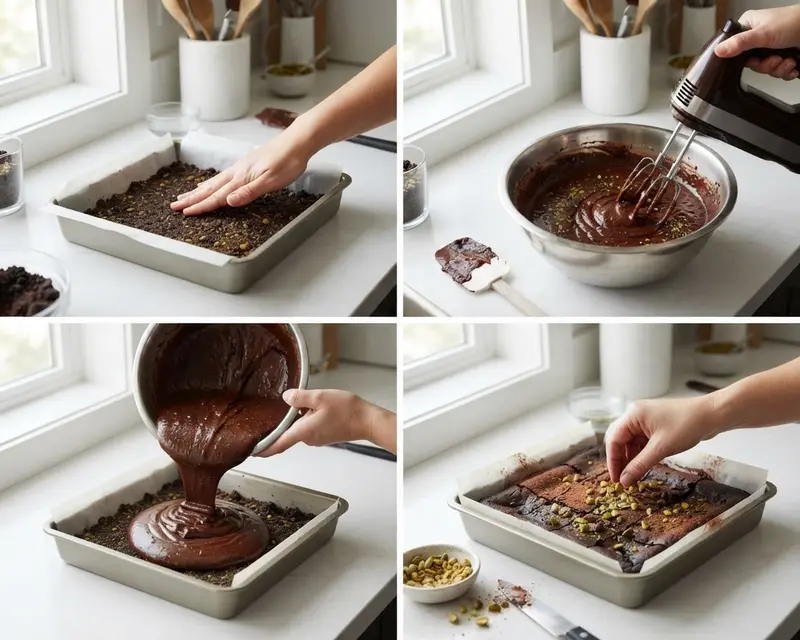
Making the Base
- Dip each ladyfinger quickly into cooled espresso — just a one-second dunk so they don’t turn mushy. [If they soak too long, they’ll fall apart when you press the base.]
- Layer the dipped ladyfingers flat in your pan, breaking pieces to fill gaps. Press down gently until the surface feels even and slightly tacky.
Building the Filling
- Whip heavy cream to soft peaks in a cold bowl — this usually takes about 3 minutes on medium-high speed. The cream should hold its shape but still look glossy.
- In a separate bowl, beat mascarpone with sugar until smooth, then fold in pistachio cream until fully incorporated. [If mixture looks curdled, keep mixing — it comes together.]
- Gently fold the whipped cream into the mascarpone mixture using a rubber spatula. Pour this over your ladyfinger base and smooth with an offset spatula.
Finishing Touches
- Melt dark chocolate in short 20-second microwave bursts, stirring between each. It should look glossy and pour like warm syrup.
- Pour chocolate evenly over the filling, tilting the pan slightly to spread it. Sprinkle crushed pistachios immediately before it sets.
- Chill for at least 4 hours, then dust with cocoa powder before slicing into squares.
Pro Tips for Perfect Pistachio Cheesecake Bars
Temperature control separates gooey, sliding layers from clean, structured bars. Every tip below came from a batch that didn’t quite work.
Cold mascarpone whips better because fat molecules stay firmer and trap air more efficiently, according to King Arthur Baking’s guidance on dairy temperature. I learned this after a room-temperature batch turned soupy on me.
Dip your ladyfingers fast — I mean one full second, not a lazy count of three. My second batch turned to mush because I got distracted checking my phone mid-dunk.
Let the chocolate ganache cool slightly before pouring, around 90°F, so it doesn’t melt the mascarpone layer underneath. I rushed this once and ended up with a marbled mess instead of clean layers.
Crush your pistachios by hand instead of in a food processor — you want visible chunks, not dust, for the best texture contrast on top.
Troubleshooting: When Something Goes Wrong
Why did my pistachio cheesecake bars turn out runny? Your mascarpone mixture likely wasn’t whipped enough, or the cream was folded in too warm. Chill everything longer and make sure your cream holds soft peaks before folding.
What causes the chocolate layer to crack when slicing? The ganache probably set too hard from being poured too thin or chilled too long uncovered. Use a hot, dry knife wiped between cuts for cleaner slices.
How do I fix a soggy ladyfinger base? You likely dipped the biscuits too long in espresso. Next time, dunk for just one second per side and press firmly into the pan.
Can I salvage bars that won’t release from the pan? Yes — run a warm knife or kitchen torch gently along the edges before lifting. A metal pan with a removable bottom prevents this issue entirely next time.
Variations & Ways to Customize
These bars adapt easily to seasons, dietary needs, and flavor cravings without losing their signature texture.
Seasonal Pistachio Cheesecake Bars Variation
Add a thin layer of tart raspberry jam between the base and filling for a bright summer twist. The acidity cuts through the richness beautifully.
Gluten-Free Pistachio Cheesecake Bars
Swap ladyfingers for a gluten-free version or crushed almond biscotti. The texture stays just as satisfying with a slightly nuttier crunch.
White Chocolate Pistachio Cheesecake Bars
Replace dark chocolate with melted white chocolate for a sweeter, milder top layer. This pairs beautifully with the technique from my pistachio buttercream frosting recipe.
Can You Make Pistachio Cheesecake Bars Ahead of Time?
Yes, these bars are actually better made one day ahead since the flavors deepen overnight in the fridge. Serve them chilled alongside espresso or a glass of dessert wine for that Italian café feel.
Storage-wise, expect the ladyfinger base to soften slightly by day three, though the flavor only improves. The chocolate top stays snappy if kept covered and cold.
| Method | How Long | Details |
|---|---|---|
| Fridge | 4-5 days | Store in an airtight container; texture stays creamy but base softens slightly after day 3. |
| Freezer | Up to 2 months | Wrap individual bars tightly in plastic, then foil; thaw overnight in the fridge for best texture. |
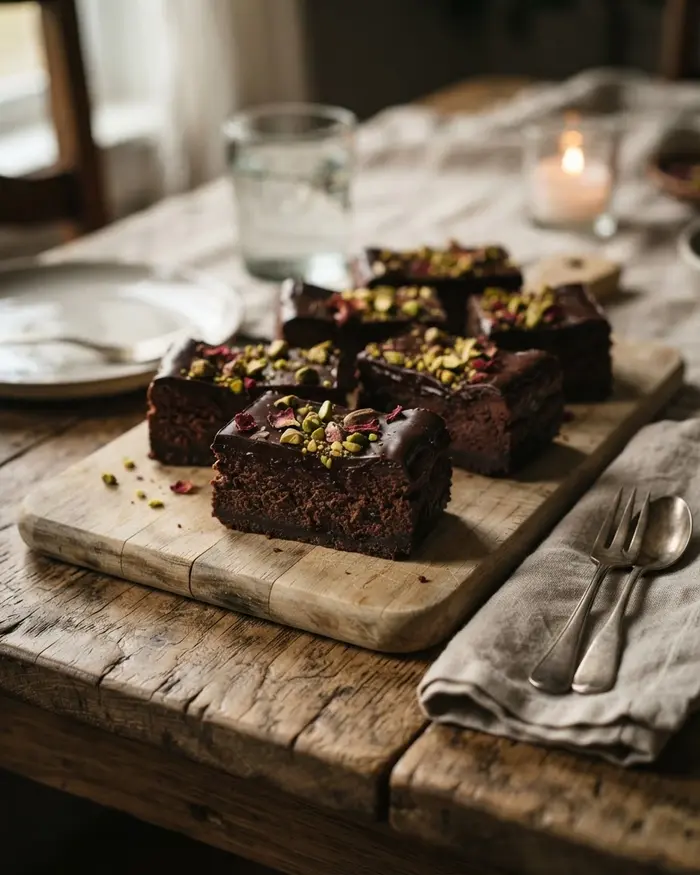
Reheating isn’t necessary — these bars are meant to be served cold, straight from the fridge for the cleanest slices and best texture.
Pistachio Cheesecake Bars FAQs
What is the difference between baked and no-bake cheesecake?
Baked cheesecake uses eggs and is cooked in the oven, resulting in a dense, firm texture. No-bake cheesecake relies on gelatin or whipped cream for structure and is set in the refrigerator. No-bake versions are lighter, creamier, and quicker to prepare since they require no oven time or cooling period after baking.
How long does a no-bake cheesecake need to set in the refrigerator?
A no-bake cheesecake typically needs 4 to 6 hours to set properly in the refrigerator. For best results, many bakers recommend leaving it overnight, which ensures the filling is completely firm and easy to slice. The setting time depends on the thickness of your cheesecake and the ingredients used in the recipe.
Can I freeze no-bake desserts for later use?
Yes, most no-bake desserts freeze well for up to 2-3 months. Wrap them tightly in plastic wrap and aluminum foil to prevent freezer burn. Cheesecakes, mousse cakes, and icebox pies are excellent candidates for freezing. Thaw overnight in the refrigerator before serving for the best texture and flavor.
What are the best crust options for no-bake cheesecake?
Graham cracker crusts are the most popular choice, made from crushed crackers mixed with melted butter and sugar. Other options include Oreo cookie crusts, vanilla wafer crusts, or pretzel crusts for a sweet-salty combination. Nut-based crusts using almonds or pecans are also excellent gluten-free alternatives.
Why is my no-bake cheesecake runny and not setting?
A runny no-bake cheesecake usually results from insufficient chilling time or incorrect ingredient ratios. Make sure you use full-fat cream cheese at room temperature and follow the recipe precisely. If using gelatin, ensure it is properly bloomed and dissolved. The mixture should be thick before refrigerating, not liquid or soupy.
Final Thoughts
Pistachio cheesecake bars are worth making because they deliver bakery-level flavor with almost none of the stress of traditional baking. I’d love to hear how yours turn out, so drop a comment below with your results or questions.
For another creamy no-bake option, try my no-bake biscoff cheesecake recipe next.
Baked with love by Rebeccah Ellene, who has tested this recipe across six batches and three different pan sizes to get the layers just right.
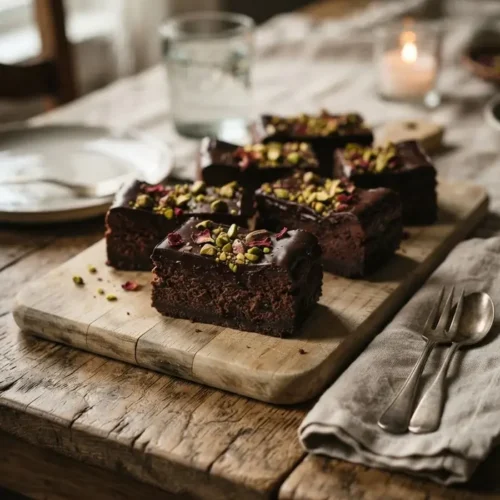
Creamy Pistachio Cheesecake Bars – Easy No-Fail Recipe
Ingredients
Ingredients
- 300 g ladyfinger biscuits
- 500 g mascarpone
- 150 g pistachio cream
- 200 g dark chocolate
- 250 ml heavy cream
- 300 ml strong espresso
- 100 g sugar
- 4 large eggs
- 2 tbsp cocoa powder
- 60 g crushed pistachios
Instructions
Prepare the Base
- Line a rectangular baking dish with parchment paper for easy removal.
- Quickly dip each ladyfinger biscuit into the strong espresso and arrange them in a single layer at the bottom of the dish.
Make the Cheesecake Filling
- In a large bowl, whisk the eggs and sugar together until pale and slightly thickened.
- Add the mascarpone and pistachio cream to the egg mixture and beat until smooth and well combined.
- In a separate bowl, whip the heavy cream until soft peaks form, then gently fold it into the mascarpone mixture.
- Pour half of the cheesecake filling over the espresso-soaked ladyfingers, spreading evenly.
Add the Chocolate Layer
- Melt the dark chocolate gently over a double boiler or in short bursts in the microwave, stirring until smooth.
- Swirl or drizzle the melted chocolate over the first layer of cheesecake filling.
- Add another layer of espresso-dipped ladyfingers on top of the chocolate layer.
- Pour the remaining cheesecake filling over the top and smooth with a spatula.
Chill and Finish
- Cover the dish and refrigerate for at least 4 hours, or overnight, until fully set.
- Before serving, dust the top generously with cocoa powder.
- Sprinkle the crushed pistachios evenly over the surface for added crunch and flavor.
- Slice into bars and serve chilled.