Chewy and Creamy Asian Ice Cream Dessert

Discover the magic of homemade mochi ice cream! This easy Asian ice cream dessert combines pillowy rice dough with creamy vanilla—pure bliss in every bite.
This Japanese Mochi Ice Cream brings together everything you love about Asian desserts with ice cream—that incredible contrast of soft, chewy mochi wrapped around cold, creamy vanilla ice cream.
With just sweet glutinous rice flour, sugar, and your favorite ice cream, you’re about to create little spheres of happiness that’ll disappear from your freezer faster than you can say “mochi”!
You know those desserts that make you close your eyes and go “mmm” on the first bite? That’s exactly what happened when I first tried mochi ice cream at a little Japanese market years ago. The texture combo was so unexpectedly perfect—like eating a sweet, edible stress ball filled with ice cream (in the best way possible!).
Now I make these adorable Asian flavored ice cream treats whenever I need something special. If you’re into matcha flavors too, you’ve gotta try my Perfect Matcha Cream Cheese recipe—it’s another crowd-pleaser!
Table of Contents
Why You’ll Love This Recipe
Making your own Asian ice cream dessert at home is way easier than you’d think, and here’s why you’re gonna fall head over heels:
- It’s surprisingly forgiving – Even if your first mochi looks a bit wonky (mine sure did!), it’ll still taste amazing
- Customize to your heart’s content – Vanilla’s classic, but wait till you try it with green tea or mango ice cream
- Party trick material – Seriously, bring these to any gathering and watch people’s minds get blown
- Budget-friendly luxury – Store-bought mochi ice cream costs a fortune; these cost pennies!
I remember the first time I made these for my sister’s birthday. She thought I’d ordered them from that fancy Japanese bakery downtown! The secret? Following the microwave method I learned from King Arthur Baking’s guide to working with glutinous rice flour—it’s foolproof and takes all the intimidation out of mochi-making.
Japanese Mochi Ice Cream Nutritional Peek
| Per Serving (1 piece) | Amount |
|---|---|
| Calories | 95 |
| Protein | 1g |
| Carbs | 19g |
| Fat | 2g |
Based on 12 servings using vanilla ice cream
Ingredients You’ll Need
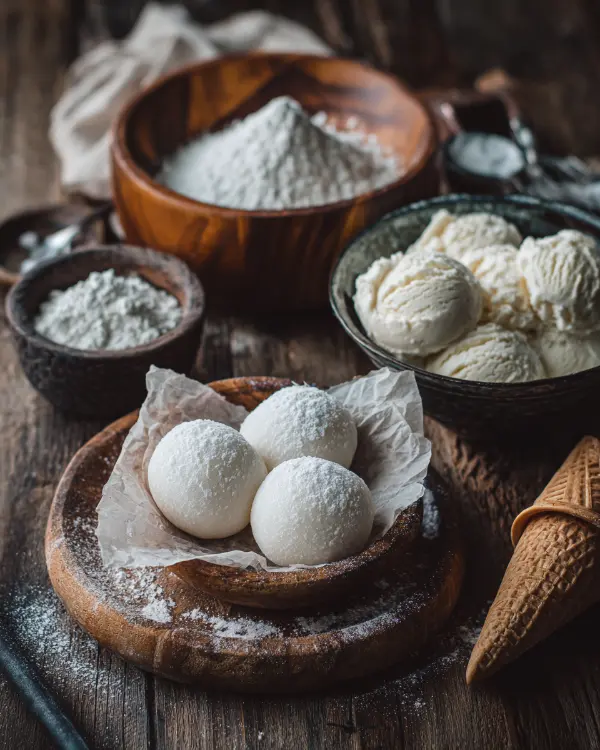
Let’s gather everything for these delightful Asian desserts with ice cream! Here’s what’s going into our mochi magic:
| Amount | Ingredient |
|---|---|
| 1½ cups (8oz/225g) | Vanilla ice cream (or your favorite flavor—I’m partial to coconut!) |
| 1 cup (5½oz/160g) | Sweet glutinous rice flour (mochiko is my go-to brand) |
| ¼ cup (2oz/57g) | Granulated sugar |
| 1 cup (8oz/225ml) | Water |
| A few drops | Red food coloring (totally optional but fun for pink mochi) |
| For dusting | Cornstarch or potato starch (potato starch gives a silkier finish) |
Pro tip: That glutinous rice flour? Despite the name, it’s actually gluten-free! And if you’re feeling adventurous, check out my Green Tea Latte with Whipped Cream for matcha inspiration—imagine that flavor in mochi form!
Japanese Mochi Ice Cream Equipment
Essential tools:
- Microwave-safe bowl (a big one—this dough expands!)
- Ice cream scoop or spoon
- Rolling pin
- 3¾ inch round cookie cutter
- Parchment paper
Nice to have:
- Small cookie scoop for uniform ice cream balls
- Egg carton (trust me on this—perfect for keeping your mochi upright in the freezer)
Step-by-Step Instructions
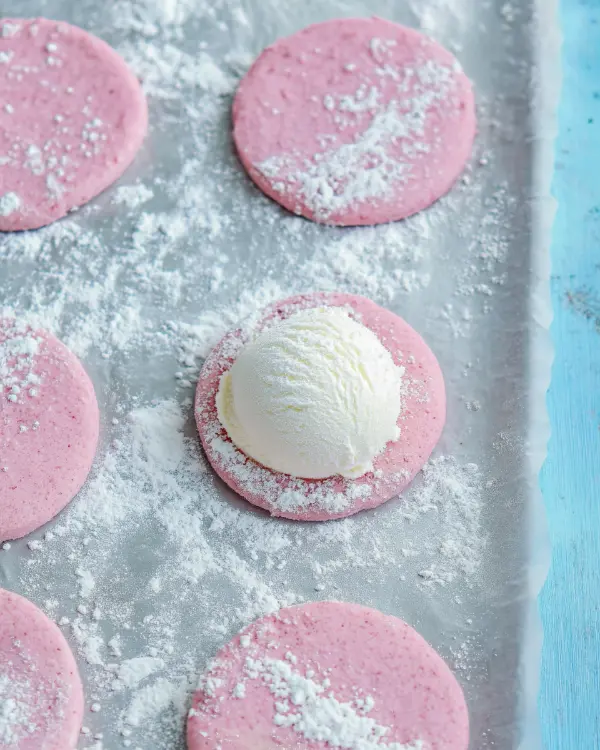
Alright, let’s make this Asian ice cream dessert happen! Don’t worry—I’ll walk you through every single step like we’re doing this together in my kitchen.
Step 1: Line that small tray with parchment paper—we’re gonna need a landing spot for our ice cream balls.
Step 2: Here’s where the fun begins! Using your ice cream scoop, portion out twelve 2-tablespoon scoops of ice cream (each about ¾oz if you’re measuring). Pop ’em on your tray and straight into the freezer. (They need to be rock-solid for wrapping later, so don’t skip this!)
Step 3: In your big microwave-safe bowl, whisk together the sweet rice flour, sugar, and water until it looks like pancake batter. Cover tightly with plastic wrap and microwave for one minute.
Step 4: Pull it out and give it a good whisk—you’ll see some lumps trying to form, but show them who’s boss! Re-cover and zap for another minute.
Step 5: Now things get sticky (literally). Dip your spatula in water first, then stir the mixture again. Ditch the whisk at this point—it’ll just get hopelessly tangled in the increasingly gummy dough.
Step 6: One more 30-second microwave session under plastic wrap, and boom—you’ve got mochi dough! If you’re adding food coloring, now’s your moment. (I love a soft pink—makes them look like little sunset clouds!)
Step 7: Here’s where the cornstarch becomes your best friend. Lay out a big sheet of parchment and go wild with the dusting. I mean really generous—think snowy Christmas morning generous.
Step 8: Using that wet spatula (water is key here!), scrape your sticky dough onto the cornstarch bed and dust the top too.
Step 9: Time to roll! Aim for a rectangle about ¼ inch thick (roughly 12×14 inches). Keep that cornstarch coming—dust, roll, dust, roll. (If it sticks to your rolling pin, you know what to do—more starch!)
Step 10: Slide your parchment onto a cookie sheet and let it chill in the fridge for 30 minutes. This firms things up beautifully.
Step 11: Cut your circles with that 3¾ inch cutter. You should get about 12 circles, maybe a couple extra if you’re good at tessellation!
Step 12: Now for the magic moment! Brush excess cornstarch off a dough circle (both sides), plop an ice cream ball in the center (flat side facing you), and pinch those edges together like you’re making a tiny dumpling. Give it a good squeeze to seal—no ice cream escapes on our watch!
Step 13: Wrap each finished mochi in cling wrap, seam-side down, and back to the freezer they go. (That egg carton trick? Use it here to keep them perfectly round!)
Step 14: Freeze for at least 2 hours—patience is a virtue, my friend. When you’re ready to indulge, let them sit out for just a couple minutes to soften slightly. Pure heaven!
Pro Tips & Guidance
Working with Japanese Mochi Ice Cream dough is all about temperature and texture control. Here’s what I’ve learned through many (delicious) trials:
The microwave timing might need tweaking based on your wattage—if your dough seems too wet after the final zap, give it another 15-20 seconds. You want it sticky but holdable, like really thick slime (appetizing, I know!).
Keep those hands and tools wet when handling the unmolded dough—it’s like the dough has a personal vendetta against dry surfaces. And here’s something I picked up from Serious Eats’ mochi guide: work quickly once you start wrapping! The dough gets less pliable as it cools, so channel your inner mochi assembly line.
Troubleshooting Guide
Dough tearing when wrapping? No worries! It’s probably too thin—roll it a smidge thicker next time, or let it warm up for a minute if it’s been in the fridge too long.
Ice cream melting before you can wrap it? Been there! Work with just 2-3 ice cream balls at a time, keeping the rest in the freezer. Speed comes with practice!
Mochi too chewy or tough? You might’ve overcooked it in the microwave. Next batch, reduce the final cooking time by 10-15 seconds.
Sticky mess everywhere? More cornstarch is your friend! Don’t be shy with it—you can always brush off the excess.
Variations & Twists
Ready to jazz up your Coconut Ice Cream or other flavors? Let’s get creative:
Flavor Adventures: • Matcha mochi + vanilla ice cream (classic combo!) • Pink strawberry mochi + chocolate ice cream • Plain mochi + mango sorbet (tropical vibes all day)
Seasonal Spins: • Add pumpkin spice to your dough in fall • Crushed candy canes mixed into peppermint ice cream for holidays • Lavender-infused dough for spring
For an elegant presentation, dust with powdered sugar or drizzle with chocolate. Want more matcha inspiration? My Matcha Mousse Cake Recipe has techniques you can adapt for green tea mochi!
Serving, Storage & Reheating
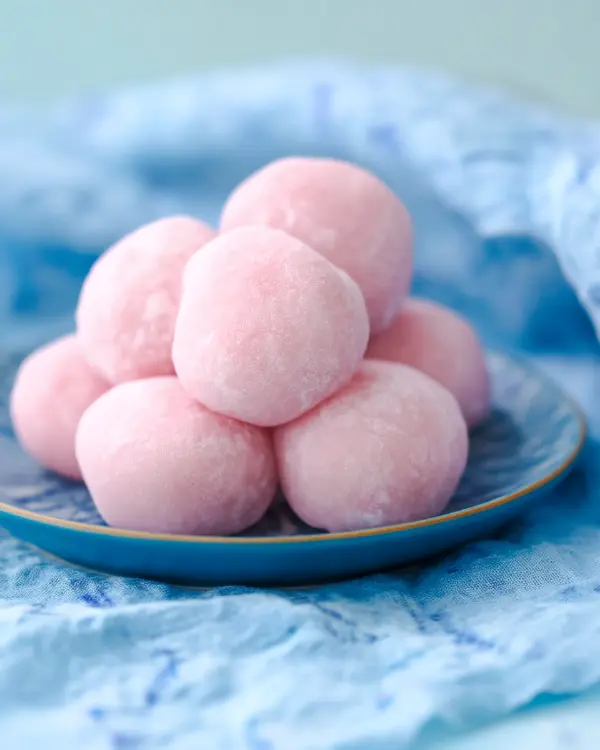
Your homemade Asian flavored ice cream treats stay perfect in an airtight container for up to a week (though good luck having them last that long!). I like to wrap each one individually in plastic wrap first, then pop them all in a freezer bag—prevents freezer burn and makes grabbing a midnight snack super easy.
When serving, let them sit out for 3-5 minutes. They should yield slightly when pressed but still feel cold. Too hard and you’ll struggle to bite through the mochi; too soft and you’ve got a melty situation on your hands.
No-Waste Kitchen Magic
Got leftover mochi dough scraps after cutting circles? Don’t toss them! Roll them into little balls, dust with kinako (roasted soybean powder) or cocoa powder, and you’ve got bonus treats.
Extra ice cream that didn’t make it into mochi? Blend it into tomorrow’s smoothie or melt it down for the world’s easiest ice cream sauce. Every bit counts in my kitchen!
Japanese Mochi Ice Cream FAQs
What is the easiest Asian dessert to make?
Honestly? Mochi ice cream ranks pretty high on the easy-yet-impressive scale! The microwave method eliminates any stovetop fussing, and once you get the hang of wrapping, you can make a dozen in under an hour.
What is Asian ice cream called?
In Japan, ice cream-filled mochi is called “mochi aisu” or sometimes “yukimi daifuku” when it’s the commercial version. Other Asian countries have their own frozen treats—like Filipino dirty ice cream or Thai rolled ice cream!
What is a 5 letter word for ice cream dessert?
You’re thinking of “float”—but let me tell you, mochi ice cream is way more exciting than a root beer float (though I love those too!).
What are the most popular Asian desserts?
Besides our beloved mochi ice cream, you’ve got Japanese dorayaki, Korean bingsu, Chinese egg tarts, Filipino halo-halo, and Thai mango sticky rice. Each one’s a textural adventure!
What are 10 Chinese desserts?
While mochi is Japanese, Chinese desserts are equally amazing! Think egg tarts, tangyuan, mooncakes, dragon’s beard candy, almond tofu, red bean soup, pineapple buns, wife cakes, sesame balls, and grass jelly. Different vibe but equally delicious!
Sweet Endings
There you have it—your very own batch of homemade Asian ice cream dessert magic! These little mochi bundles never fail to make people smile, whether you’re treating yourself after a long day or impressing dinner guests. The combination of that QQ (that’s what Taiwanese folks call that perfect chewy texture) mochi exterior and creamy frozen center is just… chef’s kiss.
I’d love to see your mochi creations! Drop a comment below with your favorite ice cream flavors to wrap, or tag me in your photos. Did you try the pink ones? Go wild with matcha? And hey, if you’re ready for your next Japanese-inspired adventure, my Green Tea Latte with Whipped Cream is calling your name.
Chewy, Creamy Japanese Mochi Ice Cream
Equipment
- Microwave-safe bowl
- Ice cream scoop
- Rolling Pin
- 3¾ inch round cookie cutter
Ingredients
Main Ingredients
- 1½ cups Vanilla ice cream or other flavor
- 1 cup Sweet glutinous rice flour mochiko brand recommended
- ¼ cup Granulated sugar
- 1 cup Water
- few drops Red food coloring optional
- Cornstarch or potato starch for dusting
Instructions
- Line a small tray with parchment paper for the ice cream balls.
- Scoop 12 portions of ice cream (about 2 tbsp each) and freeze until solid.
- Whisk rice flour, sugar, and water in a microwave-safe bowl. Microwave 1 minute covered.
- Whisk again, cover, and microwave another minute.
- Stir with a wet spatula, then microwave 30 seconds more until sticky dough forms. Add food coloring if desired.
- Dust parchment with cornstarch, place dough on top, and dust more starch.
- Roll dough into a ¼ inch thick rectangle (about 12×14 inches). Chill 30 minutes.
- Cut circles with a 3¾ inch cutter (about 12).
- Place an ice cream ball in the center of a dough circle, pinch edges to seal.
- Wrap each in plastic wrap, place seam side down, and freeze at least 2 hours.

