Matcha Mousse Cake Recipe
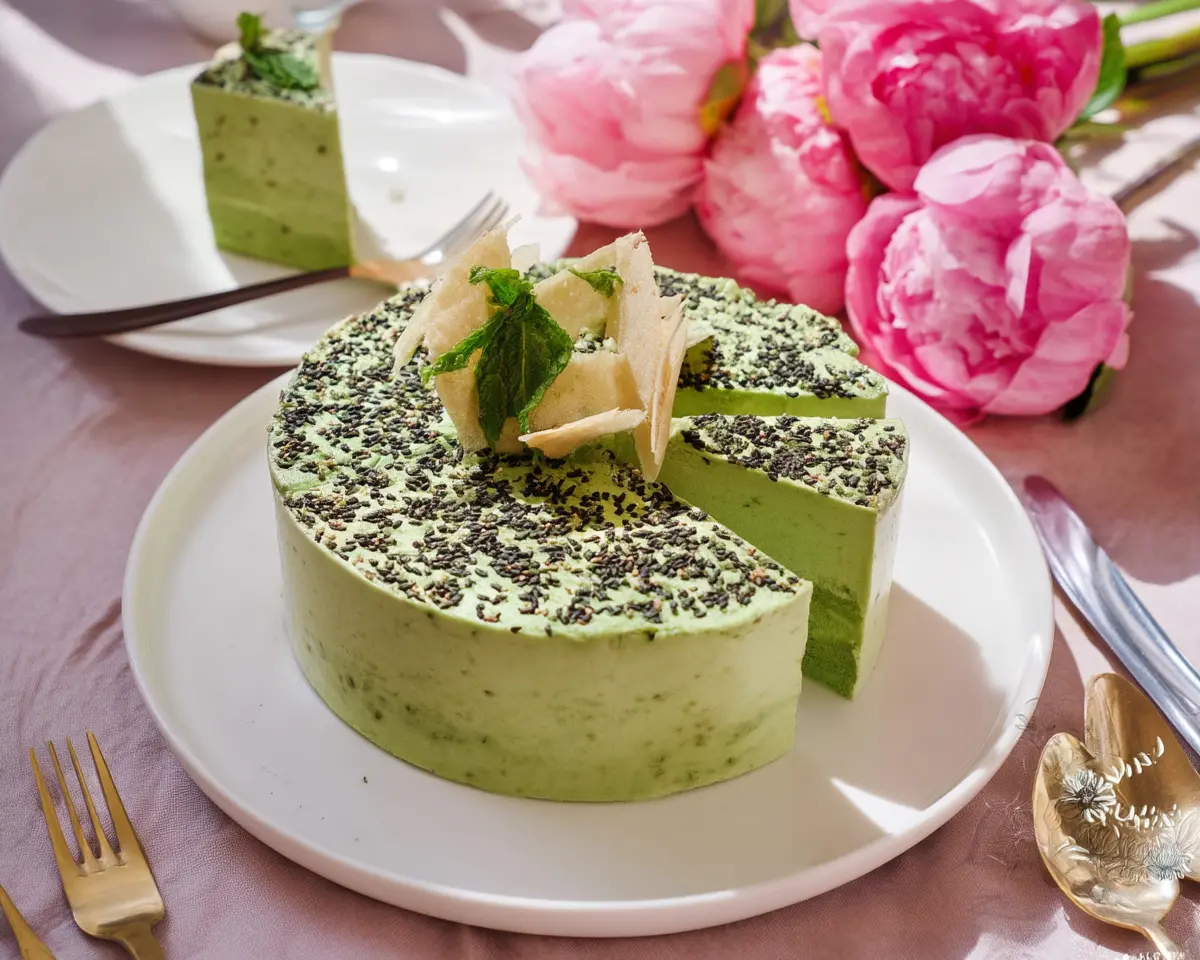
This dreamy matcha mousse cake recipe layers fluffy sponge with white chocolate and matcha mousse. Easy, elegant, and absolutely divine!
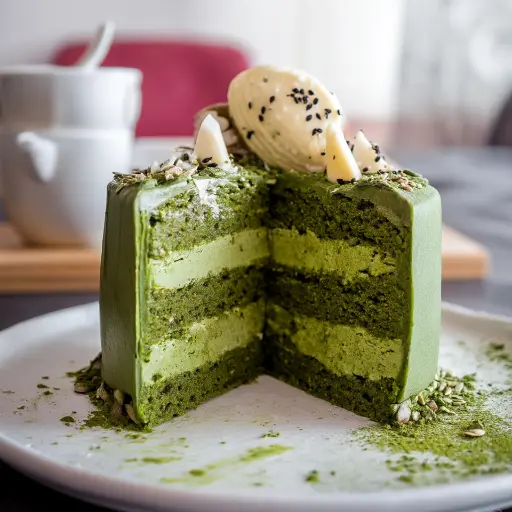
This matcha mousse cake recipe creates three stunning layers: a tender matcha sponge, silky white chocolate mousse, and vibrant green tea mousse on top. It’s like eating a cloud that tastes of earthy matcha sweetness—and honestly, it looks like something from a fancy bakery window.
I’ll never forget the first time I tasted matcha mousse cake at a tiny café in Seattle. One bite and I was completely smitten—that gorgeous green color, the way it just melted on my tongue.
I spent weeks perfecting my own version at home, and let me tell you, this recipe is the result of many “testing sessions” (my family didn’t complain). If you’re already a matcha fan, you’ll probably also love my green tea latte with whipped cream—it’s the perfect pairing.
Table of Contents
Why You’ll Love This Matcha Green Tea Mousse Cake
This green tea mousse cake recipe is absolute magic for so many reasons:
- It’s actually easier than it looks – I promise you don’t need pastry school credentials
- Three gorgeous layers that taste as good as they photograph
- Make-ahead friendly – perfect for dinner parties when you want to look effortlessly elegant
- That earthy-sweet balance matcha lovers crave
- Impressive without being fussy – your guests will think you spent all day
I remember the first time I made this for a birthday party. My friend Sarah (who claims she doesn’t like “fancy desserts”) had two slices and asked for the recipe before she left.
That’s when I knew this one was a keeper. According to King Arthur Baking Company, working with gelatin-based mousses requires patience, but the silky results are absolutely worth the chill time.
Nutritional Peek (Per Serving)
| Nutrient | Amount |
|---|---|
| Calories | 385 |
| Protein | 6g |
| Carbs | 34g |
| Fat | 26g |
Based on 10 servings
Ingredients for Your Matcha Mousse Cake
Here’s everything you’ll need to create this no bake matcha mousse cake (well, except for the sponge base—but that’s quick!):
Matcha Sponge Cake
| Amount | Ingredient |
|---|---|
| 2 tbsp | Latte matcha powder (culinary grade works great here) |
| 1/4 cup (60 ml) | Milk |
| 3 tbsp | Unsalted butter, softened |
| 1/2 cup (100 g) | Caster sugar |
| 4 | Large eggs (room temperature makes a fluffier cake) |
| 3/4 cup (100 g) | All-purpose flour |
| 1 tsp | Vanilla extract |
White Chocolate Mousse
| Amount | Ingredient |
|---|---|
| 6 | Gelatin leaves OR 2 tbsp gelatin powder |
| 2 tbsp | Cold water |
| 1 cup (200 g) | White chocolate, melted and slightly cooled |
| 2 1/2 cups (600 ml) | Heavy cream (the higher the fat content, the better!) |
Matcha Mousse
| Amount | Ingredient |
|---|---|
| 3 | Gelatin leaves OR 1 tbsp gelatin powder |
| 2 tbsp | Cold water |
| 1 1/4 cups (300 ml) | Heavy cream |
| 2 tbsp | Matcha tea powder (this is where quality really shows) |
| 1/3 cup (100 g) | Powdered sugar |
A quick note: I always spring for good matcha powder for the mousse layer. The cheap stuff can taste grassy and bitter. And if you’re curious about matcha pairings, my perfect matcha cream cheese recipe uses similar flavor principles.
Equipment You’ll Need for Matcha Mousse Cake Recipe
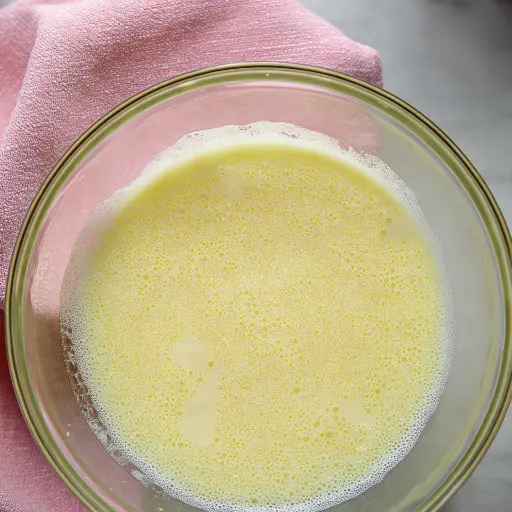
Essential:
- 9-inch round cake pan
- Parchment paper
- Electric mixer or whisk (your arm will thank you)
- Mixing bowls (at least three)
- Rubber spatula
- Microwave-safe bowl
Nice to Have:
- Springform pan (makes unmolding so much easier)
- Sifter for the matcha powder
- Offset spatula for smooth mousse layers
Step-by-Step Instructions for Matcha Mousse Cake Recipe Success
Let me walk you through this like we’re baking together in my kitchen. It’s really not complicated—just a little patience required.
Make the Matcha Sponge Cake
First things first: preheat your oven to 350°F (175°C) and get that cake pan ready. I always grease mine with butter, then line it with parchment paper—belt and suspenders approach, you know?
In a mixing bowl, cream together the softened butter and caster sugar until it’s light and fluffy (think two to three minutes with an electric mixer). Now add your eggs one at a time, beating well after each addition. This is important—don’t rush it or you’ll end up with a dense cake instead of a tender one.
Stir in the matcha powder and vanilla extract. The batter will turn this beautiful pale green color that always makes me smile. Now here’s the gentle part: gradually fold in the flour and milk, alternating between them. I usually do flour, then milk, then flour again (if the batter looks a bit lumpy at first, don’t panic—just keep folding gently until smooth).
Pour that gorgeous green batter into your prepared pan and bake for 20-25 minutes. You’ll know it’s done when a toothpick comes out clean and the edges just start pulling away from the pan. Let it cool completely—and I mean completely. A warm cake will melt your mousse layers, and trust me, I learned this the hard way.
Create the White Chocolate Mousse
While your cake’s cooling, let’s tackle the first mousse layer. If you’re using gelatin leaves, drop them in a small bowl with cold water and let them soften for about five minutes (they’ll get all wiggly and soft). Using powder instead? Just dissolve it in 2 tablespoons of cold water and set it aside.
Melt your white chocolate—I use the microwave in 30-second bursts, stirring between each one so it doesn’t seize up. Let it cool for a few minutes so it’s warm but not hot.
In a separate bowl, whip that heavy cream until you see soft peaks forming. This is where patience pays off—under-whipped and your mousse will be runny; over-whipped and it’ll be grainy.
Once you’ve got those soft peaks, gently fold in the melted white chocolate and your dissolved gelatin. Use a rubber spatula and fold (don’t stir!) so you keep all that lovely airiness.
Spread this cloud-like mixture evenly over your cooled matcha sponge. Pop it in the fridge for at least an hour. This layer needs to be firm before you add the next one.
Whip Up the Matcha Mousse
Time for the star of the show! Repeat the gelatin process—soften those leaves or dissolve that powder.
In a clean bowl (any residual grease will prevent your cream from whipping properly), whip the heavy cream until you’ve got soft peaks again. Here’s my trick: I sift the matcha powder and powdered sugar together before adding them to the cream. This prevents those annoying little matcha clumps that nobody wants to bite into.
Gradually add your matcha-sugar mixture while continuing to whip until everything’s smooth and creamy. The color should be this vibrant, gorgeous green. Fold in your dissolved gelatin nice and gently.
Assemble Your Masterpiece
Carefully spread the matcha mousse over your set white chocolate layer. Take your time here—use an offset spatula if you have one, and smooth it into an even layer. It’s okay if it’s not absolutely perfect; homemade is supposed to look homemade.
Now comes the hardest part: waiting. Cover your cake and refrigerate it for at least 4 hours, but honestly? Overnight is even better. The mousse needs time to set properly, and all those flavors meld together beautifully as it chills.
Pro Tips & Guidance for Perfect Green Tea Mousse Cake
After making this matcha green tea mousse cake probably fifty times (seriously), here’s what I’ve learned:
Room temperature matters. Cold eggs won’t incorporate as well into your sponge batter. Just set them out about 30 minutes before you start baking.
Don’t skip the sifting. Matcha powder is clumpy by nature. A quick sift makes all the difference in texture.
Gelatin timing is everything. Add it when your mixtures are just slightly warm or room temperature—too hot and it won’t set; too cold and you’ll get weird lumps.
The tap test works. Before adding the next mousse layer, gently tap the pan. If the previous layer jiggles but doesn’t wave like water, it’s set enough.
According to Serious Eats, the science behind mousse is all about creating stable air bubbles in fat (in this case, whipped cream), and gelatin provides the structure to hold everything in place. That’s why proper chilling is non-negotiable.
Matcha Mousse Cake Recipe Troubleshooting Guide
Mousse layer looks runny? No worries—you probably just need to chill it longer. Pop it back in the fridge for another hour.
White chocolate seized up? This happens when chocolate gets too hot or water gets in. Start over with fresh chocolate and melt it more gently this time (30-second intervals, remember?).
Matcha mousse tastes bitter? Your matcha powder might be too intense. Next time, reduce it by a teaspoon or add a bit more powdered sugar to balance the flavor.
Cake won’t come out of the pan? Run a thin knife around the edge, then place a warm towel on the bottom of the pan for 30 seconds. This usually does the trick.
Layers are mixing together? The first layer wasn’t set enough before you added the second. It happens! Just chill it longer next time before proceeding.
Variations & Twists
This matcha mousse cake recipe is versatile, so feel free to play around:
Chocolate Matcha Version: Replace the white chocolate mousse with dark chocolate mousse for a more intense flavor contrast.
Strawberry Matcha: Add a thin layer of fresh strawberry compote between the white chocolate and matcha layers (strawberry and matcha are BFFs).
Individual Servings: Make these in small glasses or jars for adorable parfait-style desserts—perfect for parties.
Vegan Adaptation: Use coconut cream instead of heavy cream and agar-agar instead of gelatin. It won’t be quite as silky, but it’s still delicious.
Mirror Glaze Finish: Feeling fancy? Top your set cake with a neutral or white mirror glaze for that professional bakery look.
For plating, I love adding fresh berries, a dusting of matcha powder through a stencil, or even some white chocolate shavings. Check out how I play with matcha flavors in my other recipes for more inspiration.
Serving, Storage & Reheating
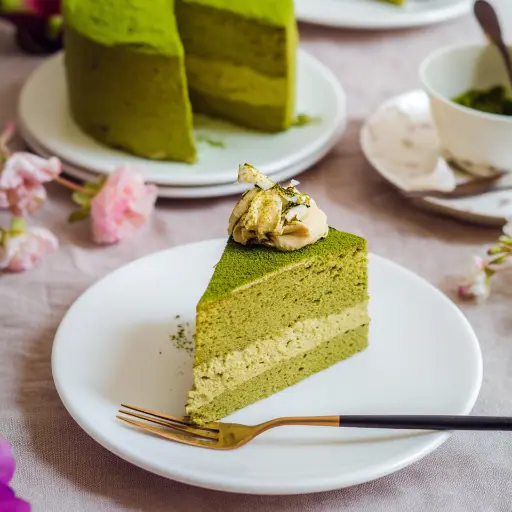
Serve your matcha mousse cake chilled—that’s when the texture is absolute perfection. I like to let slices sit at room temperature for about 5 minutes before serving, which lets the flavors open up a bit.
Storage: Cover tightly with plastic wrap and keep refrigerated for up to 4 days. The mousse holds up beautifully.
Freezing: You can freeze individual slices wrapped well in plastic wrap and aluminum foil for up to a month. Thaw overnight in the fridge (not at room temperature, or you’ll get condensation and a soggy cake).
Reheating: Don’t! This no bake matcha mousse cake is meant to be enjoyed cold. Warming it would completely ruin the mousse texture.
No-Waste Kitchen Magic
Don’t toss those egg whites if you end up with extras! Freeze them in ice cube trays for future meringues or macarons. Extra heavy cream? Whip it up and freeze in dollops for emergency coffee toppings.
If your sponge cake breaks or you trim the edges, crumble those pieces and toast them lightly. They make fantastic ice cream toppings or you can layer them in parfaits. I’ve even mixed them with a little butter and pressed them into the bottom of a cheesecake pan for an easy crust.
Leftover matcha powder? Store it in an airtight container in the fridge (not the pantry—it oxidizes quickly) and use it within a few months for the best flavor.
Matcha Mousse Cake Recipe FAQs
Can I use a different type of chocolate for the mousse?
Absolutely! Dark chocolate creates a lovely bitter-sweet contrast with the matcha layer, while milk chocolate makes it a bit sweeter and more kid-friendly. Just keep the quantities the same.
Can I freeze this matcha mousse cake recipe?
Yes! Wrap individual slices tightly in plastic wrap, then aluminum foil. Freeze for up to a month and thaw overnight in the refrigerator when you’re ready to enjoy.
What if I don’t have gelatin leaves?
No problem at all. Use gelatin powder instead—the measurements are already included in the recipe. Just dissolve it in cold water according to the package directions and you’re good to go.
How do I know when my matcha sponge cake is done?
The classic toothpick test works perfectly here. Insert a toothpick into the center—if it comes out clean or with just a few dry crumbs, your cake is ready. The edges should also be pulling slightly away from the pan.
Can I make this matcha green tea mousse cake ahead of time?
That’s actually the beauty of this recipe! It needs several hours to set anyway, so making it the day before your event is perfect. The flavors even deepen and meld together beautifully overnight.
My mousse won’t set—what went wrong?
This usually means either the gelatin wasn’t fully dissolved, or the mixture wasn’t chilled long enough. Make sure your gelatin is completely dissolved (no grains visible) before adding it, and be patient with the chilling time.
Let’s Celebrate This Matcha Magic!
There’s something so special about creating a beautiful matcha mousse cake recipe in your own kitchen. Those elegant layers, that perfect balance of earthy matcha and sweet cream—it never fails to impress, whether you’re making it for a celebration or just because it’s Tuesday and you deserve something lovely.
I’d absolutely love to see your creation! Share your photos in the comments below, and tell me—did you stick with the classic version or try one of the variations? And if you’re looking for another matcha adventure, don’t miss my other green tea treats on Dessert Haven.
Happy baking, friends. May your mousse be silky and your matcha always vibrant!
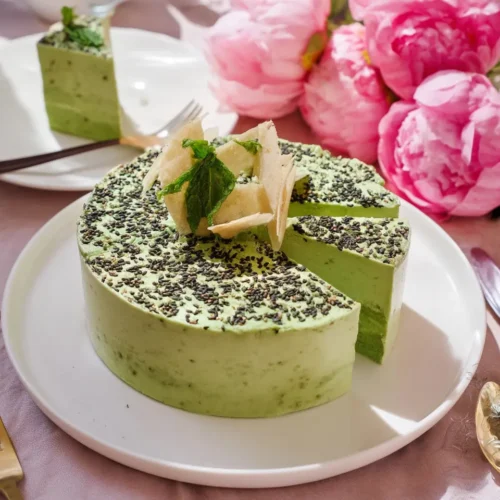
Matcha Mousse Cake
Equipment
- 9-inch round cake pan
- Electric mixer or whisk
- mixing bowls
- rubber spatula
- Microwave-safe bowl
- Springform pan
- sifter
- Offset spatula
Ingredients
Matcha Sponge Cake
- 2 tbsp latte matcha powder
- ¼ cup milk 60 ml
- 3 tbsp unsalted butter softened
- ½ cup caster sugar 100 g
- 4 large eggs
- ¾ cup all-purpose flour 100 g
- 1 tsp vanilla extract
White Chocolate Mousse
- 6 gelatin leaves OR 2 tbsp gelatin powder
- 2 tbsp cold water
- 1 cup white chocolate 200 g, melted and slightly cooled
- 2 ½ cups heavy cream 600 ml
Matcha Mousse
- 3 gelatin leaves OR 1 tbsp gelatin powder
- 2 tbsp cold water
- 1 ¼ cups heavy cream 300 ml
- 2 tbsp matcha tea powder
- ⅓ cup powdered sugar 100 g
Instructions
- Preheat your oven to 350°F (175°C). Grease and line a round cake pan with parchment paper.
- In a mixing bowl, cream together the softened butter and caster sugar until light and fluffy (about 2-3 minutes with an electric mixer). Add eggs one at a time, beating well after each addition.
- Stir in the matcha powder and vanilla extract. Gradually fold in the flour and milk, alternating between them, until a smooth batter forms.
- Pour the batter into the prepared cake pan and bake for 20-25 minutes or until a toothpick inserted into the center comes out clean. Let the cake cool completely.
- For the white chocolate mousse: Soften gelatin leaves in cold water for a few minutes. If using gelatin powder, dissolve it in 2 tbsp of cold water. Set aside.
- Melt the white chocolate in a microwave-safe bowl in 30-second bursts, stirring between each one. Let it cool slightly.
- In a separate bowl, whip the heavy cream until soft peaks form. Gently fold in the melted white chocolate and dissolved gelatin.
- Spread the white chocolate mousse evenly over the cooled matcha sponge cake. Chill in the refrigerator for at least 1 hour to set.
- For the matcha mousse: Soften gelatin leaves in cold water for a few minutes. If using gelatin powder, dissolve it in 2 tbsp of cold water. Set aside.
- In a clean bowl, whip the heavy cream until soft peaks form. Sift together the matcha powder and powdered sugar, then gradually add to the cream while continuing to whip until smooth and creamy.
- Gently fold in the dissolved gelatin until fully incorporated.
- Carefully spread the matcha mousse over the set white chocolate mousse layer. Use an offset spatula to smooth into an even layer.
- Chill the cake in the refrigerator for at least 4 hours, preferably overnight, to allow the mousse to set completely.

