The Ultimate Lotus Biscoff Mug Cake Recipe
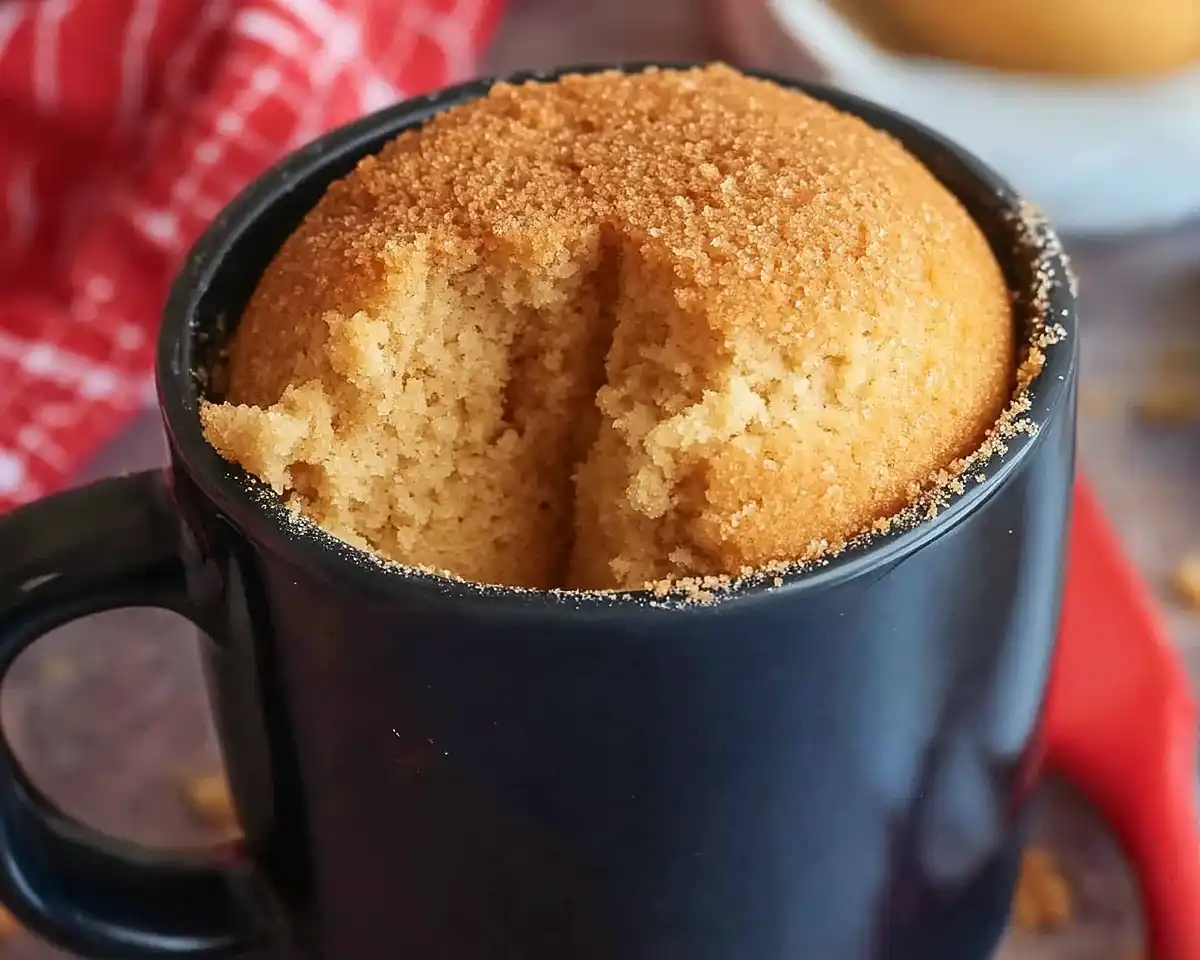
Craving cookie butter heaven? This Lotus Biscoff mug cake recipe delivers warm, gooey magic in just 2 minutes. One mug, zero cleanup—pure bliss!
What Makes This Recipe Special
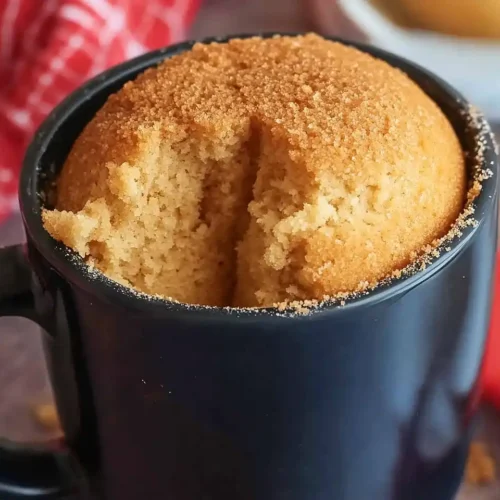
This lotus biscoff mug cake transforms three tablespoons of silky cookie butter spread into a fluffy, caramelized dessert that’s ready faster than you can scroll through your favorite show. With just one mug and a microwave, you’ll create a warm, spoon-tender cake swirled with that signature Biscoff magic—no mixer, no mess, no waiting.
Honestly? This biscoff mug cake recipe was born from a late-night craving and an almost-empty jar of cookie butter. I thought, “Why not just microwave this deliciousness?” and after a few tweaks (and one slightly rubbery attempt), I landed on this perfectly tender version.
Now it’s my go-to when I need something sweet right now. If you’re into quick, decadent treats, you’ll absolutely want to try my chocolate peanut butter mug cake recipe—it’s another flavor bomb that takes minutes.
Why You’ll Love This Lotus Biscoff Mug Cake Recipe
Starting with that gorgeous cookie butter mug cake base, here’s what makes this recipe a keeper:
- Insanely fast: Two minutes from craving to spoon-diving. Perfect for those “I need dessert NOW” moments.
- One-mug wonder: Literally everything mixes right in your coffee mug. Less dishes = more happiness.
- Cookie butter obsession satisfied: That caramelized, speculoos flavor gets baked right into every bite.
- Foolproof texture: Fluffy and moist, never dry or rubbery (trust me, I tested this many times).
- Midnight snack approved: No oven preheating means you won’t wake the whole house.
I learned so much about mug cake chemistry from King Arthur Baking Company—they explain how the ratio of liquid to flour creates that perfect crumb structure, which helped me nail this recipe. My personal tip? Don’t skip wiping down the mug’s sides before microwaving. Those batter splatters can actually burn and taste bitter!
Table of Contents
Nutritional Peek
Here’s what you’re working with per serving:
| Nutrient | Amount |
|---|---|
| Calories | 645 |
| Protein | 9g |
| Carbs | 71g |
| Fat | 36g |
Keep in mind this is an indulgent single-serve treat—perfect for when you’re celebrating small victories or just treating yourself!
Ingredients You’ll Need for Lotus Biscoff Mug Cake Recipe
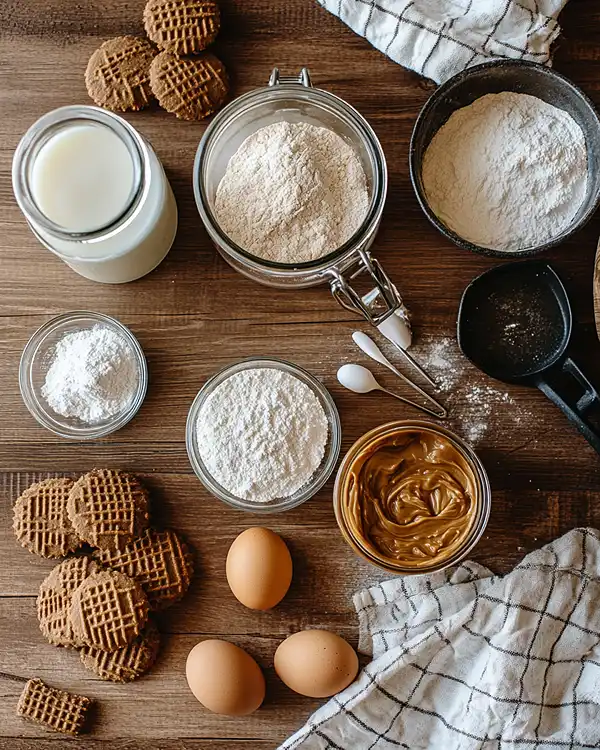
This lotus biscoff mug cake comes together with pantry staples and that gorgeous jar of Biscoff spread you’ve been hoarding:
| Amount | Ingredient |
|---|---|
| 3 tablespoon | Biscoff Spread (smooth) |
| 4 tablespoon | Plain Flour |
| 3 tablespoon | Caster Sugar (or golden caster sugar) |
| ¼ teaspoon | Baking Powder |
| 1 | Egg |
| 3 tablespoon | Milk (whole milk works best) |
| 3 tablespoon | Vegetable Oil |
For the Topping (totally optional but so worth it):
| Amount | Ingredient |
|---|---|
| 1 tablespoon | Biscoff Spread |
| 1 | Biscoff Biscuit (crushed into crumbs) |
Quick note: I always use smooth Biscoff spread here—the crunchy version has chunks that don’t distribute as evenly. And whole milk? It makes the crumb so much richer than skim. Need measuring help? Check out my guide on essential bakeware for getting your ratios just right.
Equipment You’ll Need
Essential:
- One microwave-safe coffee mug (about 12–16 oz capacity)
- Small whisk or fork
- Paper towel
- Measuring spoons
Optional but handy:
- Microwave cover (to prevent splatters)
- Small offset spatula (for spreading that melty topping)
How to Make Your Lotus Biscoff Mug Cake Recipe
Making this biscoff mug cake recipe is honestly easier than ordering takeout. Here’s how we do it:
Step 1: Grab your favorite mug and spoon in those three tablespoons of Biscoff spread. Pop it in the microwave for just 10 seconds—you want it softened and slightly melty, not bubbling. This step helps it blend smoothly without leaving sticky clumps.
Step 2: Now comes the fun part. Add your flour, sugar, baking powder, egg, milk, and oil right into that same mug. Yep, everything goes in together. (If your egg is cold from the fridge, let it sit out for five minutes first—it’ll mix more easily.)
Step 3: Take your whisk or fork and blend everything until you’ve got a smooth, lump-free batter. You’ll see beautiful caramel-colored swirls from the Biscoff—so pretty! This should take about 30 seconds of good stirring.
Step 4: Here’s the secret step most people skip: grab a paper towel and gently wipe down the inside walls of your mug above the batter line. Any stray batter stuck there will burn and taste bitter. Trust me on this one!
Step 5: Microwave on full power for 60 seconds first. Check it—the top might still look slightly wet, and that’s okay. Continue with 30-second bursts. Mine’s always perfect at exactly 2 minutes in my 900-watt microwave. (The center should spring back lightly when touched, and a toothpick comes out with just a few moist crumbs.)
Step 6: If you’re adding the optional topping (and please do!), immediately spoon that tablespoon of Biscoff spread right onto the hot cake. Watch it melt into glossy pools—it’s mesmerizing. Then sprinkle your crushed Biscoff crumbs on top for that perfect crunch-to-soft contrast.

Pro Tips & Guidance for Perfect Results
Every cookie butter mug cake deserves to be its best self, so here’s what I’ve learned:
Microwave power matters: All microwaves are different creatures. Start checking at 90 seconds if yours runs hot. According to Serious Eats, microwave wattage can vary by 200+ watts, dramatically affecting cook times. Better to check early than end up with a rubbery puck!
Don’t overmix: Once your batter’s smooth, stop whisking. Overworking develops too much gluten and creates a tough texture instead of that pillowy crumb we’re after.
Room temperature ingredients blend better: If your egg and milk are fridge-cold, they won’t incorporate as smoothly with the oil. Just fifteen minutes on the counter makes a difference.
The toothpick test works here too: Insert it into the center—you want a few moist crumbs clinging, not wet batter. Totally clean means you’ve gone too far and it’ll be dry.
Mug size counts: Too small and it’ll overflow (been there!). Too large and it spreads out thin instead of rising tall. A 12–16 oz mug is your sweet spot.
Troubleshooting Your Mug Cake
Cake turned out rubbery? You probably microwaved it too long. Mug cakes firm up as they cool, so slightly underdone is better than overdone. Next time, stop 15 seconds earlier.
Top is crusty but inside is raw? Your microwave might have hot spots. Try rotating the mug halfway through cooking, or reduce power to 80% and add more time.
Batter overflowed everywhere? (No judgment—I’ve made this mess!) Your mug was too full. Use a larger one or make sure the batter only fills it halfway before cooking.
Texture is dense and heavy? Make sure your baking powder is fresh—it loses potency after about six months. Also, that vigorous whisking really does matter for incorporating air.
Tastes eggy? This happens when the egg isn’t fully blended. Whisk extra well, and consider using the freshest eggs possible—they have a milder flavor.
Fun Variations & Flavor Twists
This biscoff mug cake recipe is incredibly versatile once you nail the base:
Double Biscoff Swirl: Reserve a teaspoon of spread and drop dollops into the batter before microwaving. Use a toothpick to swirl—you’ll get pockets of pure cookie butter throughout.
Chocolate-Biscoff Hybrid: Add a tablespoon of cocoa powder and reduce flour by one tablespoon. The chocolate-caramel combo is chef’s kiss.
Nutty Crunch: Fold in a tablespoon of chopped pecans or hazelnuts before cooking. They toast slightly in the microwave and add amazing texture.
Espresso Boost: Stir in ¼ teaspoon instant espresso powder to intensify those caramelized flavors.
Vegan Version: Swap the egg for a flax egg (1 tablespoon ground flaxseed + 2.5 tablespoons water, mixed and rested 5 minutes), use plant-based milk, and check your Biscoff spread is vegan-friendly.
For more single-serve inspiration, my chocolate oatmeal no-bake cookies are another quick fix when the sweet tooth strikes!
Serving, Storage & Reheating Your Biscoff Mug Cake
Serving: This lotus biscoff mug cake is honestly best eaten warm, straight from the mug with a spoon. But if you’re feeling fancy, flip it onto a small plate, drizzle extra melted Biscoff on top, and add a scoop of vanilla ice cream. The hot-cold combo is unreal.
Storage: Real talk—mug cakes are meant to be enjoyed immediately. But if you have leftovers (how?!), cover tightly and refrigerate for up to 2 days. The texture changes and becomes denser, almost brownie-like.
Reheating: Microwave for 15–20 seconds to revive that just-baked softness. Don’t overdo it or you’ll end up with rubber again.
No-Waste Kitchen Magic
Got leftover Biscoff spread? Here’s how to use every bit:
Swirl into oatmeal: A spoonful melted into hot oats with sliced bananas = breakfast heaven.
Coffee enhancer: Stir a teaspoon into your morning coffee instead of sugar. Game-changer.
Fruit dip: Warm it slightly and use as a dip for apple slices or strawberries.
Pancake filling: Dollop between two small pancakes for a stuffed breakfast treat.
Leftover crumbs from your Biscoff biscuit? Sprinkle them over yogurt, blend into smoothies, or press into the bottom of a glass with cream cheese and call it a no-bake cheesecake base.
Lotus Biscoff Mug Cake Recipe FAQs
Can I freeze this Lotus Biscoff Mug Cake Recipe?
While you technically can freeze it, I honestly don’t recommend it. Mug cakes are so quick to make that freezing seems unnecessary, plus the texture becomes spongy and loses that fresh-baked charm when thawed. Better to just whip up a fresh one when the craving hits!
What if I don’t have Biscoff spread?
You could substitute with any cookie butter, speculoos spread, or even smooth peanut butter in a pinch—though it won’t have that signature caramelized flavor. The texture will work, but the flavor profile changes completely.
Can I make this biscoff mug cake recipe without a microwave?
Absolutely! Preheat your oven to 350°F (175°C), prepare the batter in an oven-safe mug or ramekin, and bake for 12–15 minutes until set. It takes longer but works beautifully if you don’t have a microwave.
Why is my cookie butter mug cake dense instead of fluffy?
Usually this comes down to expired baking powder or not whisking enough air into the batter. Make sure your baking powder fizzes when you test it in water, and whisk vigorously for at least 30 seconds.
Can I double this recipe?
You can, but use two separate mugs rather than one large one. Mug cakes cook best in single portions because of how microwaves heat from the outside in. Doubling in one mug often leaves you with overcooked edges and a raw center.
Is this recipe gluten-free?
Not as written, but you can swap the plain flour for a 1:1 gluten-free baking blend. The texture might be slightly more crumbly, but it’ll still be delicious!
Time to Treat Yourself!

There you have it—your new favorite Lotus Biscoff mug cake recipe that goes from craving to spoon-diving in the time it takes to heat up leftovers. This little miracle of a dessert has saved me on countless late nights, stressful Tuesdays, and “I deserve something sweet” moments. The best part? You probably have everything you need sitting in your pantry right now.
I’d absolutely love to see your creations! Drop a comment below with your favorite mug cake toppings or tag your photos—did you try the double Biscoff swirl? Add chocolate? I’m always looking for new ways to level up this recipe.
And if you’re on a single-serve dessert kick, don’t miss my chocolate peanut butter mug cake next. It’s just as quick and equally addictive.
Baked with love by Rebeccah Ellene
Lotus Biscoff Mug Cake
Equipment
- Microwave-safe coffee mug (12-16 oz)
- Small whisk or fork
- Paper towel
- – Measuring spoons
Ingredients
Main Ingredients
- 3 tablespoon Biscoff Spread smooth
- 4 tablespoon Plain Flour
- 3 tablespoon Caster Sugar or golden caster sugar
- ¼ teaspoon Baking Powder
- 1 Egg
- 3 tablespoon Milk whole milk
- 3 tablespoon Vegetable Oil
Topping (Optional)
- 1 tablespoon Biscoff Spread
- 1 Biscoff Biscuit crushed into crumbs
Instructions
- Grab your favorite mug and spoon in those three tablespoons of Biscoff spread. Pop it in the microwave for just 10 seconds—you want it softened and slightly melty, not bubbling. This step helps it blend smoothly without leaving sticky clumps.
- Now comes the fun part. Add your flour, sugar, baking powder, egg, milk, and oil right into that same mug. Yep, everything goes in together. If your egg is cold from the fridge, let it sit out for five minutes first—it’ll mix more easily.
- Take your whisk or fork and blend everything until you’ve got a smooth, lump-free batter. You’ll see beautiful caramel-colored swirls from the Biscoff—so pretty! This should take about 30 seconds of good stirring.
- Here’s the secret step most people skip: grab a paper towel and gently wipe down the inside walls of your mug above the batter line. Any stray batter stuck there will burn and taste bitter. Trust me on this one!
- Microwave on full power for 60 seconds first. Check it—the top might still look slightly wet, and that’s okay. Continue with 30-second bursts. Mine’s always perfect at exactly 2 minutes in my 900-watt microwave. The center should spring back lightly when touched, and a toothpick comes out with just a few moist crumbs.
- If you’re adding the optional topping (and please do!), immediately spoon that tablespoon of Biscoff spread right onto the hot cake. Watch it melt into glossy pools—it’s mesmerizing. Then sprinkle your crushed Biscoff crumbs on top for that perfect crunch-to-soft contrast.

