The Ultimate Chocolate Coconut Cake Recipe
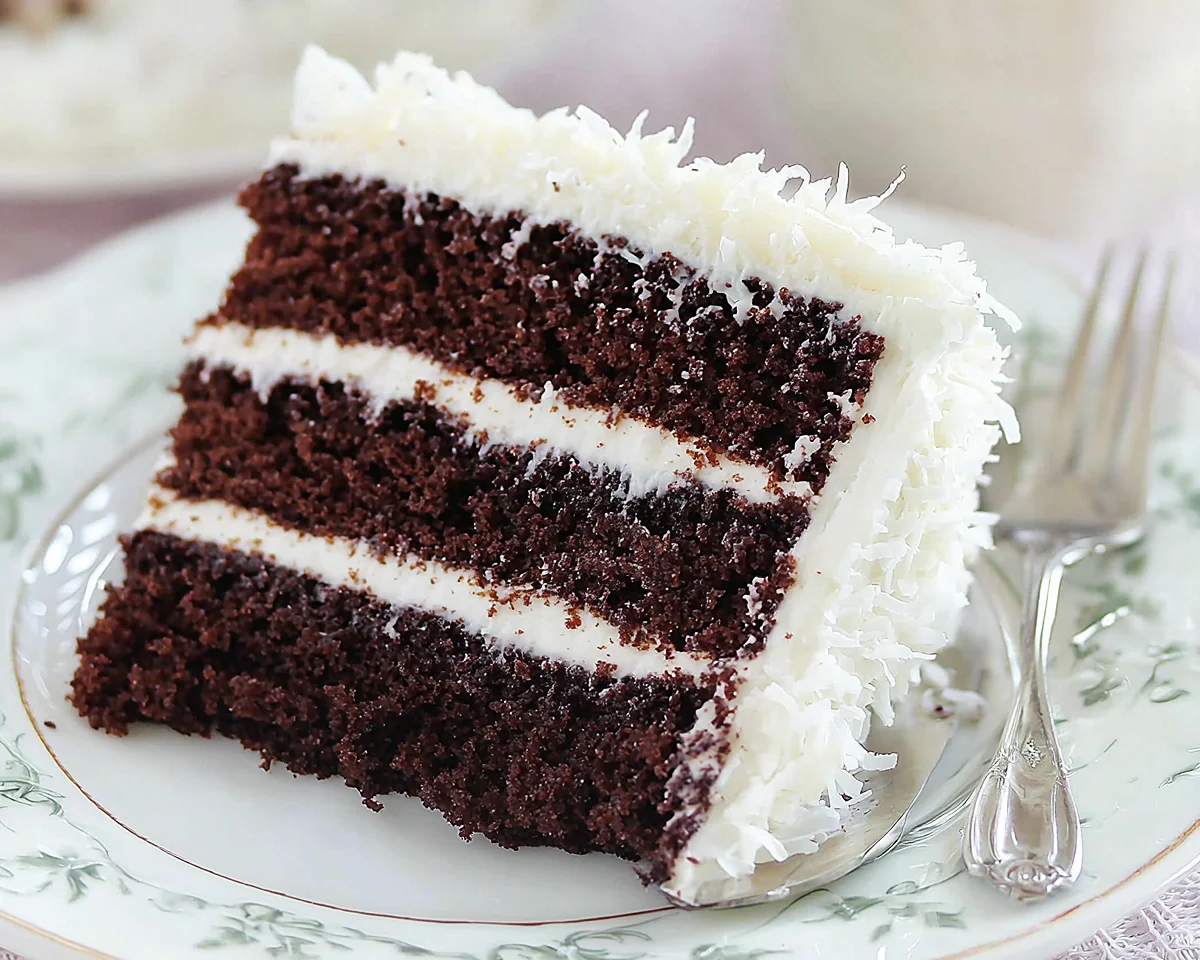
This chocolate coconut cake recipe delivers three moist layers with creamy coconut buttercream. Easy enough for beginners, impressive enough for any celebration!
This chocolate coconut cake recipe combines ultra-moist chocolate layers with dreamy coconut buttercream and toasted shredded coconut for texture that’ll make everyone ask for seconds. It’s the kind of Chocolate Coconut Cake Recipe that looks bakery-fancy but comes together easier than you’d think.
I’ll be honest—I stumbled onto this moist chocolate coconut cake by accident when I had leftover coconut from another project. One bite and I knew I’d found something special.
The cocoa powder creates this deep, almost fudgy crumb while the coconut buttercream adds a tropical sweetness that’s not too heavy. If you’re into chocolate-coconut combos, you’ve got to try my chocolate peanut butter mug cake too—different flavor profile, same “wow” factor.
Why You’ll Love This Chocolate Coconut Layer Cake
This chocolate coconut layer cake hits all the right notes:
- Ridiculously moist: That hot water trick keeps these layers tender for days
- Not too sweet: The natural cocoa balances the coconut buttercream perfectly
- Foolproof assembly: Even if you’re new to layer cakes, you’ve got this
- Make-ahead friendly: Bake the layers a day early and frost when you’re ready
- Crowd-pleaser guaranteed: I’ve never seen a slice left behind
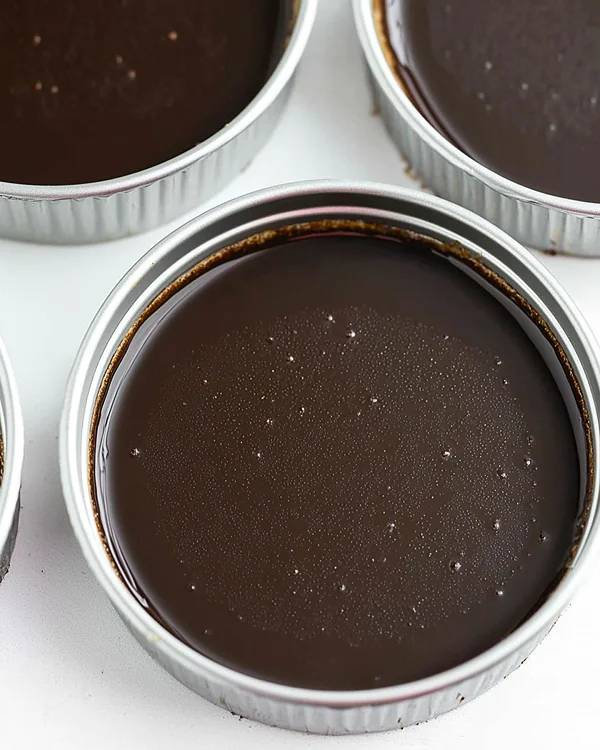
The first time I made this, I was nervous about the thin batter—it looks almost like hot chocolate before it goes in the oven! But trust the process.
According to King Arthur Baking Company, this higher liquid ratio creates steam during baking, which keeps chocolate cakes incredibly moist without being dense. I’ve tested this recipe at least a dozen times (my family wasn’t complaining), and it’s never let me down.
Table of Contents
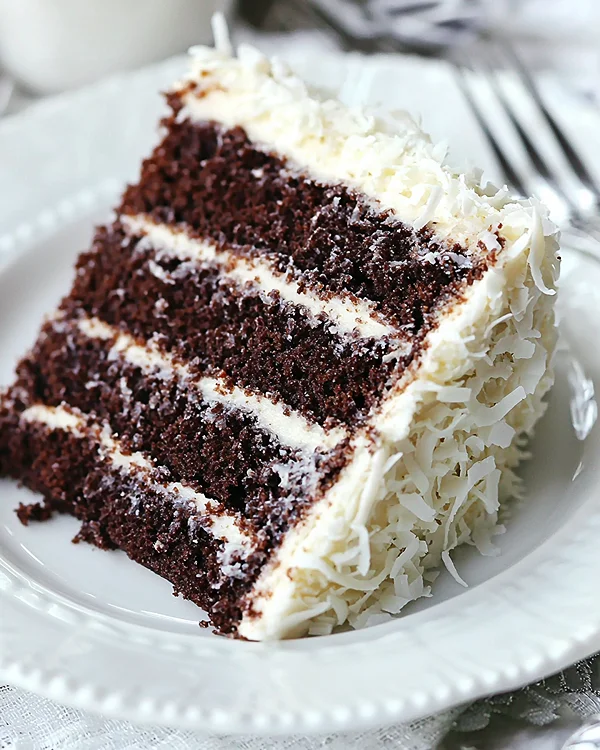
Nutritional Peek (Per Slice)
| Nutrient | Amount |
|---|---|
| Calories | 685 |
| Protein | 4g |
| Carbohydrates | 92g |
| Fat | 35g |
| Fiber | 2g |
| Sugar | 78g |
Based on 12 servings. These are indulgent slices, friends!
Ingredients for Your Easy Chocolate Coconut Cake
This easy chocolate coconut cake starts with pantry staples you probably already have. Here’s what you’ll need:
For the Chocolate Cake Layers
| Amount | Ingredient |
|---|---|
| 2 cups (260g) | all-purpose flour, measured correctly |
| 2 cups (414g) | granulated sugar |
| 3/4 cup (85g) | natural unsweetened cocoa powder |
| 2 tsp | baking soda |
| 1 tsp | salt |
| 2 large | eggs, room temperature |
| 1 cup (240ml) | whole milk |
| 1 cup (240ml) | vegetable oil |
| 1 1/2 tsp | vanilla extract |
| 1 cup (240ml) | hot water (not boiling, just hot from the tap) |
Pro tip: Use natural cocoa powder, not Dutch-processed. The acidity reacts with the baking soda to help the Chocolate Coconut Cake Recipe rise.
For the Coconut Buttercream
| Amount | Ingredient |
|---|---|
| 2 1/2 cups (560g) | unsalted butter, room temperature |
| 10 cups (1150g) | powdered sugar, sifted |
| 1 tbsp | coconut extract (don’t skimp!) |
| 6–8 tbsp (90-120ml) | heavy cream |
| Pinch | salt |
| 1 1/2 cups (113g) | sweetened shredded coconut |
The coconut extract is your secret weapon here—it gives way more flavor than just the shredded coconut alone. I love McCormick’s version.
Equipment You’ll Need
Essential:
- Three 8-inch round cake pans
- Parchment paper
- Large mixing bowls
- Whisk and electric mixer
- Offset spatula for frosting
- Large serrated knife
Nice to Have:
- Cake turntable (makes frosting so much easier)
- Piping bag with Ateco tip 808
- Cardboard cake round for stability
Step-by-Step Instructions for This Chocolate Coconut Cake Recipe
Let’s walk through this chocolate coconut cake recipe together—I promise it’s more straightforward than it looks!
Making the Chocolate Layers
Step 1: Fire up your oven to 300°F (148°C). Yes, that’s lower than most Chocolate Coconut Cake Recipe recipes—it’s intentional! The gentle heat keeps everything moist. Line three 8-inch pans with parchment circles and grease the sides generously. (I use butter and then dust with cocoa powder for extra insurance against sticking.)
Step 2: In your largest bowl, whisk together the flour, sugar, cocoa powder, baking soda, and salt. Make sure there aren’t any cocoa lumps—nobody wants a surprise bitter pocket in their slice.
Step 3: Pour in the eggs, milk, and vegetable oil. Mix with a hand mixer on medium until everything’s combined and smooth, about 2 minutes. The batter will look thick and fudgy at this point.
Step 4: Here’s the magic moment—stir your vanilla into the hot water, then slowly pour it into the batter while mixing. Watch it transform into something that looks concerningly thin. (First time I made this, I literally texted my friend asking if I’d messed up. I hadn’t!)
Step 5: Divide the batter evenly between your three pans. I use a kitchen scale to be precise—about 570g per pan. Slide them into the oven for 30-33 minutes. You’ll know they’re done when a toothpick comes out with just a few moist crumbs clinging to it. Don’t overbake or you’ll lose that gorgeous moisture.
Step 6: Let the cakes cool in their pans for 10 minutes (use a timer—patience is hard, I know), then turn them out onto cooling racks. They need to be completely cool before frosting, so this is your chance to clean up or make the buttercream.
Whipping Up the Coconut Buttercream
Step 7: Beat your room-temperature butter until it’s smooth and fluffy, about 3 minutes. Cold butter will give you lumpy frosting, so if yours is still firm, give it a few more minutes.
Step 8: Add half the powdered sugar (5 cups) and mix on low until it’s incorporated, then turn it up to medium-high and beat until smooth. Scrape down the bowl—there’s always butter hiding on the sides.
Step 9: Pour in the coconut extract, 3 tablespoons of cream, and that pinch of salt. Mix until it’s dreamy and smooth. Taste it. Go ahead, I won’t judge.
Step 10: Gradually add the remaining powdered sugar, mixing on low first to avoid a sugar cloud in your kitchen. Once it’s all in, beat on medium-high until fluffy. If it seems too thick to spread easily, add more cream one tablespoon at a time until you hit that perfect spreadable consistency.
Assembling Your Masterpiece
Step 11: Use a long serrated knife to carefully slice off any domed tops from your Chocolate Coconut Cake Recipe layers. These cakes don’t dome much, but I like perfectly flat layers. (Save those scraps for “quality control” snacking.)
Step 12: Place your first layer on a cake stand or serving plate. If you’re using a cardboard round, put it down first—it makes moving the finished cake so much easier. Spread about 1 cup of buttercream across the top, going right to the edges.
Step 13: Gently place the second layer on top and repeat with another cup of buttercream. Top with your final layer, bottom-side up for the flattest top possible.
Step 14: Now for the crumb coat—spread a thin layer of frosting all over the outside of the cake. This traps any loose crumbs. Pop it in the fridge for 15-20 minutes to firm up, then apply your final, thick layer of frosting. Use an offset spatula and a turntable if you have one.
Step 15: Immediately press the shredded coconut onto the sides and top of the cake. Work quickly before the frosting starts to crust over—I learned this the hard way when coconut kept falling off my first attempt!
Step 16: If you want those pretty swirls on top, fill a piping bag fitted with a large star tip (I use Ateco 808) with the remaining buttercream and pipe decorative rosettes around the top edge.
Pro Tips & Guidance
This moist chocolate coconut cake practically bakes itself, but here are some hard-won lessons:
- Measure flour correctly: Spoon it into your measuring cup and level it off. Scooping directly from the bag packs in way too much flour and you’ll end up with dry cake.
- Don’t skip the hot water: I know the thin batter looks wrong, but that’s what creates the incredible crumb structure.
- Room temperature matters: Your eggs and butter should be at room temperature. Cold ingredients don’t emulsify properly, and you’ll taste the difference.
- Toast your coconut: For extra flavor, spread the shredded coconut on a baking sheet and toast it at 325°F for 5-7 minutes, stirring often, until golden. Let it cool completely before pressing it onto the cake.
- The crumb coat is your friend: That thin first layer of frosting makes the final coat so much smoother and more professional-looking.
According to The Spruce Eats, the combination of baking soda with acidic ingredients like natural cocoa powder creates a chemical reaction that helps chocolate cakes rise beautifully while staying tender. It’s kitchen science that actually works!
Troubleshooting Guide
Batter looks too thin: Don’t panic! This is completely normal for this recipe. The thin consistency is what makes the cake so moist.
Cakes stuck in pans: Next time, make sure you grease really well and let them cool the full 10 minutes before attempting to remove them. If they do stick, run a thin knife around the edges and try again.
Buttercream is too soft: Pop it in the fridge for 10-15 minutes, then beat it again. If it’s a hot day, you might need to chill it a couple times while frosting.
Coconut won’t stick: The frosting has probably crusted over. Add a tiny bit more buttercream to the area and press the coconut in immediately.
Layers sliding around: Freeze the assembled cake for 20 minutes before the final frosting. The cold buttercream between layers will help everything stay put.
Variations & Twists
Start with this chocolate coconut layer cake base and make it your own:
Chocolate Coconut Almond Cake: Add 1/2 teaspoon almond extract to both the cake batter and frosting. Sprinkle toasted sliced almonds on top with the coconut.
Mint Chocolate Coconut: Replace the coconut extract with peppermint extract in the frosting. Add a few drops of green food coloring if you’re feeling festive.
Raspberry Coconut Chocolate Cake: Spread a thin layer of raspberry jam between each cake layer before adding the buttercream. The tartness cuts through the richness beautifully.
Gluten-Free Version: Swap the all-purpose flour for a 1:1 gluten-free baking blend. I’ve had success with Bob’s Red Mill.
Vegan Adaptation: Use flax eggs (1 tbsp ground flaxseed + 3 tbsp water per egg), plant-based milk, and vegan butter. The texture is slightly different but still delicious.
For a completely different chocolate experience, try my chocolate cake with peanut butter frosting—it’s got that same moist crumb with a salty-sweet twist.
Serving, Storage & Reheating
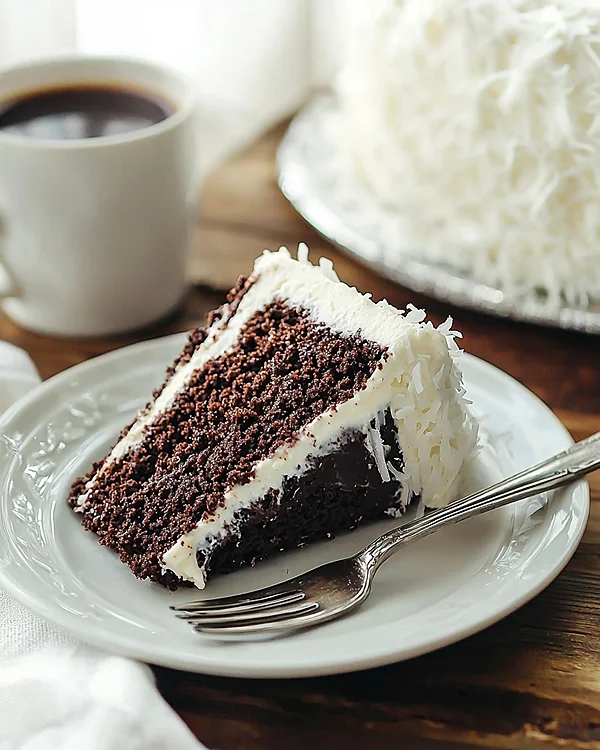
This easy chocolate coconut cake serves 12-14 people (or fewer if you’re cutting generous slices, which I always do).
Serving: Let the cake come to room temperature before serving—cold buttercream loses its creamy texture. I usually take it out of the fridge about an hour before slicing.
Storage: Keep it in an airtight container or cake dome at room temperature for up to 24 hours. After that, refrigerate it to keep the buttercream from getting too soft. It’ll stay fresh for 4-5 days in the fridge.
Reheating: I don’t recommend microwaving slices (it melts the frosting into a mess), but you can let individual slices sit at room temperature for 20-30 minutes before eating.
Freezing: Wrap unfrosted cake layers tightly in plastic wrap, then foil, and freeze for up to 3 months. Thaw in the fridge overnight before assembling. You can also freeze the whole frosted cake—just let it firm up in the freezer uncovered first, then wrap it.
No-Waste Kitchen Magic
Don’t toss those cake scraps and extra coconut! Here’s how to use every bit:
Cake Trimmings: Crumble them up and layer in parfait glasses with whipped cream and fresh berries for easy trifles. Or pulse them in a food processor to make cake crumbs for coating homemade truffles.
Extra Buttercream: Pipe it onto graham crackers for quick coconut sandwich cookies. Or spread it between two chocolate chip cookies. It’ll keep in the fridge for a week or freezer for three months.
Leftover Shredded Coconut: Toast it and sprinkle over oatmeal, yogurt, or ice cream. It also makes a great topping for brownies or mixed into granola.
Extra Frosted Cake: Cut into small squares, stick a lollipop stick in each one, and freeze for DIY cake pops. Dip in melted chocolate if you’re feeling extra.
Chocolate Coconut Cake Recipe FAQs
Can I freeze this chocolate coconut cake recipe?
Absolutely! Freeze unfrosted layers wrapped tightly for up to 3 months. The whole frosted cake can be frozen too—let it firm up first, then wrap well. Thaw overnight in the fridge before serving.
How do I make this chocolate coconut layer cake ahead of time?
Bake the layers up to 2 days ahead and store them wrapped at room temperature. Make the buttercream the day before and keep it refrigerated, then bring to room temperature and re-whip before using. Assemble the cake the day you plan to serve it for best results.
Can I use a different size pan for this moist chocolate coconut cake?
Sure! Two 9-inch pans will work—bake for 35-38 minutes. For a sheet cake, use a 9×13 pan and bake for 35-40 minutes. Adjust the frosting amounts accordingly (you’ll need less for a sheet cake).
What’s the best cocoa powder for this recipe?
Natural unsweetened cocoa powder works best because its acidity reacts with the baking soda. Don’t use Dutch-processed cocoa—it’s alkaline and won’t give you the same rise or texture.
My buttercream is too sweet. Can I reduce the sugar?
You can reduce the powdered sugar to 8 cups for a less sweet frosting, but you may need to add a bit more cream to maintain the right consistency. The pinch of salt also helps balance the sweetness.
Can I make this easy chocolate coconut cake in cupcake form?
Yes! Fill cupcake liners 2/3 full and bake at 325°F for 18-22 minutes. This recipe makes about 30-36 cupcakes. Top with the same coconut buttercream and pressed coconut.
A Slice of Heaven Awaits
There’s something really special about this chocolate coconut cake recipe—maybe it’s the way the moist chocolate layers contrast with that fluffy coconut frosting, or how impressive it looks considering how straightforward it is to make. Either way, every time I bring this cake somewhere, people ask for the recipe.
I’d love to see your creation! Drop a comment below with how yours turned out, any tweaks you made, or questions you have. And if you snap a photo, tag me so I can cheer you on—there’s nothing I love more than seeing your baking wins.
Looking for more chocolate magic? Don’t miss my chocolate orange cake recipe—it’s got that same wow factor with a citrus twist.
Baked with love by Rebeccah Ellene.
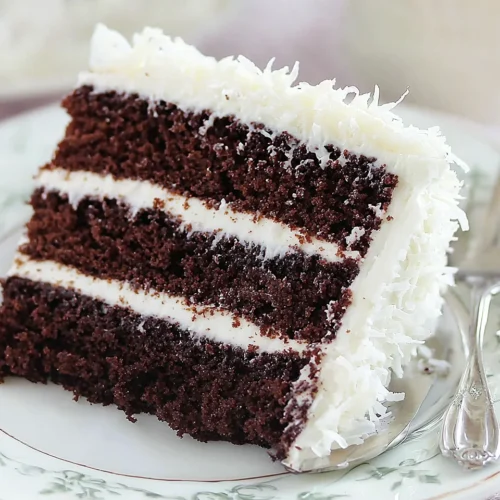
The Ultimate Chocolate Coconut Cake
Equipment
- Three 8-inch round cake pans
- Large mixing bowls
- Whisk
- Electric mixer
- Offset spatula
- Large serrated knife
- Cake turntable
- Piping bag with Ateco tip 808
- Cardboard cake round
Ingredients
For the Chocolate Cake Layers
- 2 cups all-purpose flour 260g, measured correctly
- 2 cups granulated sugar 414g
- ¾ cup natural unsweetened cocoa powder 85g
- 2 tsp baking soda
- 1 tsp salt
- 2 large eggs room temperature
- 1 cup whole milk 240ml
- 1 cup vegetable oil 240ml
- 1 ½ tsp vanilla extract
- 1 cup hot water 240ml, not boiling
For the Coconut Buttercream
- 2 ½ cups unsalted butter 560g, room temperature
- 10 cups powdered sugar 1150g, sifted
- 1 tbsp coconut extract
- 6-8 tbsp heavy cream 90-120ml
- 1 pinch salt
- 1 ½ cups sweetened shredded coconut 113g
Instructions
- Preheat your oven to 300°F (148°C). Line three 8-inch round cake pans with parchment paper circles and grease the sides generously with butter, then dust with cocoa powder for extra insurance against sticking.
- In your largest bowl, whisk together the flour, sugar, cocoa powder, baking soda, and salt. Make sure there aren’t any cocoa lumps.
- Pour in the eggs, milk, and vegetable oil. Mix with a hand mixer on medium until everything’s combined and smooth, about 2 minutes.
- Stir your vanilla into the hot water, then slowly pour it into the batter while mixing. The batter will look very thin – this is normal and creates the moist texture.
- Divide the batter evenly between your three pans (about 570g per pan if using a scale). Bake for 30-33 minutes, or until a toothpick comes out with just a few moist crumbs clinging to it.
- Let the cakes cool in their pans for 10 minutes, then turn them out onto cooling racks to cool completely before frosting.
- To make the buttercream, beat the room-temperature butter until smooth and fluffy, about 3 minutes.
- Add half the powdered sugar (5 cups) and mix on low until incorporated, then turn to medium-high and beat until smooth. Scrape down the bowl.
- Pour in the coconut extract, 3 tablespoons of cream, and the pinch of salt. Mix until smooth and creamy.
- Gradually add the remaining powdered sugar, mixing on low first to avoid a sugar cloud. Once incorporated, beat on medium-high until fluffy. Add more cream one tablespoon at a time if needed for spreadable consistency.
- Use a long serrated knife to carefully slice off any domed tops from your cake layers to create flat surfaces.
- Place your first layer on a cake stand or serving plate. Spread about 1 cup of buttercream across the top, going right to the edges.
- Gently place the second layer on top and repeat with another cup of buttercream. Top with your final layer, bottom-side up.
- Apply a thin crumb coat of frosting all over the outside of the cake. Refrigerate for 15-20 minutes to firm up, then apply your final thick layer of frosting.
- Immediately press the shredded coconut onto the sides and top of the cake before the frosting crusts over.
- If desired, fill a piping bag fitted with a large star tip with remaining buttercream and pipe decorative rosettes around the top edge.

