The Easiest Oreo Mug Cake (2 Ingredients!)
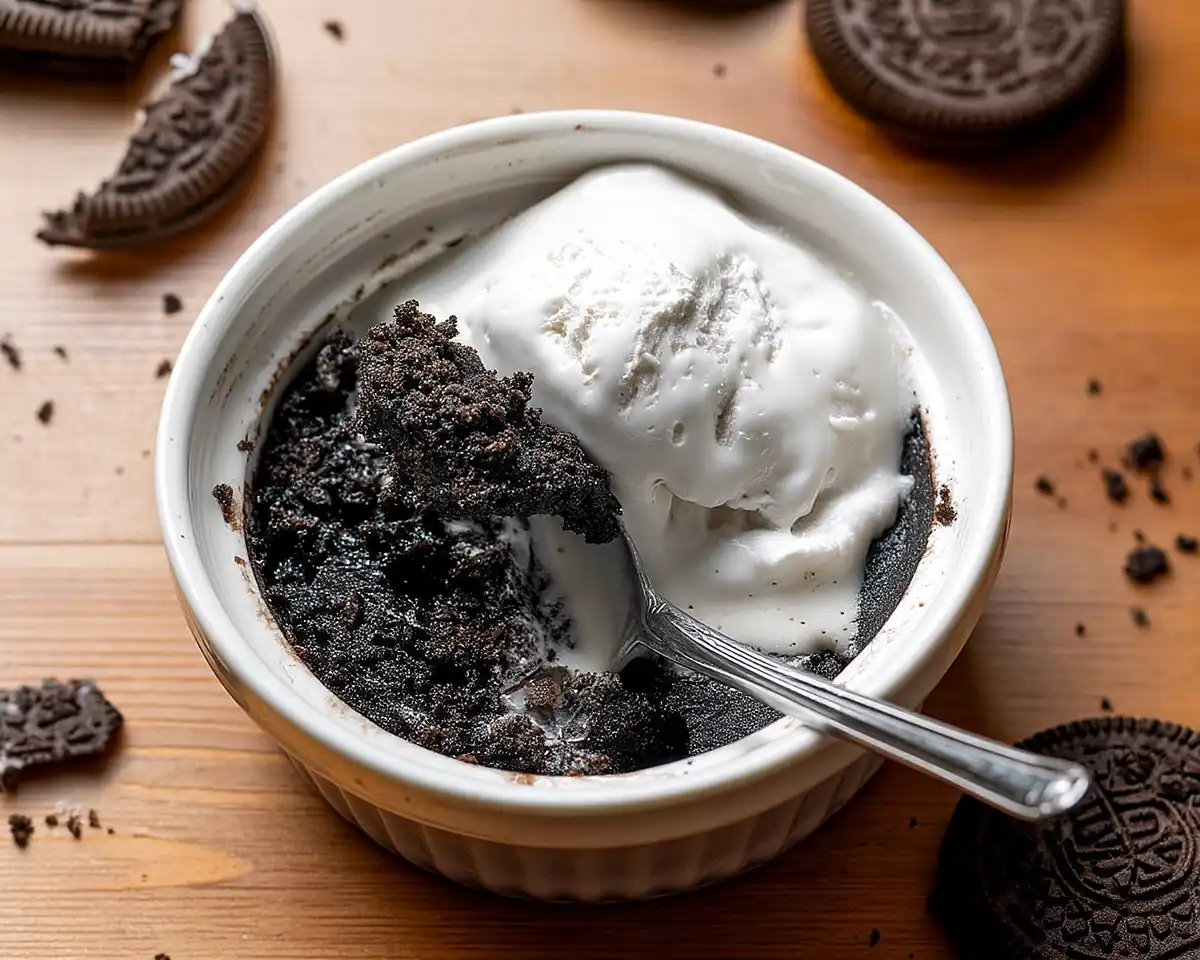
This Oreo Mug Cake (2 Ingredients!) is ready in 90 seconds! Rich, fudgy, and ridiculously easy—your new favorite microwave dessert for those late-night cravings.
What Makes This Recipe Special
This Oreo mug cake transforms just six cookies and a splash of milk into a warm, gooey dessert that’s ready before you can finish scrolling TikTok. It’s the kind of 2 ingredient mug cake that feels like cheating—but in the best possible way.
I’ll be honest: this recipe was born from a midnight craving and a nearly empty pantry. Standing in my kitchen at 11 PM, staring at a pack of Oreos, I thought, “There’s gotta be a way.” Turns out, there absolutely is.
This easy microwave dessert has become my go-to when I need something sweet right now—no mixer, no oven preheating, no judgment.
If you’re into single-serving treats that don’t require a culinary degree, you’ll probably obsess over my Chocolate Peanut Butter Mug Cake too.
Table of Contents
Why You’ll Love This Oreo Mug Cake (2 Ingredients!)
This 2 ingredient mug cake is about to become your new best friend, and here’s why:
- Lightning fast – From craving to eating in under two minutes
- No fancy ingredients – If you’ve got Oreos and milk, you’re golden
- Perfectly portioned – One serving means no leftover temptation (or total freedom to make two)
- Foolproof – I mean it. If you can stir, you can nail this
- Customizable – Add chocolate chips, peanut butter, a pinch of sea salt—go wild
I’ve made this recipe approximately 47 times (not that I’m counting), and it’s saved me from ordering overpriced delivery desserts more times than I’d like to admit.
According to King Arthur Baking, mug cakes work because the microwave rapidly heats the moisture in the batter, creating steam that makes the cake rise quickly—basically kitchen science doing its thing while you wait impatiently with a spoon.
My favorite version? Made at 10 PM on a Wednesday, topped with vanilla ice cream that melts into every chocolatey crevice. Pure bliss.
Nutritional Peek
Here’s what you’re getting per serving (because sometimes we like to know):
| Nutrient | Per Serving |
|---|---|
| Calories | 285 |
| Protein | 6g |
| Carbs | 42g |
| Fat | 11g |
Oreo Mug Cake (2 Ingredients!) Ingredients
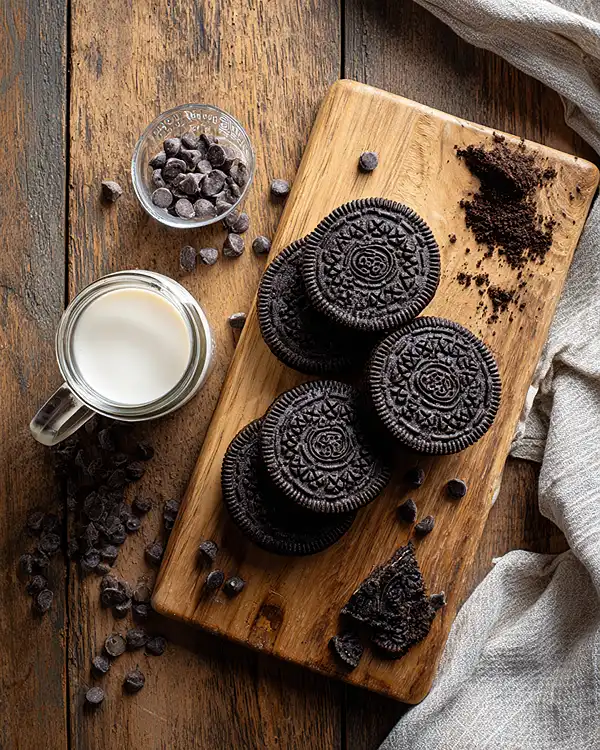
Making an Oreo mug cake really is this simple—you probably have everything already.
| Amount | Ingredient |
|---|---|
| 6 cookies | Oreo cookies (regular or your favorite flavor—Birthday Cake Oreos? Yes, please!) |
| ¼ cup (63 ml) | Milk of choice (I use oat milk, but anything works—even the dairy-free stuff) |
| Optional | |
| 2 Tablespoons | Semisweet chocolate chips (because more chocolate is never wrong) |
A few friendly notes: The milk is what brings everything together and creates that cake-like texture, so don’t skip it. And honestly? Those chocolate chips are technically optional, but they add melty pockets of chocolate that make this feel extra special. Totally worth it.
For more quick dessert ideas using pantry staples, check out my Chocolate Oatmeal No Bake Cookies—another lifesaver recipe.
Equipment You’ll Need
Essential:
- One microwave-safe mug or ramekin (8-12 oz works great)
- A fork for breaking up cookies
- A spoon for stirring and eating
Optional but helpful:
- Oven-safe ramekin (if you’re going the baking route)
- A knife if you prefer chopping the cookies first
How to Make the Perfect Oreo Mug Cake
Making this 2 ingredient mug cake is honestly easier than convincing yourself you don’t need dessert (spoiler: you do need it).
Step 1: Grab your mug or ramekin and add those 6 Oreos. Use your fork to break them into smaller chunks—they don’t need to be crumbs, just bite-sized pieces. If your mug is on the smaller side, chop them up on a cutting board first to avoid cookie shrapnel flying everywhere. Trust me on this one.
Step 2: Pour in that ¼ cup of milk and stir everything together until it’s completely combined. It’s going to look chunky and weird—that’s exactly what you want. The cookies will soften as they soak up the milk.
Step 3: If you’re team chocolate chips (and why wouldn’t you be?), stir them in now. They’ll get all melty and wonderful.
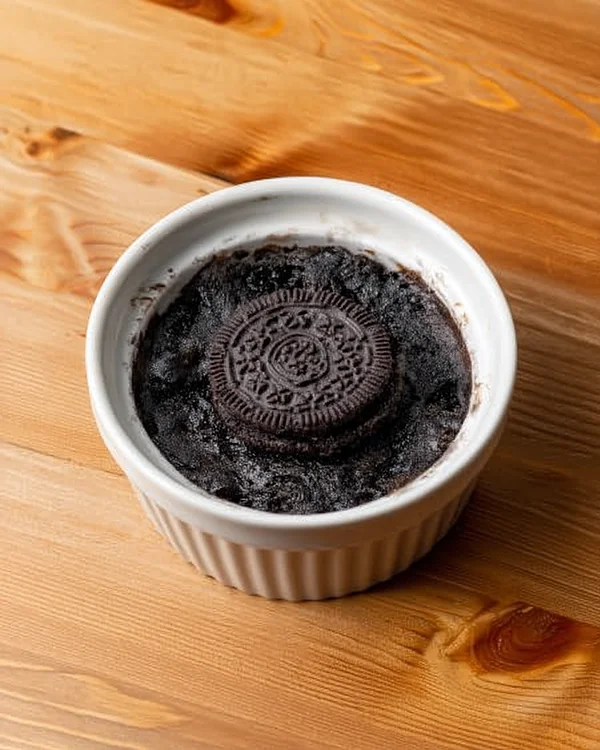
For the Microwave Method: Pop your mug in the microwave and cook for 45-90 seconds. Start with 45 seconds and check it—if the top still looks really wet, give it another 15-20 seconds. You want it to look just slightly under-cooked on top; it’ll continue cooking a bit as it sits.
(Every microwave has its own personality, so yours might need a little more or less time.)
For the Oven Method: Preheat your oven to 350°F and make sure you’re using an oven-safe ramekin. Bake for 20-30 minutes, until the top looks almost set but still slightly gooey in the center.
Step 4: Let it cool for a solid 5 minutes—I know waiting is torture, but molten mug cake burns are real. Then top with whipped cream, ice cream, or eat it straight from the mug like the dessert rebel you are.
Pro Tips for Mug Cake Success
This easy microwave dessert is seriously foolproof, but here are some tricks I’ve picked up:
- Don’t overmix – Stir just until combined. Overmixing can make it tough (though honestly, it’s still delicious).
- Size matters – An 8-12 oz mug is the sweet spot. Too small and it might overflow; too big and it’ll cook unevenly.
- The poke test – After microwaving, gently press the top with your finger. It should spring back slightly but still feel soft. That’s perfection.
- Undercook slightly – Mug cakes continue cooking after you take them out, so a slightly wet top becomes perfectly gooey after resting.
- Flavor experiments – Try mint Oreos, peanut butter Oreos, or even those chocolate hazelnut ones. They all work beautifully.
Serious Eats has a great breakdown of microwave baking science if you’re curious about what’s happening in there—basically, the microwave excites water molecules, creating steam that leavens the cake faster than conventional heat.
Troubleshooting Your Mug Cake
My mug cake is rubbery: You probably cooked it a touch too long. Next time, reduce the cooking time by 10-15 seconds. Remember, slightly under-cooked is way better than over-cooked.
It’s too dry: Add an extra splash of milk—literally just a tablespoon more. Sometimes cookies vary in moisture content, so yours might’ve needed that bit extra.
It overflowed in the microwave: No worries! Your mug was likely too small, or it cooked at too high a power. Try a bigger mug or reduce your microwave power to 80% next time.
It’s not cooked in the middle: Give it another 15 seconds in the microwave. Some microwaves have cold spots, so you might need to rotate it halfway through.
Fun Variations & Flavor Twists
Once you’ve mastered the classic Oreo mug cake, the world is your oyster:
Mix-in Magic:
- Swirl in a spoonful of Nutella or peanut butter before microwaving
- Add a pinch of espresso powder for a mocha vibe
- Sprinkle sea salt on top for salted chocolate perfection
- Stir in mini marshmallows for a s’mores situation
Dietary Swaps:
- Use any plant-based milk for a vegan version (with vegan Oreos, of course)
- Try gluten-free Oreos if you’re avoiding gluten
- Swap regular chocolate chips for dark, white, or butterscotch
Fancy Presentation: Unmold your cooled mug cake onto a plate, dust with powdered sugar, add a scoop of ice cream, and suddenly you’ve got restaurant-worthy plating. Nobody needs to know it took you 90 seconds.
For more creative cookie-based treats, my Viral Matcha Brookies are another must-try.
Serving, Storage & Reheating
Best served: Warm from the microwave with a generous scoop of vanilla ice cream melting on top, or a dollop of fresh whipped cream. Some people (me) also enjoy it with a drizzle of chocolate sauce because why not?
Storage: Honestly, this 2 ingredient mug cake is best eaten immediately—that’s kind of the whole point. But if you somehow have leftovers, cover the mug with plastic wrap and refrigerate for up to 1 day. Reheat for 20-30 seconds in the microwave.
Make-ahead tip: You can pre-break the Oreos and store them in a small container, then just add milk when you’re ready. Not much prep, but it shaves off 30 seconds when that craving hits.
No-Waste Kitchen Magic
Got leftover Oreos that have gone slightly stale? Perfect! They actually work great in this recipe since they’re getting softened by milk anyway. You can also:
- Crush extra cookies for a crunchy topping on ice cream
- Blend them into milkshakes
- Mix into brownie or cookie batter for extra texture
- Save the crumbs in a jar to sprinkle over yogurt or oatmeal
And that splash of leftover milk? Use it in your morning coffee or save it for tomorrow’s mug cake—because let’s be real, you’ll probably want another one.
Oreo Mug Cake (2 Ingredients!) FAQs
Can I freeze this Oreo mug cake?
Technically yes, but I really don’t recommend it. The texture changes and gets a bit soggy when thawed. Since it only takes 2 minutes to make fresh, there’s no reason to freeze it.
What if I don’t have a microwave?
No problem! The oven method works beautifully—just follow the instructions above using an oven-safe ramekin at 350°F for 20-30 minutes.
Can I make this with other cookies?
Absolutely! I’ve tried it with chocolate chip cookies, Nutter Butters, and even graham crackers mixed with cocoa powder. Adjust the milk slightly based on how dry your cookies are.
How do I know when my mug cake is done?
The top should look mostly set with just a slightly wet sheen. It’ll feel soft when you gently press it but shouldn’t be liquidy. Remember, it firms up as it cools.
Can I double the recipe?
You can, but I’d recommend making two separate mugs instead of one large one. It cooks more evenly that way, and honestly, everything tastes better in personal-sized portions.
Is this recipe really just 2 ingredients?
Yes! The chocolate chips are completely optional—the magic happens with just Oreos and milk. Everything else is just extra deliciousness.
Time to Dig In!
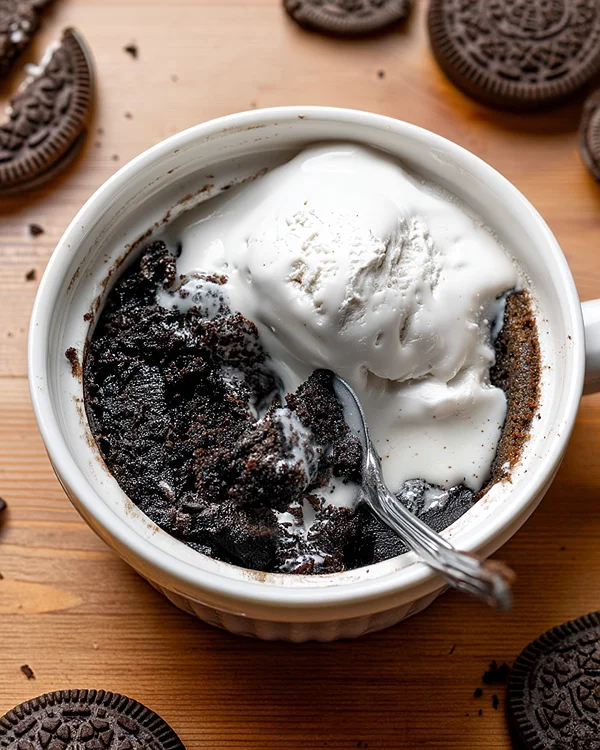
So there you have it—the simplest, most satisfying Oreo mug cake that’s saved countless late-night sweet tooth emergencies in my kitchen. There’s something magical about crushing cookies, adding milk, and watching them transform into warm, gooey cake right before your eyes.
I’d love to hear how yours turns out! Drop a comment below with your favorite mix-ins or tag your mug cake masterpiece on social media. Did you go classic or add a creative twist? Every version is the right version.
And if you’re on a single-serving dessert kick like me, definitely try my Chocolate Peanut Butter Mug Cake next—it’s just as easy and equally dangerous at midnight.
Now go make yourself that mug cake. You deserve it.
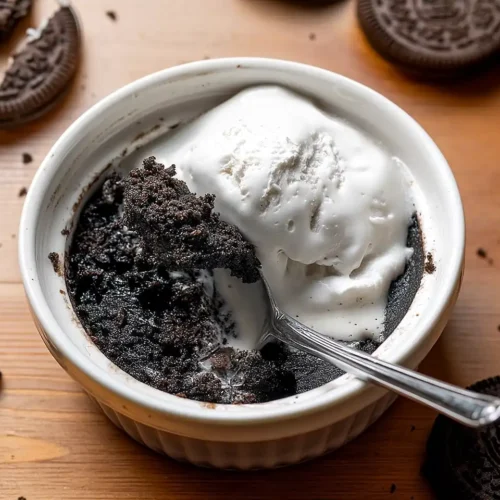
Oreo Mug Cake (2 Ingredients!)
Equipment
- Microwave-safe mug or ramekin (8-12 oz)
- fork
- Spoon
- Oven-safe ramekin (optional)
Ingredients
Main Ingredients
- 6 Oreo cookies regular or your favorite flavor
- ¼ cup milk of choice 63 ml, regular or vegan
Optional
- 2 tablespoons semisweet chocolate chips regular or vegan
Instructions
- Add the 6 Oreos to your mug or ramekin. Use your fork to break them into smaller chunks—they don’t need to be crumbs, just bite-sized pieces. If your mug is on the smaller side, chop them up on a cutting board first to avoid cookie shrapnel flying everywhere.
- Pour in that 1/4 cup of milk and stir everything together until it’s completely combined. It’s going to look chunky and weird—that’s exactly what you want. The cookies will soften as they soak up the milk.
- If you’re using chocolate chips, stir them in now. They’ll get all melty and wonderful.
- Microwave Method: Pop your mug in the microwave and cook for 45-90 seconds. Start with 45 seconds and check it—if the top still looks really wet, give it another 15-20 seconds. You want it to look just slightly under-cooked on top; it’ll continue cooking a bit as it sits.
- Oven Method: Preheat your oven to 350°F and make sure you’re using an oven-safe ramekin. Bake for 20-30 minutes, until the top looks almost set but still slightly gooey in the center.
- Let it cool for a solid 5 minutes—I know waiting is torture, but molten mug cake burns are real. Then top with whipped cream, ice cream, or eat it straight from the mug.


