No-Bake Biscoff Cheesecake Recipe
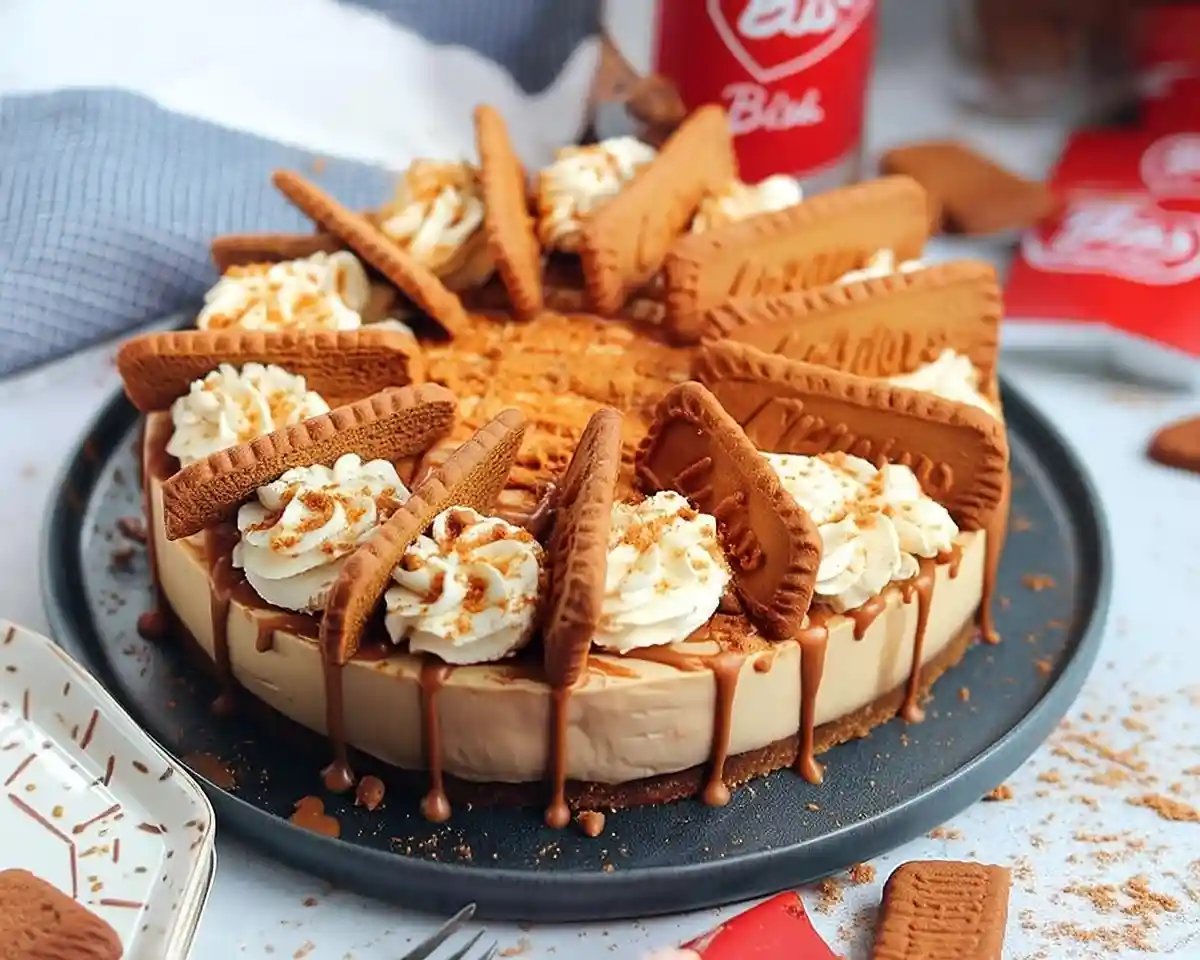
Indulge in this creamy no-bake Biscoff cheesecake with caramelized cookie butter swirls. No oven needed—just chill and devour this dreamy dessert!
What Makes This Biscoff Cheesecake Special?
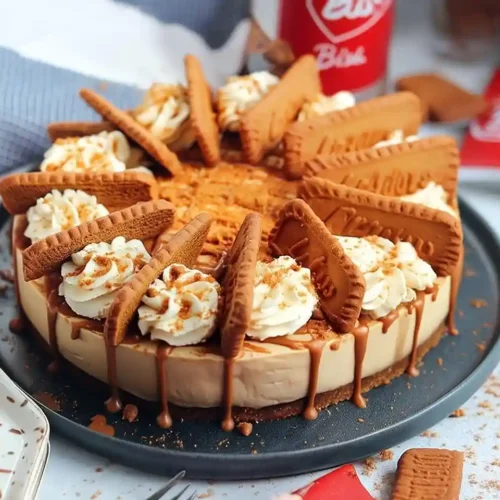
This biscoff cheesecake recipe no bake transforms buttery Lotus Biscoff cookies and silky cookie butter spread into a cloud-like cheesecake filling that tastes like caramelized heaven, with a crunchy spiced biscuit base and creamy whipped topping—no oven, no water bath, just pure indulgence.
I’ll be honest—I created this no bake biscoff cheesecake after a particularly disastrous attempt at a baked version that cracked like the Grand Canyon.
Sometimes our kitchen failures lead us to even better discoveries! The beauty of this dessert is its foolproof nature: you literally can’t overbake it because there’s no baking involved.
Love no-bake desserts? Our key lime pie with graham cracker crust uses a similar pressed-cookie base technique and requires zero oven time—just chill and serve!
Why You’ll Love This No-Bake Biscoff Cheesecake
This lotus biscoff cheesecake no bake will become your new party showstopper for several delicious reasons. First, there’s zero oven stress—perfect for summer when you can’t bear to heat up the kitchen.
Second, that distinctive caramelized Biscoff flavor weaves through every creamy bite, creating this magical balance between spiced cookie warmth and tangy cream cheese.
I’ve tested this recipe seventeen times (yes, really—my family didn’t complain). Each version taught me something new about achieving that perfect mousse-like texture without gelatin.
The no-bake method also means beginners can nail this on their first try. According to King Arthur Baking, no-bake cheesecakes rely on whipped cream for structure rather than eggs, which eliminates the risk of curdling or cracking that plagues traditional baked versions.
Plus, you can make this no bake cheesecake with biscoff spread a full day ahead, which means less last-minute stress when you’re hosting.
Table of Contents
No-Bake Biscoff Cheesecake
Equipment
- 8-inch springform pan
- Electric mixer
- mixing bowls
- rubber spatula
Ingredients
Biscuit Base
- 300 g Biscoff biscuits
- 125 g Unsalted butter melted
Cheesecake Filling
- 500 g Cream cheese full-fat
- 100 g Icing sugar
- 250 g Biscoff spread
- 1 tsp Vanilla extract
- 300 ml Double cream cold
Decoration
- 150 ml Double cream for topping
- 2 tbsp Icing sugar for whipped topping
- 75 g Biscoff spread melted for drizzle
- 8-10 Biscoff biscuits for garnish
Instructions
- Blitz Biscoff biscuits into fine crumbs using a food processor.
- Mix crumbs with melted butter until combined, then press firmly into the base of a springform pan.
- Beat cream cheese, icing sugar, vanilla, and Biscoff spread until smooth.
- Slowly add cold double cream and whip until thick and mousse-like.
- Spread the filling over the biscuit base and smooth the top.
- Chill for 5-6 hours, preferably overnight.
- Whip remaining cream with icing sugar and pipe on top. Drizzle melted Biscoff and add biscuit decorations.
Notes
Nutrition
Nutritional Information Per Slice
| Nutrient | Amount |
|---|---|
| Calories | 485 |
| Protein | 6g |
| Carbohydrates | 42g |
| Fat | 33g |
| Saturated Fat | 18g |
| Sugar | 28g |
Based on 12 servings
Ingredients You’ll Need
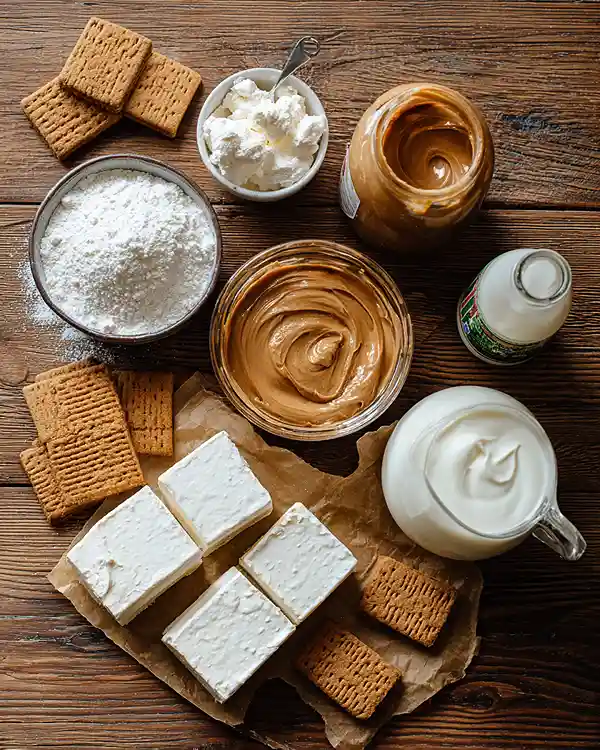
Let’s gather everything for this no bake biscoff cheesecake masterpiece. The ingredient list is surprisingly short, but each component plays a crucial role in creating that signature silky texture.
| Amount | Ingredient | Notes |
|---|---|---|
| 300g | Lotus/Biscoff biscuits | The classic ones with caramelized flavor—not the chocolate variety |
| 125g | Unsalted butter (melted) | Salted butter works too; just reduce any added salt |
| 500g | Cream cheese (full fat) | Must be full-fat for proper structure—low-fat will make it runny |
| 100g | Icing sugar | Also called powdered sugar or confectioners’ sugar |
| 250g | Biscoff spread (smooth or crunchy) | I prefer smooth for an even texture, but crunchy adds fun texture pops! |
| 1 tsp | Vanilla extract | Pure vanilla beats imitation every time |
| 300ml | Double cream | Heavy whipping cream in the US—must be cold! |
| 150ml | Double cream (decoration) | Optional but highly recommended |
| 2 tbsp | Icing sugar (decoration) | For sweetening whipped cream topping |
| 75g | Biscoff spread (decoration) | Melted for that gorgeous drizzle |
| 8-10 | Biscoff biscuits (decoration) | One per slice for visual wow factor |
Essential Equipment
Here’s what you’ll need to make this beauty happen:
Must-Have Tools:
- 8-inch (20cm) deep springform tin
- Food processor or blender
- Electric mixer (stand mixer or handheld)
- Mixing bowls (medium and large)
- Rubber spatula
- Measuring cups and spoons
Nice-to-Have Items:
- Piping bag with star nozzle for decoration
- Offset spatula for smooth sides
- Cake turntable for easier decorating
Want to master more pie and cheesecake techniques? Our complete guide to homemade pies covers everything from crust fundamentals to filling secrets for both baked and no-bake versions.
Step-by-Step Instructions
Making this biscoff cheesecake recipe no bake is honestly easier than you’d think. Let’s walk through it together, and I promise you’ll feel like a dessert genius by the end!
Preparing the Biscuit Base
- Blitz those biscuits. Toss all 300g of Lotus Biscoff biscuits into your food processor and pulse until they transform into fine golden crumbs that resemble wet sand. You want no large chunks—they’ll make your base uneven and crumbly.
- Mix with melted butter. Pour the 125g melted butter over those crumbs and pulse again (or stir vigorously with a fork) until every crumb is coated and the mixture holds together when you squeeze it. It should look like damp sand that clumps easily.
- Press into the tin. Dump the buttery crumb mixture into your springform tin and press down firmly with the back of a spoon or the flat bottom of a glass. Really pack it down—weak pressure creates a crumbly base that falls apart when sliced. Don’t forget to press slightly up the sides (about 1cm) for a professional look.
Creating the Cheesecake Filling
- Beat the cream cheese mixture. Add the 500g cream cheese, 1 tsp vanilla extract, 100g icing sugar, and 250g Biscoff spread to your mixer bowl. Beat on medium speed for 2-3 minutes until completely smooth with no lumps—any lumps now will stay in your finished cheesecake, and nobody wants that surprise texture.
- Incorporate the double cream slowly. Pour in the 300ml cold double cream and switch to low speed. Whisk gently and steadily, increasing to medium only once it starts thickening—rushing this step creates butter instead of fluffy filling!
- Spread over the base. Gently dollop the filling over your biscuit base and use a spatula to spread it evenly to all edges. Smooth the top as best you can—it doesn’t need to be perfect since you’ll decorate it later.
The Waiting Game
- Chill thoroughly. Cover the tin with plastic wrap (don’t let it touch the surface) and refrigerate for at least 5-6 hours, though overnight is genuinely better. The cheesecake needs this time for the cream to fully set and the flavors to meld together into that signature Biscoff magic.
Final Decorating Touches
- Release from the tin. Run a thin knife around the edge of the chilled cheesecake to loosen it, then carefully release the springform clasp. The sides should pull away cleanly if you pressed the base firmly enough.
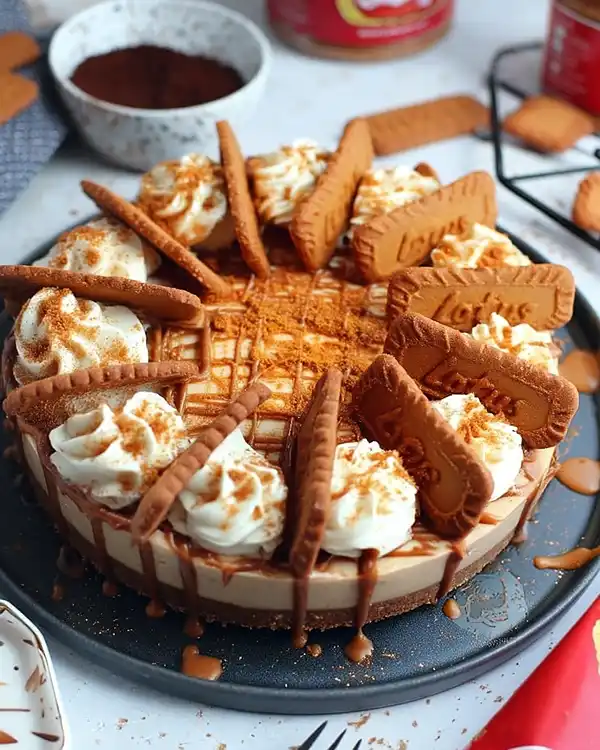
- Whip the topping cream. In a clean bowl, whisk together the 150ml double cream and 2 tbsp icing sugar until you get soft peaks that gently fold over. Pipe this in decorative swirls around the edge using a star nozzle, or simply dollop it casually with a spoon for a rustic look.
- Drizzle and garnish. Melt the 75g Biscoff spread in the microwave for 15-20 seconds until pourable but not hot. Drizzle it artistically over the cream (I use a teaspoon for controlled drips). Press one whole Biscoff biscuit into each cream rosette so guests know exactly what flavor adventure awaits them.
Pro Tips for Cheesecake Perfection
Getting your no bake biscoff cheesecake absolutely perfect requires a few insider tricks I’ve learned through trial and error (mostly error, if I’m being honest).
Temperature matters tremendously. Let your cream cheese sit at room temperature for 30-45 minutes before mixing—cold cream cheese creates lumps that refuse to disappear no matter how long you beat it. Room-temperature ingredients incorporate more evenly, creating a stable emulsion.
According to America’s Test Kitchen, ingredients at the same temperature (within 10°C) blend smoothly because the fat molecules distribute evenly throughout the mixture, while cold ingredients can cause the batter to break and develop a grainy texture that ruins the silky mouthfeel.
Don’t overwhip the cream. When adding double cream to the cream cheese mixture, keep your mixer on low to medium speed and watch carefully.
The second it holds stiff peaks, stop immediately—overwhipped cream turns grainy and eventually becomes butter, which will ruin your light, mousse-like texture.
Press the base properly. A weak biscuit base crumbles when you cut slices, creating a messy presentation. Use serious pressure with the back of a measuring cup to really compress those buttery crumbs into a solid foundation.
Chill overnight if possible. While 5-6 hours works technically, overnight chilling allows the Biscoff flavor to infuse throughout the cream cheese and creates an even firmer, sliceable texture. Patience genuinely pays off here.
What If Something Goes Wrong?
Why is my cheesecake filling too runny? You likely didn’t whip the double cream to stiff peaks, or your cream cheese was too cold to incorporate properly. Pop it back in the fridge for a few extra hours—it might firm up as it chills. If it’s still soft after 12 hours, the cream wasn’t whipped enough.
What if my biscuit base won’t hold together? You probably need more melted butter—the mixture should feel slightly wet and hold its shape when squeezed. Add another tablespoon of melted butter and mix well before pressing again.
Can I fix a cracked or messy top? Absolutely! That’s the beauty of the whipped cream decoration—it hides all imperfections. Pipe generous swirls all over the top, and nobody will ever know what’s underneath.
Why won’t my cheesecake release from the tin cleanly? The filling might have stuck to the sides. Always run a thin knife around the edge before releasing the springform—warm the knife under hot water for even easier release.
Creative Variations to Try
This lotus biscoff cheesecake no bake is incredibly versatile once you master the basic technique. Here are some flavor twists I absolutely love!
Salted caramel Biscoff. Swirl 3 tablespoons of salted caramel sauce through the filling before chilling, creating beautiful marbled ribbons. Add a pinch of sea salt flakes on top for that sweet-salty magic.
Chocolate Biscoff fusion. Replace 100g of the cream cheese with melted dark chocolate (cooled slightly) for a mocha-meets-cookie-butter situation that’s dangerously addictive.
Nutella swirl version. Dollop spoonfuls of Nutella over the filling and use a knife to create swirl patterns before chilling. This creates a gorgeous marbled effect with complementary hazelnut notes.
Gluten-free adaptation. Substitute gluten-free digestive biscuits for the Biscoff cookies in the base, and ensure your Biscoff spread is certified gluten-free. The filling naturally contains no gluten.
For another game-changing dessert with a unique twist, try our Milk Bar pumpkin pie recipe that reimagines classic flavors with modern techniques.
How Should I Serve and Store This?
Serving suggestions: This no bake cheesecake with biscoff spread slices beautifully when properly chilled. Use a long, sharp knife dipped in hot water and wiped clean between each cut for professional-looking slices.
Serve it cold straight from the fridge—the contrast between the cold creamy filling and room temperature is perfect.
Storage guidelines: Cover the whole cheesecake tightly with plastic wrap or store individual slices in airtight containers in the refrigerator for up to 5 days. The texture actually improves on day two as the flavors meld together even more deeply.
Can you freeze it? Yes! Wrap individual slices tightly in plastic wrap, then aluminum foil, and freeze for up to 2 months. Thaw overnight in the refrigerator before serving—never at room temperature, which creates condensation and makes it soggy.
Zero-Waste Kitchen Ideas
Biscuit crumbs leftover? Sprinkle them over ice cream, yogurt parfaits, or blend them into your morning smoothie for a cookie butter flavor boost.
Extra Biscoff spread in the jar? Swirl it into brownies, spread it on toast with sliced bananas, or thin it with a little milk to create an instant coffee syrup. I also love freezing tablespoon-sized dollops on parchment paper to drop into hot chocolate.
Leftover double cream? Whip it with a touch of sugar for fresh berries, make homemade butter by overwhipping it deliberately, or freeze it in ice cube trays to drop into soups and sauces later.
Your Questions Answered
Can I make this biscoff cheesecake recipe no bake ahead of time?
Absolutely! This dessert actually benefits from advance preparation. Make it 1-2 days before serving and store it covered in the refrigerator. Add the whipped cream decoration and Biscoff drizzle just before serving for the freshest look.
What’s the best substitute for Biscoff spread in this recipe?
Cookie butter from Trader Joe’s or Speculoos spread work identically since they’re essentially the same product. In a pinch, you could blend Biscoff cookies with a little vegetable oil until smooth, though the texture won’t be quite as creamy.
How do I prevent my no-bake cheesecake base from getting soggy?
Make sure you press the buttery crumb base firmly and evenly—loose crumbs create gaps where moisture can seep in. Also, ensure the base is completely cooled to room temperature before adding the filling, and always store the finished cheesecake in the refrigerator, never at room temperature.
Why did my filling turn out grainy instead of smooth?
This usually happens when the cream cheese is too cold or contains lumps that weren’t beaten out properly. Always soften cream cheese to room temperature and beat it thoroughly before adding other ingredients. If you notice graininess developing, it’s often from overwhipped cream that’s starting to turn to butter.
Time to Dig In!
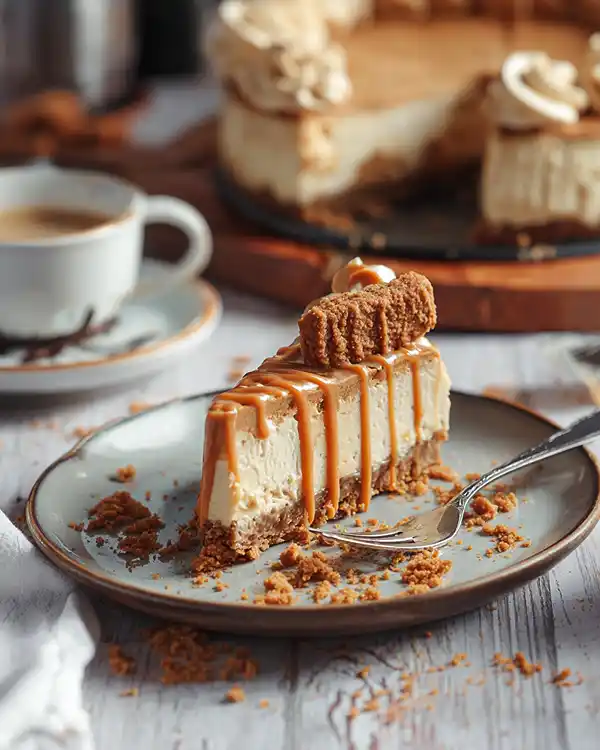
There you have it—the ultimate biscoff cheesecake recipe no bake that’ll make you look like a dessert wizard without breaking a sweat (or heating up your oven). That creamy, caramelized cookie butter filling nestled on a crunchy Biscoff base is honestly the stuff dreams are made of.
I’d absolutely love to see your creations! Drop a comment below with how yours turned out, any creative variations you tried, or questions if you hit a snag.
Baked with love by Rebeccah Ellene 🍰

