Fresh Peach and Raspberry Pie
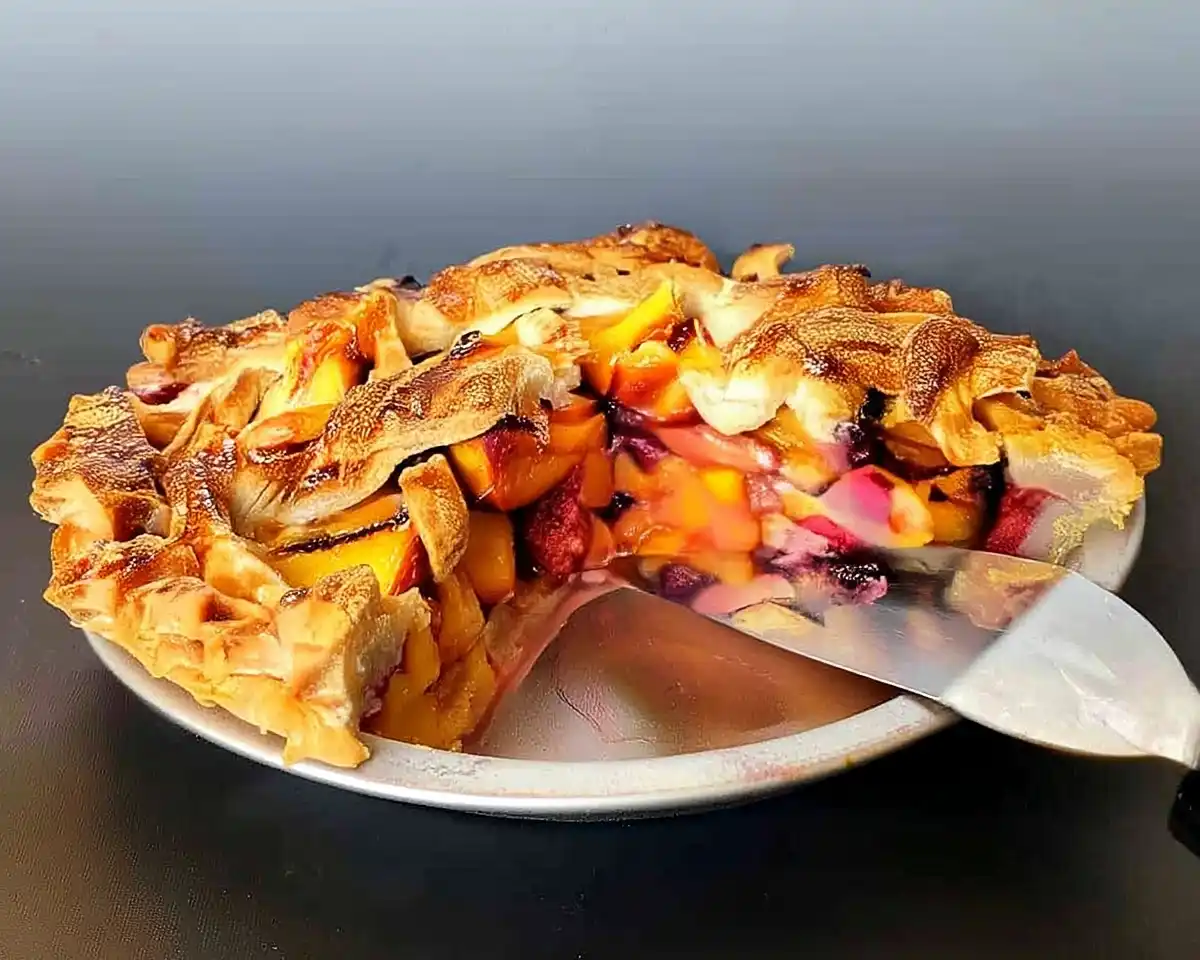
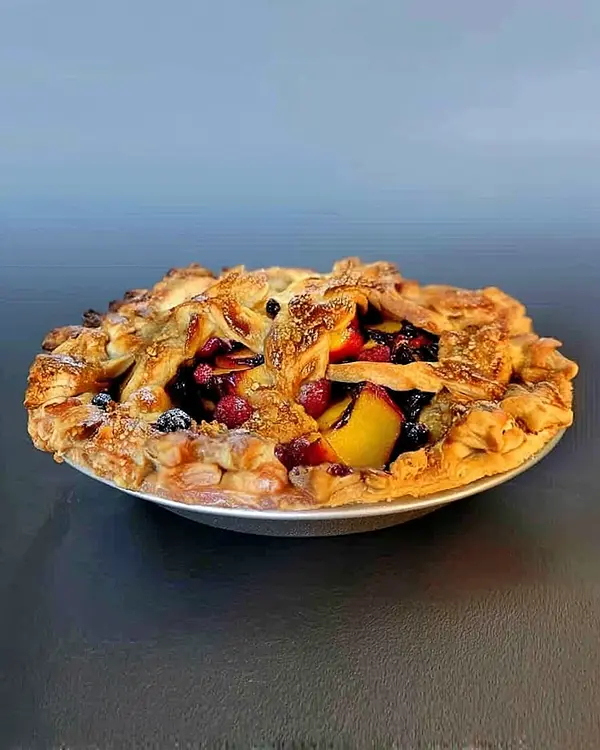
This peach and raspberry pie combines juicy summer peaches with tart raspberries in a flaky butter crust—the perfect balance of sweet and tangy in every bite.
What Makes This Peach and Raspberry Pie Special?
This peach and raspberry pie brings together 3 pounds of fresh, ripe peaches sliced thin with a full pint of plump raspberries, all nestled in a flaky butter crust with just enough cornstarch to thicken the jammy filling without making it gluey—the brown sugar adds caramel depth while lemon juice keeps the fruit bright and prevents browning.
You know that magical week in late July when peaches are practically falling off the tree and raspberries are staining your fingers at the farmers market? That’s when this raspberry peach pie was born.
I had both fruits threatening to go soft on my counter, and instead of making two separate pies, I thought—why not combine them? The result surprised me. The peaches bring juicy sweetness and body, while raspberries add these little bursts of tartness that keep each bite interesting.
Why You’ll Love This Peach Raspberry Pie Recipe
Fresh peach raspberry pie starts with proper fruit prep, and here’s why you’ll keep making this:
- The maceration step is non-negotiable—letting cut peaches and whole raspberries sit with sugar for an hour draws out excess moisture, which you’ll actually drain away (I know, it feels wrong!), preventing that dreaded soggy bottom crust
- Minimal thickener means maximum fruit flavor—just 3 tablespoons of cornstarch lets you taste the peaches and raspberries, not a gummy filling
- The brown sugar secret—swapping a quarter cup of white sugar for brown adds a subtle molasses note that makes people ask “what’s that flavor I can’t quite place?”
- I’ve baked this pie dozens of times testing the fruit-to-sugar ratio, and I promise this version won’t be cloyingly sweet or watery
The first time I made this, I skipped the maceration (I was impatient), and ended up with a soup situation inside an otherwise beautiful lattice crust.
If you’re working with peak-season stone fruit, our peach phyllo dough dessert offers a rustic, free-form approach that’s ready in just 30 minutes—perfect when you want impressive results without the lattice work.
According to King Arthur Baking’s fruit pie guide, stone fruits like peaches can release up to ½ cup of liquid during baking, which is why pre-draining those juices makes all the difference.
Nutritional Information Per Slice
| Nutrient | Amount (1/8 of pie) |
|---|---|
| Calories | 340 |
| Protein | 4g |
| Carbohydrates | 52g |
| Fat | 14g |
| Fiber | 3g |
| Sugar | 28g |
Based on standard 9″ pie cut into 8 slices
What You’ll Need for This Raspberry Peach Pie
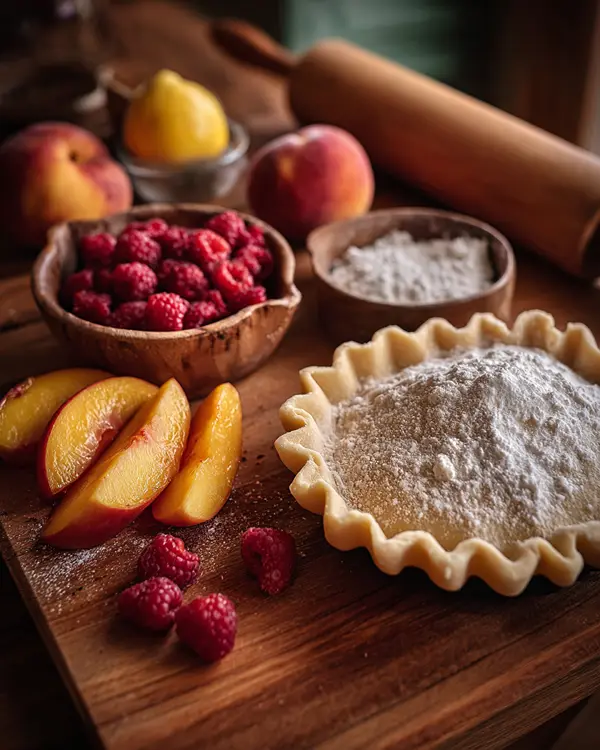
This peach raspberry pie recipe starts with peak-season fruit—don’t even attempt this in February with rock-hard grocery store peaches.
| Amount | Ingredient |
|---|---|
| 1 batch | Flaky pie dough, rolled into 9″ bottom crust plus lattice strips or top crust |
| 3 pounds | Fresh peaches (approximately 2½ to 3 cups sliced)—look for freestone varieties that smell fragrant at the stem end |
| 1 pint | Fresh raspberries—check the bottom of the container for mold before buying |
| 1 tablespoon | Fresh lemon juice, optional but recommended to brighten flavors and prevent browning |
| ¼ cup | Granulated white sugar for macerating |
| ¼ cup | Light or dark brown sugar, packed—I prefer dark for deeper flavor |
| 3 tablespoons | Cornstarch—measure carefully; too much creates that artificial gel texture |
| 1 large | Egg, lightly whisked for egg wash |
| 1 tablespoon | Raw turbinado sugar or regular granulated sugar for sparkly topping |
About the peaches: Freestone peaches separate easily from the pit, making prep faster. If you can only find clingstone varieties, just do your best—the pie will still be delicious. I love using a mix of white and yellow peaches for complexity, though all yellow works beautifully too.
Raspberries note: Don’t rinse them unless they’re visibly dirty; raspberries are like little sponges and get waterlogged. If you must rinse, pat them incredibly gently with paper towels.
New to pie making? Our complete guide to homemade pies walks through everything from selecting the right pan to mastering crimping techniques.
Essential Equipment
You’ll definitely need:
- 9-inch pie pan (metal conducts heat better than ceramic for a crispier bottom crust)
- Rolling pin
- Mixing bowls (medium and large)
- Strainer or colander for draining fruit
- Pastry brush for egg wash
- Sharp paring knife for slicing peaches
- Sheet pan or pie drip catcher (trust me on this—fruit pies bubble over)
Nice to have:
- Pie shield or aluminum foil strips to prevent over-browning
- Bench scraper for moving dough
- Lattice cutter if you’re feeling fancy
- Cooling rack
How to Make the Best Fresh Peach Raspberry Pie
Making this peach and raspberry pie requires patience during the maceration step, but the actual assembly is straightforward—even pie newbies can pull this off.
Prepare and Macerate the Fruit (Start 1+ Hour Before Baking)
Prep the peaches: Fill a large bowl with cold water and rinse 3 pounds of fresh peaches, rubbing away any fuzzy residue with your fingers.
Working one peach at a time, slice from stem to bottom along the natural seam, twist the two halves in opposite directions, and lift away the pit (freestone varieties should release easily).
Cut each half into ⅓-inch thick slices—uniformity helps them cook evenly. If some peaches are stubborn and won’t release the pit, just slice around it carefully.
Add lemon juice: Drizzle 1 tablespoon of fresh lemon juice over the sliced peaches and toss gently with your hands. The acid not only prevents enzymatic browning (that unappealing gray color) but also brightens the overall flavor profile, balancing the peaches’ natural sweetness.
Start maceration: Sprinkle ¼ cup granulated white sugar over the peaches, then add 1 pint of fresh raspberries directly on top. Toss everything together with the gentlest touch—raspberries break apart if you’re rough, and we want whole berries in the finished pie, not raspberry mush.
The waiting game: Cover the bowl with a clean kitchen towel (plastic wrap makes condensation) and set aside at room temperature for exactly 1 hour. During this time, the sugar draws out the fruits’ natural juices through osmosis.
You’ll return to find a pool of peachy-pink liquid at the bottom—that’s exactly what we want, because we’re going to drain it away rather than baking it into the crust.
Prepare the Pie Filling (After Maceration)
Drain thoroughly: Set a fine-mesh strainer over a bowl and pour the macerated fruit mixture in, letting it drain for 2–3 minutes. Gently shake the strainer to encourage draining, but don’t press on the fruit.
Yes, you’re discarding ½ to ¾ cup of sweet juice—it feels wasteful, but this step prevents a soggy bottom crust and runny filling. (Pro move: save that drained juice in the fridge and stir it into sparkling water later for a refreshing drink.)
Add brown sugar: Transfer the drained fruit back to your mixing bowl. Sprinkle ¼ cup of brown sugar (packed) over the top and toss gently until the peach slices and raspberries are evenly coated.
The brown sugar’s molasses content adds complexity that straight white sugar can’t match—think subtle caramel undertones.
Incorporate cornstarch: Sprinkle 3 tablespoons of cornstarch over the fruit mixture and toss gently but thoroughly. Make sure every piece gets a light coating—cornstarch only thickens when it’s evenly distributed and heated.
Undissolved pockets of cornstarch create lumps, while areas without any thickener will leak. The filling should look slightly dusty but not chalky.
Assemble the Pie
Prevent soggy bottom: Lightly whisk 1 large egg in a small bowl until the white and yolk are combined. Using a pastry brush, paint a thin layer of egg wash across the entire bottom crust, paying special attention to the center where filling weight settles.
This creates a waterproof barrier between crust and fruit—a technique pastry chefs call “sealing the crust.” Set aside the remaining egg wash for the top crust.
Fill the pie: Pour the prepared peach and raspberry mixture into your dough-lined 9-inch pie pan, using a silicone spatula to scrape every last bit from the bowl. Spread the filling evenly from edge to edge—don’t mound it all in the center, or the middle will take longer to cook than the edges.
Top the pie: If you’re making a lattice, weave your strips over and under, trimming excess dough and crimping the edges to seal.
For a solid top crust, drape the rolled dough over the filling, trim to ½-inch overhang, tuck under, crimp, and cut at least four 2-inch vents (steam needs escape routes or your pie could crack or explode—yes, I’ve had this happen).
Final touches: Brush the remaining egg wash over the entire top crust or lattice strips—this creates that gorgeous golden-brown shine. Immediately sprinkle 1 tablespoon of raw turbinado sugar (or regular granulated sugar) over the egg wash. The sugar crystals catch light and add textural crunch.
Rest the crust (optional but recommended): Place the assembled pie in the refrigerator for 15–20 minutes, or in the freezer for 10 minutes. Cold dough relaxes the gluten structure developed during rolling and reduces shrinkage during baking—plus, cold butter creates flakier layers when it hits hot oven air.
Bake the Pie to Golden Perfection
Preheat properly: While the pie rests, preheat your oven to 350°F (180°C). Don’t skip preheating—starting a pie in a cold oven makes for pale, undercooked bottom crusts.
Set up for success: Place the pie on a rimmed sheet pan or a dedicated pie drip catcher. Fruit pies almost always bubble over as the filling reduces and caramelizes, and you’ll thank yourself for not having burnt sugar welded to your oven floor.
Bake and monitor: Bake for 35–40 minutes, checking at the 25-minute mark. You’re looking for a deep golden-brown crust and visible bubbling in the center vents or between lattice strips—those bubbles mean the cornstarch has activated and the filling has thickened properly.
If the crust edges darken too quickly (common with butter-based doughs), loosely cover just the edges with a pie shield or strips of aluminum foil, leaving the center exposed.
Cool completely: This is the hardest part. Remove the pie from the oven when the crust is deep golden and filling is actively bubbling. Set it on a wire cooling rack and walk away for 2–3 hours—yes, really.
The filling needs this time to set up as it cools; cut too early and you’ll have runny juice instead of sliceable pie. I know it smells incredible and you want to dive in, but patience is rewarded here.
Pro Tips for Peach Raspberry Pie Perfection
Here’s what I’ve learned making this raspberry peach pie dozens of times in my own kitchen:
Room-temperature matters for crust: If you’re making pie dough from scratch, ensure your butter is cool but not ice-cold (around 60°F), and use cold water. Room-temperature ingredients incorporate more evenly, creating a stable emulsion that results in flakier layers.
According to Serious Eats’ pastry science guide, butter that’s too cold won’t incorporate properly, while too-warm butter melts into the flour instead of creating those steam pockets that make pastry flaky.
Don’t skip the egg wash barrier: That layer on the bottom crust isn’t just fussy technique—it genuinely prevents the dreaded soggy bottom by creating a water-resistant seal. I learned this the hard way after years of serving pies with beautiful tops and pale, mushy bottoms.
Freeze before baking for cleaner lattice: If you’ve made a lattice top, pop the whole assembled pie in the freezer for 10–15 minutes before baking. The cold dough holds its woven pattern better and won’t slump during the first minutes in the oven.
Visual cues trump timing: Every oven runs slightly different. Instead of relying solely on the timer, look for these signals: deep golden-brown crust color, filling actively bubbling in the center (not just edges), and the smell of caramelized sugar wafting from your oven.
If you have an instant-read thermometer, the center filling should reach 200°F when done.
The parchment trick for easy cleanup: Before placing the pie on your sheet pan, line the pan with parchment paper. When sugary juices inevitably bubble over, they’ll harden on the parchment instead of the pan—just peel and toss when cool.
Troubleshooting Common Peach Raspberry Pie Problems
Why is my pie filling runny even after cooling? You likely didn’t see active bubbling in the center before removing it from the oven. The cornstarch needs to reach 200°F throughout the filling to properly activate and thicken—bubbles at the edges aren’t enough.
Next time, bake 5–10 minutes longer until you see bubbles in the very center, or use an instant-read thermometer to check.
What if my bottom crust is soggy? Three likely causes: you skipped the egg wash barrier on the bottom crust, you didn’t drain the macerated fruit long enough (that excess liquid has to go somewhere), or your oven temperature ran low.
Try baking on the lowest oven rack next time—closer to the heat source helps set the bottom crust faster.
My raspberries turned to complete mush—what happened? Over-mixing during the tossing steps breaks down the delicate berries. Handle raspberries like you’re working with flower petals—the absolute gentlest touch.
Also, if your raspberries were overly ripe or starting to get soft, they’ll break down further during maceration and baking.
The crust shrank away from the pan edges. Your dough was either overworked (developing too much gluten) or you didn’t let the assembled pie rest before baking. Gluten needs time to relax after rolling and shaping—that 15-minute chill isn’t optional if you want pastry that holds its shape.
What if the filling seems too thick or too thin before baking? If it looks soupy after adding cornstarch, you didn’t drain the macerated fruit long enough—try adding another tablespoon of cornstarch.
If it looks dry and clumpy, your fruit might not have released much juice during maceration (underripe peaches are the usual culprit)—add 2 tablespoons of the drained juice back in or splash in a bit of water.
Help—my crust burned before the filling cooked! Tent the pie loosely with aluminum foil after the first 20 minutes, and make sure your oven temperature is accurate (use an oven thermometer to verify). Also, avoid placing the pie on the top rack—middle rack allows for more even heat circulation.
For more detailed crust crimping techniques and lattice troubleshooting, check out our old-fashioned raisin pie recipe, which includes step-by-step photos of proper venting and sealing methods.
Creative Variations on This Peach Raspberry Pie Recipe
Seasonal swaps: When summer fades, try this same technique with frozen peaches and raspberries—just thaw completely, drain very well, and proceed as written (frozen fruit releases even more liquid).
In late summer, substitute 1 cup of blackberries for half the raspberries for a deeper, more complex flavor. Early summer? Use half strawberries, half raspberries with the peaches.
Spice it up: Add ½ teaspoon ground cinnamon and ¼ teaspoon cardamom to the brown sugar before tossing with fruit. The warm spices complement peaches beautifully without overwhelming the fresh fruit flavor.
A tiny pinch of black pepper (seriously—just a pinch) makes the raspberries taste more “raspberry-ish.”
Gluten-free version: For a detailed guide to gluten-free pie crust that actually works with this juicy filling.
Individual servings: Divide the filling among six 4-inch mini pie pans or use it for hand pies (reduce baking time to 25–30 minutes). Mini pies bake faster, cool faster, and give everyone their own perfect portion with maximum crust-to-filling ratio.
Bourbon addition: Replace the lemon juice with 1 tablespoon bourbon—the alcohol burns off but leaves behind oaky, vanilla notes that make people swear you did something fancy. Just don’t tell them how easy it was.
Skip the top crust entirely and finish with a brown butter streusel topping (see our Milk Bar pumpkin pie for the technique)—the nutty, crunchy texture contrasts beautifully with jammy fruit.
How to Serve, Store, and Reheat Your Pie
Serving this fresh peach raspberry pie: Warm or room temperature is ideal—the filling holds together better than when piping hot. A scoop of vanilla ice cream or a dollop of barely sweetened whipped cream balances the fruit’s tartness.
I’m also partial to a small wedge of sharp cheddar cheese alongside fruit pie (a traditional American pairing that sounds weird but works beautifully).
Storing leftovers: Cover loosely with aluminum foil (plastic wrap makes the crust soggy) and keep at room temperature for up to 2 days—fruit pies don’t need refrigeration unless your kitchen is extremely warm.
For longer storage, refrigerate for up to 5 days, though the crust will soften somewhat. Bring to room temperature before serving or rewarm.
Reheating: Preheat your oven to 325°F and warm individual slices for 10–12 minutes, or a whole pie for 20–25 minutes. Tent loosely with foil if the crust is already dark enough.
Avoid microwaving if possible—it makes the crust tough and rubbery. If you must microwave, do it in 15-second bursts on 50% power.
Freezing: This peach raspberry pie recipe freezes beautifully either unbaked or baked. For unbaked, assemble completely (including egg wash and sugar), freeze on a sheet pan until solid, then wrap tightly in plastic wrap and foil—bake from frozen, adding 15–20 minutes to the bake time.
For baked pie, cool completely, wrap well, and freeze up to 3 months. Thaw overnight in the fridge and rewarm as directed above.
Zero-Waste Kitchen Magic with This Recipe
Don’t toss those peach pits and skins: Simmer them in 2 cups of water with ½ cup sugar for 20 minutes to make a delicate peach simple syrup. Strain and use in cocktails, iced tea, or drizzled over pancakes. The pits add an almond-like flavor that’s surprisingly lovely.
That drained fruit juice you discarded? I lied about throwing it away. Freeze it in ice cube trays and add to smoothies, or reduce it by half on the stove to make a concentrated syrup for drizzling over yogurt or oatmeal. It’s too thin for pie filling but too delicious to waste.
Leftover pie dough scraps: Gather them, roll out, cut into shapes, brush with butter, sprinkle with cinnamon-sugar, and bake at 350°F for 10–12 minutes. Instant pie crust cookies that disappear embarrassingly fast.
Overripe raspberries from the bottom of the container: Mash them with a fork, push through a fine-mesh strainer to remove seeds, and swirl the purée into yogurt or fold into whipped cream for raspberry cream.
Frequently Asked Questions About Peach Raspberry Pie
Can I make this peach and raspberry pie ahead of time?
Absolutely. Assemble the pie completely (including egg wash and sugar), cover loosely with plastic wrap, and refrigerate up to 24 hours before baking—just add 5 minutes to the bake time since it’s starting cold.
What’s the best substitute for fresh peaches in this raspberry peach pie?
Frozen peaches work well—thaw completely in a strainer, press gently to remove excess moisture, and proceed with the recipe (you might need an extra tablespoon of cornstarch since frozen fruit releases more liquid)
Why did my peach raspberry pie filling bubble over in the oven?
Most likely your pie was too full (filling should come just to the rim, not mounded over), you didn’t cut sufficient vents in a solid top crust for steam to escape, or the cornstarch wasn’t mixed thoroughly and created thin spots in the filling
What fruit combinations work best with peaches in pie?
Raspberries (obviously!), blackberries, blueberries, or strawberries all pair beautifully with peaches. The key is combining a juicy stone fruit with berries that add tartness and structural integrity
Can I use a store-bought crust for this fresh peach raspberry pie?
Yes, though homemade flaky crust is worth learning for how it complements the fruit. If using store-bought refrigerated dough, still brush the bottom with egg wash before filling. Avoid pre-baked graham cracker or cookie crusts—they don’t hold up to the juicy filling and won’t survive the baking time needed for the fruit.
Your Summer Kitchen Awaits
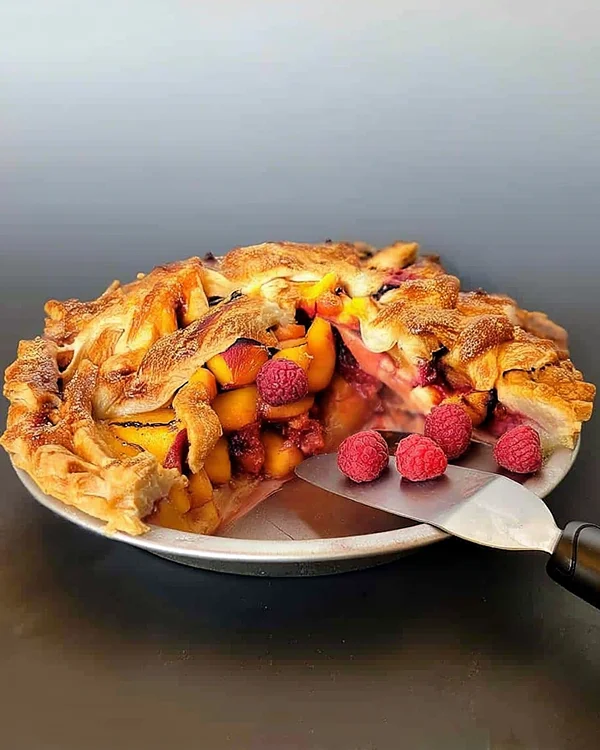
There’s something almost meditative about making this peach and raspberry pie on a Sunday afternoon when stone fruit season peaks—the slow process of slicing peaches, the gentle toss with sugar, watching the fruit release its juices while you prep the crust.
This isn’t a recipe you rush. It’s the kind of pie you make when you want your kitchen to smell like summer preserved, when you want to share something beautiful you made with your own hands.
I’d love to hear how your pie turns out! Drop a comment below with your favorite fruit combination, any creative variations you tried, or just share a photo of your finished masterpiece. Did you go classic double crust or get fancy with a lattice?
Baked with love by Rebeccah Ellene
Fresh Peach and Raspberry Pie
Equipment
- 9-inch pie pan
- Rolling Pin
- mixing bowls
- Strainer
- Sheet pan
Ingredients
Pie
- 1 batch Flaky pie dough for 9″ pie with top crust
- 3 pounds Fresh peaches sliced, freestone preferred
- 1 pint Fresh raspberries
- 1 tablespoon Lemon juice optional but recommended
- ¼ cup Granulated sugar for macerating
- ¼ cup Brown sugar packed
- 3 tablespoons Cornstarch measure carefully
- 1 large Egg for egg wash
- 1 tablespoon Turbinado sugar or regular sugar, for topping
Instructions
- Macerate the sliced peaches and raspberries with granulated sugar and lemon juice for 1 hour, then drain thoroughly.
- Add brown sugar and cornstarch to the drained fruit and toss gently to coat.
- Brush the bottom crust with egg wash to help prevent sogginess, then add the fruit filling.
- Add the top crust (lattice or solid), crimp edges, brush with egg wash, and sprinkle with sugar.
- Bake at 350°F (180°C) for 35–40 minutes, until the crust is golden and the filling is bubbling in the center.
- Cool the pie fully for 2–3 hours to allow the filling to set before slicing.

