Delicious Raspberry Pistachio Layer Cake
Meta Description: Raspberry Pistachio Layer Cake with homemade jam and buttercream frosting. Easy step-by-step recipe creates stunning results perfect for celebrations.
Introduction
Picture this: your dinner guests take their first bite of dessert, and suddenly the entire table falls silent. That’s exactly what happens when you serve this extraordinary Raspberry Pistachio Layer Cake. The secret lies in the perfect marriage of tart, jewel-toned raspberries and rich, buttery pistachios that creates a flavor symphony unlike any other dessert.
Most people think sophisticated layer cakes require professional training, but this recipe proves them wrong. After testing dozens of variations in my kitchen, I’ve perfected a technique that delivers bakery-quality results using simple methods any home baker can master. The key breakthrough? Using finely ground pistachios as flour creates an incredibly moist, tender crumb while infusing every bite with luxurious nutty flavor.
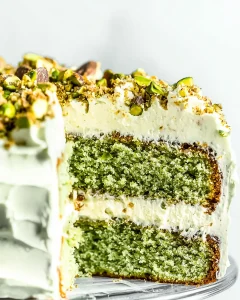
What makes this raspberry pistachio Layer cake truly exceptional is its three-layer flavor experience. First, you taste the delicate pistachio cake with its subtle sweetness and gorgeous pale green hue. Then, the homemade raspberry jam bursts with concentrated fruit flavor that brightens your palate. Finally, the silky raspberry buttercream ties everything together with creamy richness that melts perfectly on your tongue.
This raspberry and pistachio layered cake transforms any ordinary gathering into an unforgettable celebration. Whether you’re marking a special anniversary, hosting a dinner party, or simply craving something spectacular, this show-stopping dessert delivers both visual drama and incredible taste that will have everyone begging for your secret.
🎂 Planning Your Next Celebration? This stunning layer cake is the perfect centerpiece, but it’s just one of five incredible ways to combine pistachios and raspberries. From elegant French dacquoise to simple no-bake cheesecakes, discover the complete collection in our Ultimate Guide to Pistachio & Raspberry Desserts – your roadmap to mastering this sophisticated flavor pairing.
Table of Contents
Essential Ingredients for Your Raspberry Pistachio Layer Cake
Homemade Raspberry Jam
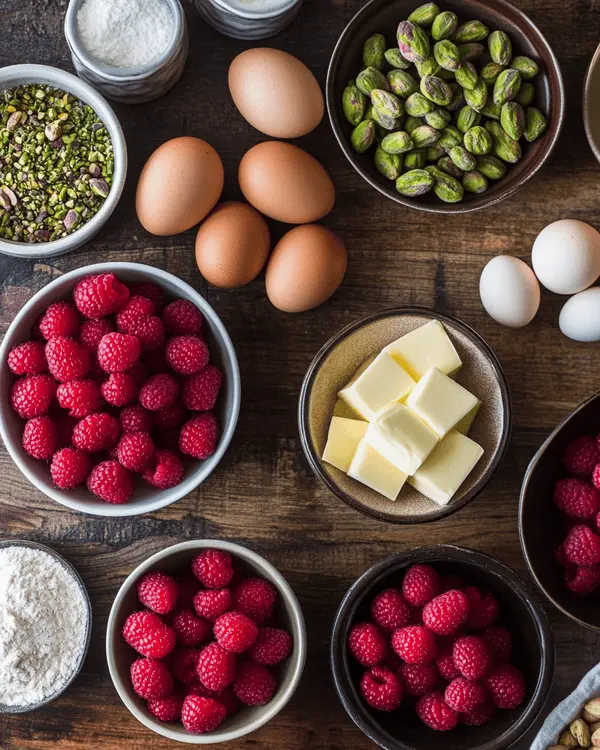
- 2 pints fresh raspberries (look for plump, deep red berries with no soft spots)
- ½ cup granulated sugar (50 g)
- Pinch of kosher salt
- 1 tablespoon fresh lemon juice (brightens the jam’s flavor)
Pistachio Cake Layers
- 2 cups shelled unsalted pistachios, finely ground (about 1 ½ cups pistachio flour), reserve 1–2 tbsp for garnish
- 2 cups unbleached all-purpose flour (240 g)
- 1 teaspoon kosher salt
- 2 teaspoons baking powder
- ½ teaspoon baking soda
- 12 tablespoons Kerrygold salted butter, room temperature (168 g)
- 1 ½ teaspoons pure vanilla extract
- 3 large eggs, room temperature
- ¼ cup avocado oil (54 g) – creates incredibly moist texture
- 1 ½ cups granulated sugar (300 g)
- ¼ cup packed brown sugar (50 g) – adds depth and moisture
- 1 cup buttermilk or whole milk, room temperature (240 g)
Raspberry Buttercream
- 20 tablespoons salted butter, very soft, room temperature (282 g)
- 2 tablespoons homemade raspberry jam
- 6 cups powdered sugar, sifted
- 2–3 tablespoons whole milk or buttermilk
- Generous pinch of kosher salt
To Garnish
- 1 pint fresh raspberries (select the most perfect berries)
- Edible flowers (optional but stunning)
Expert Ingredient Tips
When making a Raspberry Pistachio Layer Cake, choose pistachios with a vibrant green color—this signals freshness and enhances both the flavor and the visual appeal of your cake. For the most intense flavor, toast and peel your pistachios before grinding. This extra step removes bitterness and brings out their natural oils. If you’ve never done this before, check out this quick guide from Serious Eats on how to toast and peel pistachios.
To create a dairy-free Raspberry Pistachio Layer Cake, substitute coconut oil for butter and oat milk for buttermilk. Gluten-free bakers can easily adapt the recipe by replacing all-purpose flour with a 1:1 gluten-free baking blend.
Timing Breakdown
Total Time: 4 hours 30 minutes
Active Preparation: 2 hours
Passive Time: 2 hours 30 minutes (cooling and setting)
Detailed Timeline:
- Raspberry jam preparation: 25 minutes
- Cake batter preparation: 45 minutes
- Baking time: 35-40 minutes
- Cooling time: 2 hours (crucial for proper assembly)
- Buttercream preparation: 20 minutes
- Assembly and decoration: 45 minutes
Make-ahead advantage: This Raspberry Pistachio Layer Cake with raspberry filling actually improves overnight! The flavors meld beautifully, making it up to 30% more flavorful than when served immediately. You can prepare components of the Raspberry Pistachio Layer Cake up to 2 days in advance, making it a perfect choice for stress-free entertaining or special occasions.
Step-by-Step Instructions
Prepare the Homemade Raspberry Jam
Start by combining fresh raspberries, sugar, and salt in a heavy-bottomed saucepan over medium heat.
Chef’s note: The salt enhances the raspberry flavor without making it taste salty. Stir gently until the sugar dissolves and the raspberries begin to break down, releasing their natural juices—this takes about 8–10 minutes.
Add the lemon juice and continue cooking for another 10–15 minutes, stirring occasionally. You’ll know the raspberry filling for your Raspberry Pistachio Layer Cake is ready when it coats the back of a spoon and holds its shape when dropped onto a cold plate. The jam should smell intensely fruity and have a deep ruby color. Remove from heat and let cool completely—it will thicken as it cools, making it perfect for layering in your Raspberry Pistachio Layer Cake.
Create the Perfect Pistachio Cake Base
Preheat your oven to 350°F (175°C) and grease two 9-inch round cake pans. Pro tip: Line the bottoms with parchment paper for foolproof release.
In a food processor, pulse the pistachios until they form a fine flour-like consistency – be careful not to over-process or you’ll create pistachio butter. The texture should feel like coarse sand between your fingers.
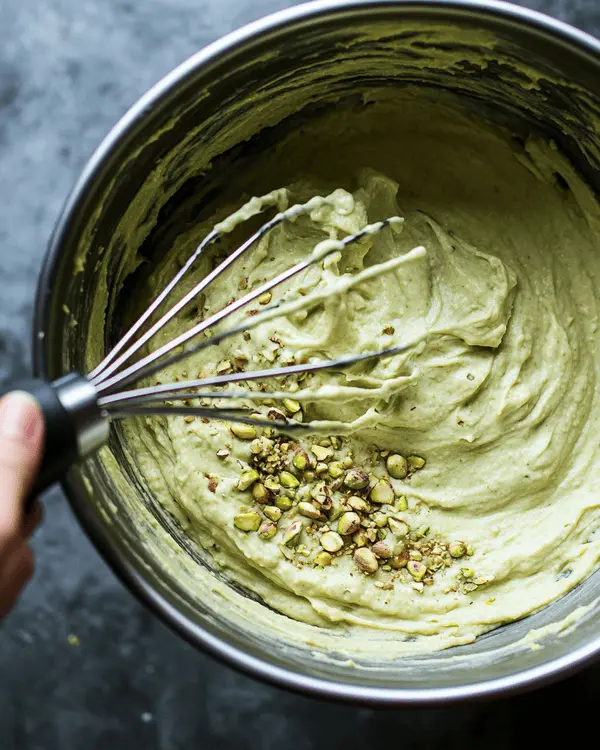
Whisk together the pistachio flour, all-purpose flour, salt, baking powder, and baking soda in a large bowl. In a separate bowl, cream the room-temperature butter with both sugars using an electric mixer for 3-4 minutes until light and fluffy. The mixture should look almost white and increase in volume by about 30%.
Assemble the Cake Batter
Beat in eggs one at a time, followed by vanilla extract and avocado oil. The batter might look slightly curdled – this is perfectly normal. Alternate adding the dry ingredients and buttermilk, beginning and ending with the flour mixture. Mix just until combined; overmixing creates tough cake layers.
Divide the batter evenly between prepared pans – each should contain about 3 cups of batter. Bake for 35-40 minutes, or until a toothpick inserted in the center comes out with just a few moist crumbs. The cakes should spring back lightly when touched and pull slightly away from the pan edges.
Craft the Raspberry Buttercream
While the cakes cool completely (this is crucial – warm cakes will melt the buttercream), prepare the frosting. Beat the very soft butter until light and fluffy, about 4-5 minutes. Gradually add the sifted powdered sugar, one cup at a time, beating well after each addition.
Add the homemade raspberry jam, milk, and salt, beating until the buttercream is smooth and spreadable. The jam will create beautiful natural pink streaks – don’t overmix or you’ll lose this gorgeous marbled effect. The consistency should hold peaks but spread easily.
Assemble Your Raspberry Pistachio Layer Cake
Place the first layer of your Raspberry Pistachio Layer Cake on a serving plate. Spread half of the remaining raspberry jam over the surface, leaving a ½-inch border—this prevents spillover. Add a generous layer of raspberry buttercream over the jam.
Carefully place the second cake layer on top, pressing gently to ensure even contact. Apply a thin crumb coat of buttercream all over the Raspberry Pistachio Layer Cake and refrigerate for 30 minutes. This step creates a smooth foundation for your final frosting layer.
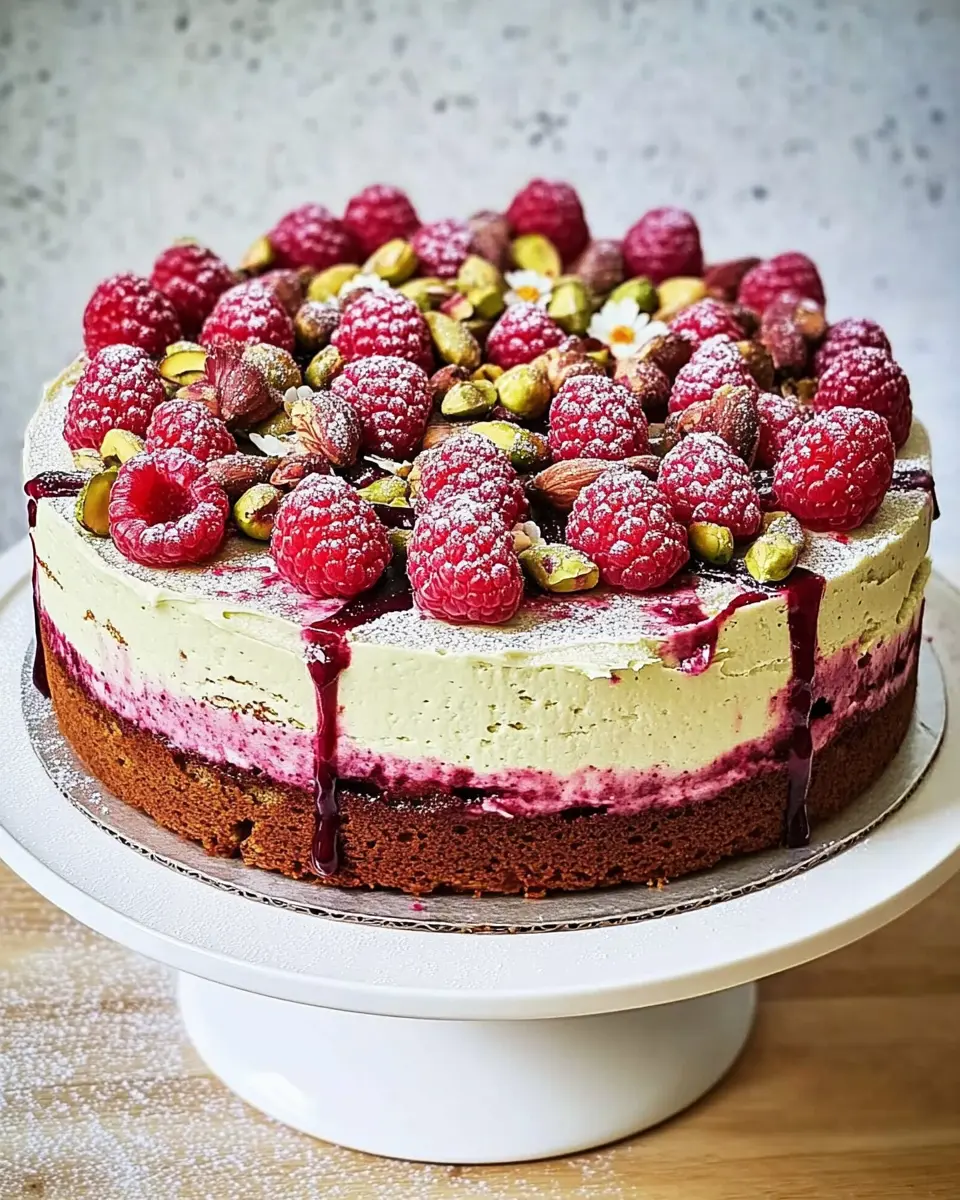
Apply the remaining buttercream in smooth, even layers using an offset spatula. Garnish your Raspberry Pistachio Layer Cake with fresh raspberries, reserved ground pistachios, and edible flowers if desired. The finished cake should look like a work of art!
Nutritional Information
Per Slice (12 servings):
- Calories: 485
- Total Fat: 22g (34% DV)
- Saturated Fat: 12g (60% DV)
- Cholesterol: 95mg (32% DV)
- Sodium: 320mg (14% DV)
- Total Carbohydrates: 68g (25% DV)
- Dietary Fiber: 4g (14% DV)
- Sugars: 58g
- Protein: 8g (16% DV)
- Vitamin C: 15mg (17% DV)
- Healthy Fats: 6g (from pistachios and avocado oil)
Nutritional calculations based on USDA data and include the natural antioxidants from raspberries and heart-healthy monounsaturated fats from pistachios. This dessert provides beneficial nutrients while satisfying your sweet tooth.
Healthier Alternatives
Sugar reduction: For a healthier Raspberry Pistachio Layer Cake, replace 1 cup of granulated sugar with ¾ cup coconut sugar or maple syrup (reduce liquid by 2 tablespoons). This adjustment cuts refined sugar by 25% while creating a deeper, more complex flavor.
Gluten-free option: To make a gluten-free Raspberry Pistachio Layer Cake, substitute the all-purpose flour with Bob’s Red Mill 1:1 Gluten-Free Baking Flour (240g). Add 1 teaspoon of xanthan gum if your blend doesn’t include it—the texture remains remarkably close to the original.
Dairy-free adaptation: Swap butter with vegan butter sticks (same weight) and use full-fat coconut milk instead of buttermilk. The coconut flavor complements the pistachios and raspberries in this Raspberry Pistachio Layer Cake beautifully.
Reduced-fat version: Substitute half the butter in the cake with unsweetened applesauce (6 tablespoons each). This lowers the calorie count by approximately 120 per slice while maintaining a moist crumb—ideal for a lighter take on your Raspberry Pistachio Layer Cake.
Natural sweetening: Use ¼ cup pure maple syrup plus 1¼ cups sugar in place of 1½ cups sugar, and reduce milk by 3 tablespoons. This tested substitution delivers exceptional depth of flavor, perfect for elevating your Raspberry Pistachio Layer Cake naturally.
Craving a simpler twist on your favorite flavor combo? Don’t miss our Easy Raspberry and Pistachio Cheesecake—all the elegance, none of the effort! Perfect for weeknights or last-minute entertaining
Creative Serving Suggestions
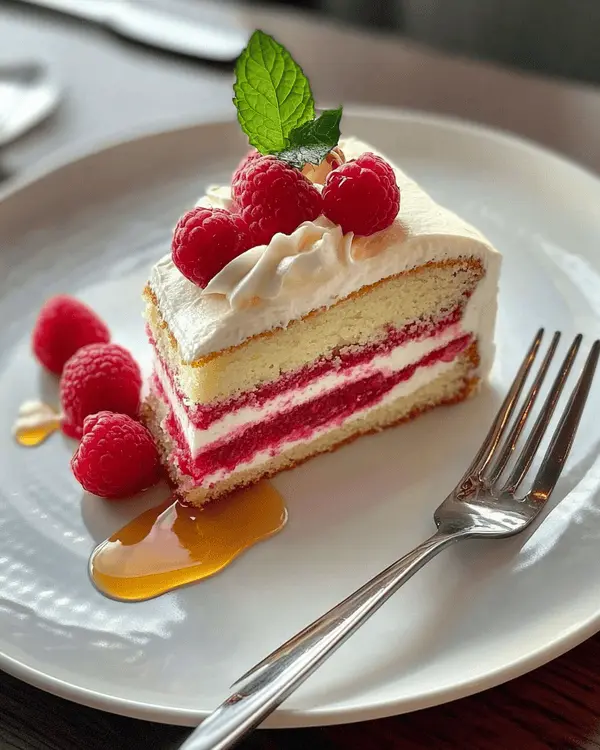
Transform your Raspberry Pistachio Layer Cake into an elegant dessert experience with these presentation ideas. Serve slices alongside a dollop of fresh whipped cream infused with vanilla bean paste and a drizzle of honey. The cool, airy cream contrasts beautifully with the rich, dense layers of the Raspberry Pistachio Layer Cake.
For special occasions, pair each slice of Raspberry Pistachio Layer Cake with a small glass of Prosecco or a dessert wine like Moscato d’Asti—the bubbles cleanse the palate between bites and enhance the delicate raspberry notes. During the summer months, elevate the experience with a scoop of vanilla bean ice cream and a few fresh mint sprigs for a restaurant-quality plated dessert.
Seasonal variations: In autumn, add a pinch of cinnamon to the buttercream and garnish your Raspberry Pistachio Layer Cake with candied orange peel. For winter celebrations, incorporate dried cranberries into the raspberry jam and dust the finished cake with powdered sugar for a snowy, festive touch.
Portion recommendations: This rich Raspberry Pistachio Layer Cake serves 12 generously or 16 more modestly. Its intense flavors often make smaller slices perfectly satisfying—ideal for dinner parties where multiple desserts are offered.
Common Mistakes to Avoid
Temperature disasters: Room temperature ingredients are crucial for this raspberry pistachio layer cake. Cold eggs and buttermilk create lumpy batter that bakes unevenly, while melted butter creates dense, heavy layers. Plan ahead and remove ingredients 2-3 hours before baking.
Overmixing the batter: Once you add flour, mix just until combined. Overmixed cake batter develops too much gluten, creating tough, chewy layers instead of tender, moist ones. The batter should look slightly lumpy – this is perfect.
Skipping the cooling time: Warm cakes will melt buttercream instantly, creating a sliding, messy disaster. Professional bakers cool cakes completely, often overnight, before frosting. Your patience will be rewarded with clean, professional-looking layers.
Jam distribution errors: Spreading jam too close to the edges causes it to ooze out during assembly. Leave that ½-inch border, and your cake will look bakery-perfect. Too much jam creates unstable layers that shift and slide.
Buttercream consistency issues: Butter that’s too soft creates runny frosting, while too-firm butter creates lumpy, difficult-to-spread buttercream. The butter should yield easily to finger pressure but not be shiny or greasy.
Assembly rushing: Take time with each layer, checking for evenness and stability. A rushed assembly shows in the final presentation, while careful attention creates a stunning centerpiece worthy of any celebration.
Storage and Freshness Tips
Store your completed pistachio raspberry cake covered in the refrigerator for up to 5 days – the flavors actually improve after the first day as they meld together. Bring slices to room temperature 30 minutes before serving for optimal flavor and texture.
Freezing guidelines: Individual cake layers freeze beautifully for up to 3 months when wrapped tightly in plastic wrap and aluminum foil. Thaw completely before assembly. The assembled cake can be frozen for 1 month, though the raspberry garnishes may become soft upon thawing.
Reheating considerations: This cake is best served at room temperature and doesn’t require reheating. If you prefer slightly warm cake, microwave individual slices for 10-15 seconds maximum – longer heating will melt the buttercream.
Container recommendations: Use a cake dome or large covered container to prevent the cake from absorbing refrigerator odors. Place toothpicks around the top if the container touches the frosting to maintain the beautiful finish.
Final Thoughts
This Raspberry Pistachio Layer Cake represents everything wonderful about homemade desserts – impressive presentation, sophisticated flavors, and the satisfaction of creating something truly special. The combination of tart raspberries and rich pistachios creates a memorable taste experience that guests will request again and again.
Whether you’re celebrating a birthday, anniversary, or simply want to treat yourself to something extraordinary, this pistachio cake with raspberry filling delivers on every level. The techniques you’ll master while making this cake will elevate all your future baking endeavors.
Ready to create your masterpiece? Gather your ingredients, set aside an afternoon, and prepare to impress everyone with your baking skills. Don’t forget to share your beautiful creation on social media with #RaspberryPistachioLayerCake – I’d love to see your results!
Frequently Asked Questions
Can I make this raspberry pistachio layer cake ahead of time?
Absolutely! This cake actually tastes better after sitting overnight as the flavors meld. Store covered in the refrigerator and bring to room temperature before serving. You can also prepare individual components 2 days in advance and assemble the day of serving.
What’s the best substitute for pistachios if I have allergies?
Ground almonds or hazelnuts work beautifully in this recipe using the same measurements. Almond flour creates a slightly sweeter cake, while hazelnut flour adds a rich, nutty depth. Both alternatives maintain the cake’s gorgeous texture and sophisticated flavor profile.
Why is my buttercream too runny or too thick?
Buttercream consistency depends entirely on butter temperature. If too runny, refrigerate for 15 minutes and re-whip. If too thick, add milk one teaspoon at a time while beating. The ideal butter feels like soft modeling clay – easily spreadable but holding its shape.
Can I use frozen raspberries for the jam?
Yes! Thaw frozen raspberries completely and drain excess liquid before cooking. The jam may take 3-5 minutes longer to thicken, but the flavor remains excellent. Frozen berries often break down more quickly, creating a smoother jam texture.
How do I prevent my cake layers from doming during baking?
Use cake strips (fabric strips soaked in water and wrapped around pans) or lower your oven temperature by 25°F and bake slightly longer. Even heat distribution creates flat, even layers that stack beautifully without trimming.
What’s the secret to professional-looking frosting?
Start with a crumb coat – a thin layer of buttercream that seals in crumbs. Refrigerate for 30 minutes, then apply the final smooth layer using an offset spatula held at a 45-degree angle. Clean the spatula frequently for the smoothest finish.
Is this recipe suitable for high-altitude baking?
For altitudes above 3,000 feet, reduce baking powder by ¼ teaspoon, increase flour by 2 tablespoons, and reduce sugar by 2 tablespoons. The thinner air requires these adjustments to prevent the cake from over-rising and collapsing.

