Viral Burn Away Cake Recipe at Home
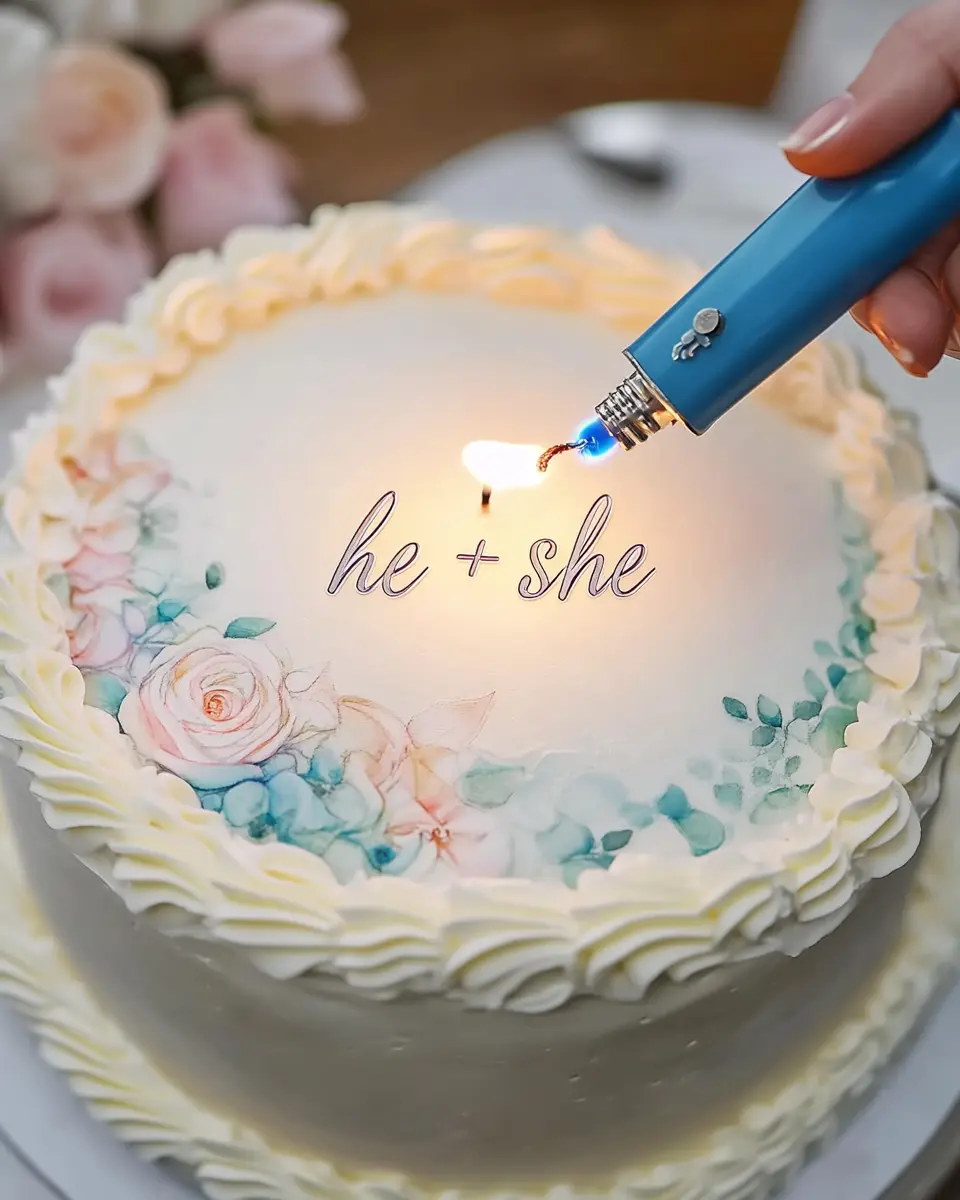
Master the burn away cake recipe at home with this complete guide. Learn step-by-step techniques, safety tips, and creative ideas for viral reveal cakes.
Okay, so picture this – you’re scrolling through TikTok (as one does), and suddenly you see someone literally setting a cake on fire. But wait, instead of calling the fire department, everyone’s cheering! Why? Because they just witnessed the magic of a burn away cake recipe at home that’s absolutely taking over social media.
If you haven’t fallen down this rabbit hole yet, let me catch you up. A Burn-away cake is basically the coolest party trick disguised as dessert. You’ve got this gorgeous cake that looks totally normal, then BAM – someone lights it up and a completely different design appears underneath like some kind of edible magic show.
I’ll be honest, when I first saw these viral cake trend videos, I thought “there’s no way I could pull this off.” But guess what? It’s actually way easier than you’d think! This how to make burn away cake guide is gonna walk you through everything – and I mean everything – from the science-y stuff to the “please don’t burn your kitchen down” safety bits.
Whether you’re planning the ultimate gender reveal, want to surprise someone for their birthday, or just need to be the coolest person at your next gathering, this DIY burn away cake tutorial has got your back. Trust me, once you master this, you’ll be the friend everyone calls when they need to make jaws drop.
Table of Contents
What’s All the Fuss About? Understanding Burn-Away Cakes
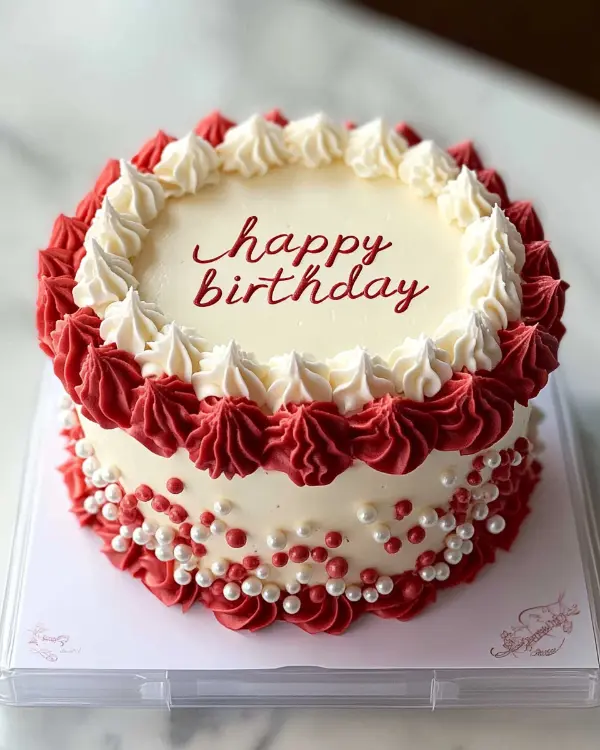
The Magic Behind the Madness
Alright, let’s break this down without getting too nerdy. A burn away cake tutorial starts with understanding that you’re basically creating a two-layer surprise. Think of it like those scratch-off lottery tickets, but way more dramatic and involving actual fire.
The whole thing works because you’ve got two different edible images stacked on top of each other. The top one is designed to burn away (hence the name – shocking, I know), and the bottom one stays put to reveal your hidden message or design. It’s like the ultimate reveal cake that’s perfect for those “wait for it” moments we all love.
What makes this such a hit for special occasions is the pure drama of it all. I mean, when was the last time someone literally set dessert on fire and everyone got excited instead of terrified?
The Science Stuff (Don’t Worry, I’ll Keep It Simple)
Here’s where it gets interesting – and don’t worry, I’m not gonna make your brain hurt with too much technical stuff.
Your Two-Layer System:
- Top Layer (Wafer paper): This bad boy is made from potato starch, water, and oil. It’s basically designed to be the sacrificial lamb – burns clean and fast
- Bottom Layer (Frosting sheet or Icing sheet): This thicker, sugar-based layer is printed with Edible ink and stays put when things get toasty. It’s like the hero that survives the fire to tell the tale
The Secret Sauce – Buttercream Borders: Here’s the game-changer that makes everything work. You pipe Buttercream between these layers to create an air gap. No gap = disaster. With gap = magic. It’s that simple!
How This Whole Thing Went Viral (And Why We’re All Obsessed)
The Origin Story
You know how some trends just appear out of nowhere and suddenly everyone’s doing them? Well, this one actually has a pretty cool backstory. The whole burn cake phenomenon started with creative bakers on social media who were basically competing to see who could create the most jaw-dropping content.
The Queen Who Started It All
Let’s give credit where it’s due – Denise Steward (@denises_delights_, @denises_delights93) is the genius behind this whole movement. This woman literally changed the cake game forever with her innovative thinking. Other amazing bakers like Cakes by Nams (@CakesByNams) jumped on board and helped spread this edible image cake trend like wildfire.
TikTok Made It Famous
Here’s the thing about TikTok – it’s basically designed for this kind of content. There’s something incredibly satisfying about watching that wafer paper curl up and disappear, revealing the surprise underneath. Videos of these reveal cakes regularly get millions of views because, let’s face it, we’re all suckers for a good reveal.
The algorithm ate this content up, and before you know it, every baker worth their salt was getting requests for these DIY burn away cake creations.
Game-Changer for Bakeries
I’m talking about a complete industry shift here. Suddenly, neighborhood bakeries were scrambling to learn this technique because customers were demanding it. It went from “that’s a cool TikTok thing” to “I need this for my party” faster than you could say “viral cake trend.”
Your Step-by-Step Burn Away Cake Tutorial
What You’ll Need (Shopping List Time!)
Okay, let’s talk supplies. Some of this stuff might seem specialized, but trust me, it’s worth the investment – especially if you’re planning to become the designated cake person in your friend group.
| Must-Haves | What It Does | Pro Tips |
|---|---|---|
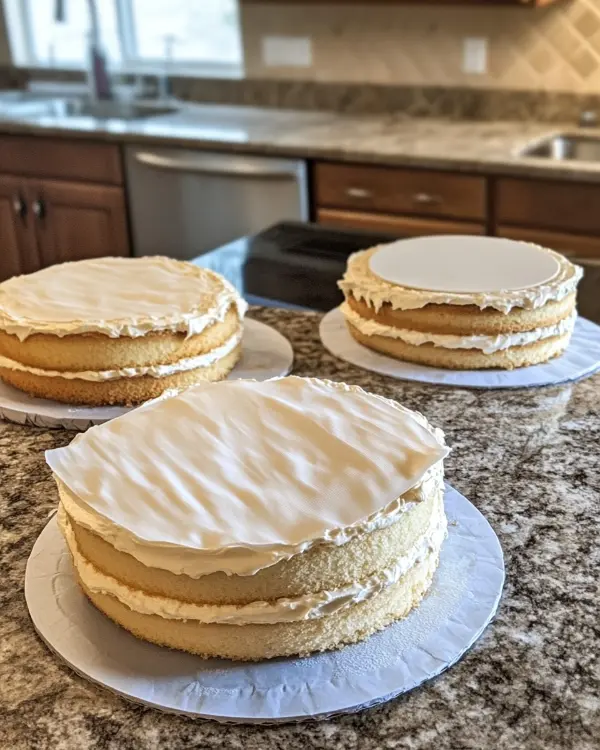
| Frosted cake (any flavor!) | Your canvas | Make sure the top’s flat – lumpy won’t work |
| Edible printer | Prints both your designs | Get one that’s ONLY for food – super important |
| Wafer paper (0.35mm thick) | Burns away layer | Paper2Eat makes great quality ones |
| Frosting sheet/Icing sheet | Reveal layer underneath | Go for premium – it shows |
| Culinary torch | Safe way to light it | Small and controlled is key |
| Extra buttercream | Creates the magic air gap | Make it the right consistency |
Your Cake Base: Any cake works, but you want that top surface smooth as butter. I’ve done this with chocolate, vanilla, red velvet – they all work great.
The Printing Setup: This is where you might need to invest a bit. You absolutely need an Edible printer that’s never touched regular ink. Canon makes some good ones, and honestly, it pays for itself after a few cakes.
Paper Quality Matters: Don’t cheap out here. Good wafer paper burns evenly, and quality frosting sheets give you those crisp, clear reveals that make people go “wow.”
Let’s Make Some Magic (Step by Step)
Ready to become a burn cake wizard? Here we go:
Step 1: Prep Your Canvas Start with a completely cooled, beautifully frosted cake. Room temperature is your friend here – you don’t want any condensation messing with your masterpiece.
Step 2: Design Time Fire up Canva or whatever design tool you love and create your two images. Remember, one’s gonna burn away, one’s gonna be revealed. Make them the right size for your cake with room for borders.
Step 3: Print Like a Pro Use your dedicated edible printer with food-safe Edible ink. For wafer paper especially, let that ink dry completely – I’m talking overnight if you have time.
Step 4: Cut It Perfect Carefully cut your printed images just a bit smaller than your cake’s surface. Clean cuts make all the difference in how professional this looks.
Step 5: Apply Your Reveal Layer Gently place that frosting sheet (your big reveal) on the cake. Smooth out any bubbles – they’ll totally show in your final result.
Step 6: Border Magic #1 Here’s where the real technique comes in. Pipe a continuous buttercream border around your reveal image. This air gap is literally what makes everything work.
Step 7: Top Layer Time Place your wafer paper on top of that buttercream border. Press gently at the edges to secure it.
Step 8: Border Magic #2 Add another buttercream border on top. This holds everything in place and adds some extra decoration.
Step 9: The Big Moment Light the center or edge with your Culinary torch and watch the magic happen! It takes about 50 seconds to a minute (those TikTok videos are totally sped up).
Creative Ideas That’ll Blow Everyone’s Mind
Perfect Occasions for Maximum Drama
Birthday cakes: Imagine burning away to reveal someone’s age or their favorite character. I’ve done everything from retro 90s themes to current obsessions – the reactions are priceless.
Gender reveals: This trend was practically made for these parties. Burn away neutral colors to reveal pink or blue underneath. Talk about timing!
Anniversaries and proposals: Hide engagement rings in the design or romantic messages. Fair warning – have tissues ready.
Corporate stuff: Yeah, even business events can benefit from this. Logo reveals and product launches get way more memorable with a little fire involved.
Check out our delish cakes for evert occasion
Burn Away Cake Design Ideas That Actually Work
The beauty of these customizable cakes is that literally anything goes. Here’s what’s trending:
- Character obsessions: Pokémon, SpongeBob, Bluey, Minnie Mouse – whatever they’re into
- Celebrity worship: Taylor Swift reveals are huge right now (no judgment here)
- Personal touches: Inside jokes, family photos, or custom logos for businesses
- Seasonal vibes: Holiday themes, seasonal colors, you name it
Quick tip: Canva and Corjl.com are your friends for easy customization. You can tweak colors, fonts, and add your own creative spin without needing to be a design genius.
Safety First (Because Nobody Wants Burnt Eyebrows)
Look, I’m gonna be your mom for a second here – safety isn’t optional when you’re literally playing with fire and food.
Don’t Be Stupid About Fire
Use proper tools: That Culinary torch isn’t just for fancy crème brûlée. Matches and lighters work too, but keep it small and controlled.
Ventilation is key: Do this somewhere with decent air flow. A little smoke is normal, but you want it to clear out.
Clear the area: Move anything flammable away from your cake. That includes plastic decorations, paper napkins, and your cousin’s polyester shirt.
Never leave it alone: Seriously, don’t walk away from a burning cake. Not even for a second.
Keep kids and pets back: They don’t understand the magic and might try to “help.”
Only Use Food-Safe Stuff for Burn away cake
This should be obvious, but only use materials labeled as 100% edible. Regular printer paper or non-food inks will literally poison people. Your Edible printer should never have touched regular ink – ever.
Pro Tips and Troubleshooting (Learn From My Mistakes)
Dealing With Moisture Drama
Wafer paper is basically the drama queen of edible papers – it hates moisture with a passion. Here’s how to keep it happy:
Storage secrets: Keep your finished cake at room temperature. If you absolutely must refrigerate, use a cake box (not airtight) to protect from humidity.
Weather matters: Humid days are your enemy. In sticky weather, make your cake closer to serving time.
Getting That Perfect Burn
Air gap everything: That buttercream border isn’t decoration – it’s engineering. Without proper spacing, your burn will be messy and incomplete.
Dry ink saves the day: Be patient and let that Edible ink dry completely. Wet ink = uneven burning or no burning at all.
Buttercream consistency: Too soft and your border collapses. Too stiff and it’s impossible to pipe. Find that sweet spot.
After the Show
The taste test: That burnt wafer paper tastes like toasted marshmallow – most people actually like it. If you don’t, just scrape it off.
Easy cleanup: Both layers peel off easily if you want them gone. Some people eat around them, others remove them.
Round two: Here’s something cool – you can actually reset and re-burn the same cake by scraping away the buttercream and starting over!
Current Trends and Popular Ideas
Based on what’s absolutely crushing it on social media right now:
| Occasion Type | What’s Hot | Design Strategy |
|---|---|---|
| Birthdays | Age reveals, throwback themes | Bold colors, clear numbers |
| Gender reveals | Pink/blue surprises, baby themes | Simple, high-contrast designs |
| Anniversaries | Photo collages, love quotes | Elegant fonts, romantic colors |
| Business events | Logo reveals, product shots | Clean, professional aesthetics |
Your Burning Questions Answered (See What I Did There?)
Is this Burn-Away Cakes actually safe to eat?
Totally! When you use proper 100% edible papers and Edible ink plus follow basic fire safety, it’s completely fine. The burning is minimal – think toasted marshmallow level.
Does it taste weird and burnt?
Nope! There’s a super subtle toasted flavor that most people actually enjoy. Plus, the sweetness of the cake balances everything out. If you’re not into it, the burnt bits scrape off easily.
Can I stick this in the fridge?
I wouldn’t recommend it. Wafer paper and moisture are enemies – you’ll end up with wrinkled, sad-looking paper that might not burn properly. Room temperature storage is your friend.
How long does the actual burning take?
In real life? About 50 seconds to a minute. Those TikTok videos showing lightning-fast burns are usually sped up for drama.
Can I use my regular printer?
NOPE. Never. Not even once. You need a dedicated Edible printer that’s never touched regular ink. Cross-contamination is a real food safety issue.
Who’s the genius behind this trend?
Denise Steward gets all the credit for starting this viral cake trend madness. Her creativity literally changed the cake game forever.
Time to Set Your Creativity on Fire!
Here’s the thing – these DIY burn away cake creations aren’t just desserts, they’re experiences. They turn regular celebrations into unforgettable moments that people will be talking about for years.
The best part about mastering this burn away cake recipe at home? It’s not just about the technical skills (though those are cool too). It’s about the pure joy on people’s faces when they see that reveal. Whether you’re announcing a pregnancy, celebrating a milestone, or just showing off at a dinner party, these cakes deliver that “holy cow, how did you do that?” moment every single time.
Don’t let the safety stuff scare you off – with the right materials and basic common sense, this is totally doable. Plus, once you get the hang of it, you’ll be amazed at how many creative cake ideas start flowing.
Ready to join the ranks of bakers breaking the internet? Grab that Edible printer, start brainstorming your first design, and get ready to become everyone’s favorite person. And hey, when you create your masterpiece, definitely share it on Instagram, TikTok, or Lemon8 – the cake decorating trend community loves seeing fresh takes on this technique.
The future of this cake tutorial phenomenon is looking brighter than ever, with new variations and creative applications popping up constantly. Who knows? Your next creation might be the one that inspires the next big thing in the world of reveal cakes and special occasions.
Now stop scrolling and go make something amazing – your friends are gonna flip!
