Matcha Mousse Recipe
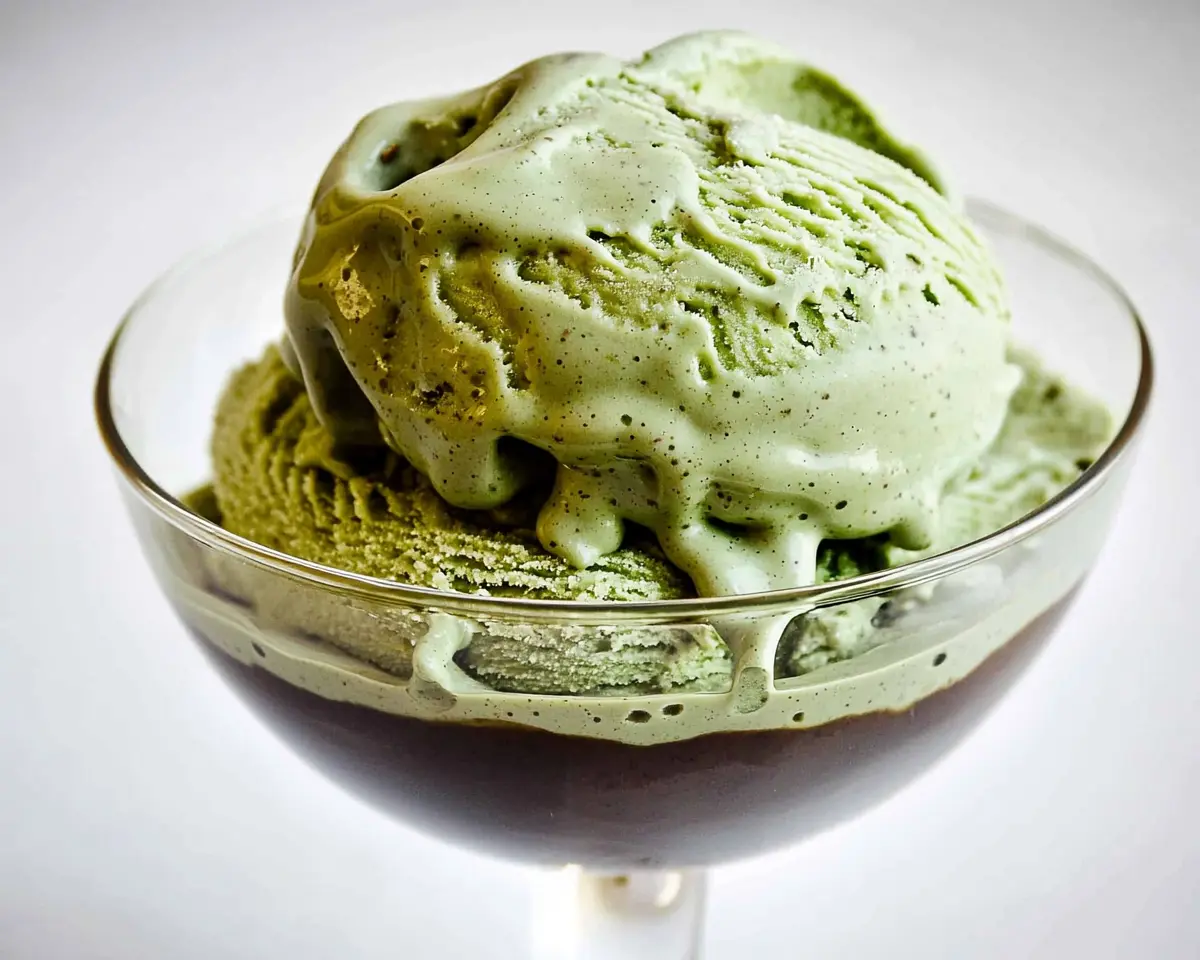
This easy matcha mousse recipe is silky, airy, and bursting with earthy green tea flavor. Just 5 ingredients and no gelatin needed—ready in 20 minutes!
This matcha mousse recipe creates a silky, cloud-like dessert using whipped egg whites, heavy cream, sugar, and culinary-grade matcha powder.
The airy mousse requires no gelatin, comes together in about 20 minutes, and chills to perfection with minimal hands-on effort—delivering that gorgeous green color and earthy, slightly sweet flavor matcha lovers crave.
This matcha green tea mousse is the kind of dessert that feels fancy but comes together surprisingly fast. With just whipped egg whites, cream, and vibrant matcha powder, you’ll have a light, airy treat that’s perfect for dinner parties or a quiet weekend indulgence.
If you’re into elegant Japanese-inspired desserts, you’ll also love our Perfect Matcha Cream Cheese recipe.
Table of Contents
Why You’ll Love This Recipe
Honestly? This easy matcha mousse is about to become your new obsession. Here’s why:
- Minimal ingredients, maximum wow factor – Just 5 pantry staples transform into something restaurant-worthy.
- No gelatin needed – The magic happens through proper whipping technique (we’ll walk you through it!).
- Gorgeous natural color – That dreamy jade-green hue comes straight from the matcha—no dyes here.
- Perfectly balanced flavor – Earthy matcha meets subtle sweetness without being cloying.
- Make-ahead friendly – This mousse actually gets better after chilling, so it’s ideal for entertaining.
- Lighter than traditional desserts – The airy texture means you can enjoy a decadent treat without feeling weighed down.
According to Bon Appétit’s guide to matcha, culinary-grade matcha is perfect for recipes like this because its robust flavor holds up beautifully when blended with cream and sugar.
Matcha Mousse Nutritional Peek
Per serving (serves 4):
| Nutrient | Amount |
|---|---|
| Calories | 285 |
| Protein | 4g |
| Carbohydrates | 28g |
| Fat | 18g |
| Sugar | 26g |
| Fiber | 0g |
Matcha Mousse Recipe Ingredients
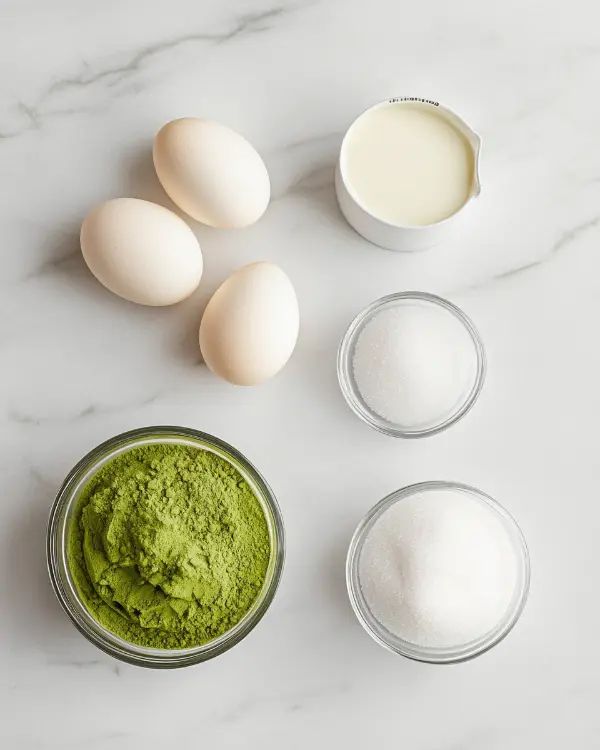
Let’s talk about what makes this vegan matcha mousse alternative possible (or stick with the classic!). Here’s your shopping list:
| Amount | Ingredient |
|---|---|
| ⅔ cup | Sugar (divided into two 1/3 cup portions) |
| 1 tbsp | Culinary-grade matcha powder (not ceremonial—save that for drinking!) |
| 3 | Egg whites (room temp works best) |
| 1 cup | Heavy cream, cold (the colder, the better for whipping) |
| ½ tsp | Vanilla extract (optional but lovely) |
A few friendly notes:
- Culinary-grade matcha has a stronger, slightly more bitter flavor that actually shines in desserts. Ceremonial grade is too delicate and pricey for baking.
- If you’re going the vegan route, you can substitute aquafaba (chickpea liquid) for egg whites and coconut cream for heavy cream—just know the texture will be slightly different.
- Need homemade whipped cream inspo? Check out our Green Tea Latte with Whipped Cream for technique tips!
Matcha Mousse Equipment
Here’s what you’ll need to make this magic happen:
Essential:
- Stand mixer or hand mixer (trust me, your arm will thank you)
- Two mixing bowls (one for egg whites, one for cream)
- Rubber spatula (for folding—this is key!)
- Measuring cups and spoons
- Serving glasses or small bowls
Optional but nice:
- Fine mesh sieve (for sifting matcha and avoiding clumps)
- Piping bag (if you want to get fancy with presentation)
Step-by-Step Instructions
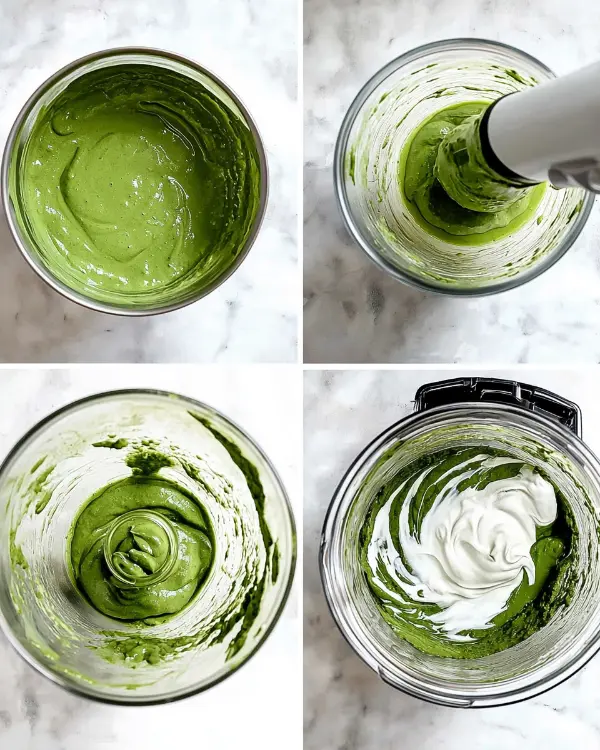
Alright, let’s make some matcha mousse magic! The secret here is treating your egg whites and cream with respect—patience pays off big time.
Step 1: Whip the Matcha Meringue
Start by adding your 3 egg whites to a completely clean, dry mixing bowl. (Any trace of fat or yolk will prevent proper whipping—learned that the hard way!) Beat on medium speed until they turn white and foamy, then gradually increase to medium-high.
When the whites start getting stiff and glossy (you’re looking for soft peaks that curl over when you lift the beater), slowly stream in 1/3 cup of sugar while the mixer’s running. Keep whipping until you’ve got stiff, shiny peaks—the kind that stand up straight when you pull the beater out.
Now here’s where the color comes in: Sift in that tablespoon of matcha powder and gently mix until it’s fully incorporated and you’ve got this stunning pale green cloud. Don’t overmix or you’ll deflate all that hard-earned volume! Set this aside and thoroughly wash your mixer and bowl before moving on. (Seriously—any egg residue will mess with your cream.)
Step 2: Whip the Cream
In your sparkling clean bowl, pour in the cold heavy cream. Start whipping on medium speed, gradually increasing as it thickens. When you see soft peaks forming, add the remaining 1/3 cup of sugar (and that vanilla if you’re using it). Whip to stiff peaks—you want it thick enough that it holds its shape but still looks silky, not grainy or butter-like.
Step 3: The Gentle Fold
Here’s where technique really matters. Add about 1/3 of your whipped cream to the matcha meringue. Using a rubber spatula, gently fold it in using a circular motion—cutting down through the center, sweeping along the bottom, and bringing it up and over. This lightens the meringue and makes the next step easier.
Now fold in the remaining whipped cream in two additions, being extra gentle to maintain that airy texture. You’ll see pale green and white streaks gradually blend into a uniform, dreamy mousse. A few small streaks are totally fine—overmixing is worse than a little marbling!
Step 4: Chill Out
Spoon or pipe your mousse into serving glasses. Cover with plastic wrap (press it gently onto the surface to prevent a skin from forming) and refrigerate for at least 1 hour. The flavor actually deepens and the texture sets beautifully if you can wait 2-4 hours—or even make it the day before!
Pro Tips & Guidance
Want to nail this easy matcha mousse every single time? Here’s what I’ve learned through plenty of kitchen experiments:
- Room temperature egg whites whip better – They incorporate more air and create more stable peaks. Just let them sit out for 30 minutes before starting.
- Sift your matcha – According to Serious Eats’ matcha baking guide, sifting prevents those stubborn clumps that refuse to dissolve.
- Don’t rush the folding – I know it’s tempting to just stir everything together, but gentle folding keeps all that precious airiness intact.
- Taste as you go – If your matcha is particularly bitter, you can add an extra tablespoon of sugar to the whipped cream. Every brand varies slightly in intensity.
- Keep everything cold – Your cream, your bowl, even your beaters can be chilled beforehand. Cold = better whipping stability.
- The “clean bowl” rule is non-negotiable – Any grease or egg residue will prevent your cream from whipping properly. When in doubt, wipe your bowl with a bit of vinegar or lemon juice, then rinse and dry completely.
Troubleshooting Guide
Let’s fix those common hiccups (because we’ve all been there):
My egg whites won’t whip up!
Check for any traces of yolk or grease in your bowl. Even the tiniest bit of fat prevents egg whites from whipping. Start fresh with a clean bowl if needed.
The mousse is grainy or separated
You might have overmixed or used cream that wasn’t cold enough. The texture should be smooth and uniform—if it’s splitting, try folding more gently next time and keep that cream icy cold.
My matcha has clumps
Sift it before adding! Matcha powder is super fine and loves to clump. A quick sift makes all the difference.
The mousse deflated after folding
This usually means the egg whites or cream were under-whipped, or you stirred instead of folded. Remember: gentle, swooping motions are your friend here.
It tastes too bitter
Different matcha brands have different intensities. Add a bit more sugar to the whipped cream next time, or try a different culinary-grade brand. You want earthy, not mouth-puckering!
Variations & Twists
This matcha mousse recipe is endlessly adaptable. Here are some of my favorite ways to switch it up:
Vegan Matcha Mousse:
Replace egg whites with aquafaba (the liquid from a can of chickpeas—I know, sounds wild, but it works!). Use 6 tablespoons aquafaba whipped to stiff peaks. Swap heavy cream for full-fat coconut cream that’s been chilled overnight. The texture will be slightly denser but still delicious.
White Chocolate Matcha Mousse:
Melt 2 oz white chocolate and gently fold it into the whipped cream before combining with the matcha meringue. So decadent!
Layered Matcha-Vanilla Mousse:
Make half the recipe with matcha and half as plain vanilla mousse (skip the matcha powder). Layer them in glasses for a stunning two-tone effect.
Matcha Mousse Cake Filling:
Use this as a filling between cake layers! It pairs beautifully with vanilla, chocolate, or even our Rose Water Macarons as a fancy dessert duo.
Topped & Fancy:
Finish with whipped cream rosettes, fresh berries, a dusting of matcha powder, crushed pistachios, or even edible flowers for special occasions.
Serving, Storage & Reheating
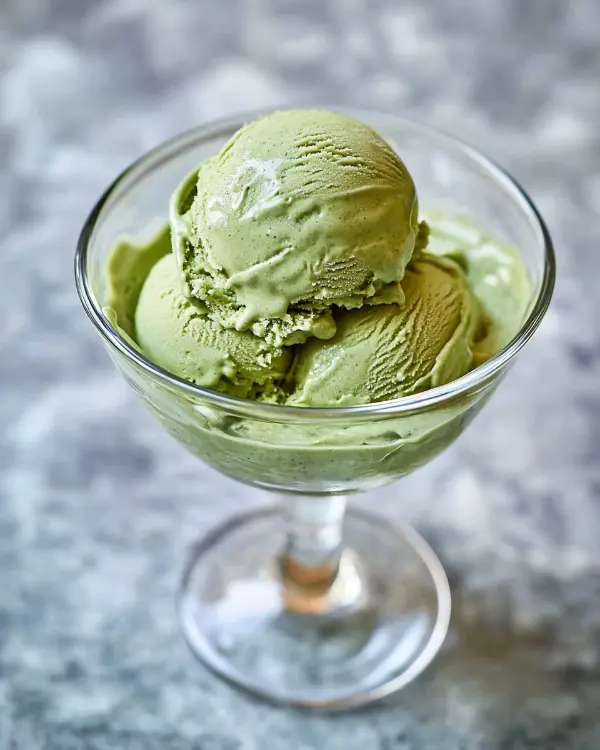
Your matcha green tea mousse deserves to be enjoyed at its absolute best—here’s how:
Serving:
Serve chilled in pretty glasses, teacups, or small bowls. I love topping each serving with a tiny dollop of whipped cream and a light dusting of matcha powder right before bringing it to the table. It’s also gorgeous with fresh raspberries or a crispy cookie on the side for textural contrast.
Storage:
Cover tightly and refrigerate for up to 4 days. The flavor actually deepens over time, which makes this perfect for dinner party prep! Just know that the texture might become slightly denser after day 3—still delicious, just a bit more set.
Freezing:
Technically you can freeze this for up to a month, but the texture won’t be quite as ethereal when thawed. If you do freeze it, let it thaw in the fridge overnight and give it a gentle stir before serving.
Reheating:
Not applicable here—this is definitely a keep-it-cold situation!
No-Waste Kitchen Magic
Let’s not let anything go to waste:
Those leftover egg yolks? Perfect for homemade custard, lemon curd, or carbonara pasta. You can also freeze them with a pinch of sugar for up to 3 months—just thaw and use in baking later.
Extra whipped cream: Dollop it onto morning coffee, freeze small portions for hot chocolate, or pipe it onto fresh fruit for an easy dessert.
Matcha powder container: Once empty, these tins are perfect for storing loose tea, spices, or even as a tiny planter for herbs.
Leftover mousse (if that’s even possible): Blend it into a milkshake, use it as a filling for cream puffs, or freeze in popsicle molds for matcha mousse pops!
Matcha Mousse Recipe FAQs
Can I make this matcha mousse recipe ahead of time?
Absolutely! In fact, I recommend it. This mousse benefits from at least an hour of chilling and tastes even better after 4-24 hours. It’ll keep beautifully in the fridge for up to 4 days when properly covered.
What’s the difference between culinary and ceremonial grade matcha?
Ceremonial grade is the highest quality, meant for whisking with hot water and drinking straight. It’s delicate, sweet, and expensive. Culinary grade has a stronger, more robust flavor that stands up well in baking and cooking—perfect for this recipe and way more budget-friendly!
Can I use regular green tea powder instead of matcha?
Unfortunately, no. Matcha is made from specially grown and processed tea leaves that are stone-ground into a fine powder. Regular green tea powder won’t give you the same flavor, color, or texture.
Why do I need to fold instead of just mixing everything together?
Folding is a gentle technique that preserves all the air you’ve worked so hard to whip into your egg whites and cream. Regular stirring or mixing will deflate those bubbles, and you’ll end up with a dense, flat result instead of light, airy mousse.
Is this mousse safe to eat with raw egg whites?
The egg whites in this recipe are indeed raw. If you’re concerned about food safety (especially if serving to pregnant folks, young children, or those with compromised immune systems), you can use pasteurized egg whites from a carton instead.
Cozy Closing
And there you have it—your very own matcha mousse recipe that’s destined to become a regular in your dessert rotation! There’s something so satisfying about creating something this elegant from just a handful of ingredients, right? The earthy matcha, the cloud-like texture, that gorgeous green hue… it’s basically edible joy.
I’d love to hear how yours turns out! Did you add any fun toppings? Try the vegan version? Drop a comment below and share your matcha mousse adventures. And if you’re on a Japanese-inspired dessert kick, don’t miss our Perfect Matcha Cream Cheese—it’s another crowd-pleaser!

Matcha Mousse Recipe
Ingredients
Equipment
Method
- Add 3 egg whites to a completely clean, dry mixing bowl. Beat on medium speed until they turn white and foamy, then gradually increase to medium-high. When the whites start getting stiff and glossy with soft peaks that curl over, slowly stream in 1/3 cup of sugar while the mixer’s running. Keep whipping until you’ve got stiff, shiny peaks that stand up straight when you pull the beater out.
- Sift in 1 tablespoon of matcha powder and gently mix until it’s fully incorporated and you’ve got a stunning pale green cloud. Don’t overmix or you’ll deflate all that volume. Set aside and thoroughly wash your mixer and bowl before moving on.
- In your clean bowl, pour in the cold heavy cream. Start whipping on medium speed, gradually increasing as it thickens. When you see soft peaks forming, add the remaining 1/3 cup of sugar and vanilla if using. Whip to stiff peaks—thick enough that it holds its shape but still looks silky, not grainy.
- Add about 1/3 of your whipped cream to the matcha meringue. Using a rubber spatula, gently fold it in using a circular motion—cutting down through the center, sweeping along the bottom, and bringing it up and over. This lightens the meringue.
- Fold in the remaining whipped cream in two additions, being extra gentle to maintain that airy texture. You’ll see pale green and white streaks gradually blend into a uniform, dreamy mousse. A few small streaks are fine—overmixing is worse than a little marbling.
- Spoon or pipe your mousse into serving glasses. Cover with plastic wrap, pressing it gently onto the surface to prevent a skin from forming, and refrigerate for at least 1 hour. The flavor deepens and texture sets beautifully if you can wait 2-4 hours or make it the day before.

